posture can tell a lot about his character; it also indicates the coherence of muscle function. Poor posture can negatively affect not only your appearance, but also cause poor health. Problems with posture are accompanied by fatigue, general weakness and headaches, chronic pain in the back, neck , etc. In this article we will talk about how to independently detect poor posture and what exercises will help you get rid of them.
Poor posture: why they are dangerous and how to correct them
A person’s appearance, as well as his well-being, are directly related to posture. However, despite the importance of correct posture , many people take absolutely no measures to improve it. In fact, ignoring poor posture is quite dangerous, because poor posture can cause the following problems:
- muscle weakness and atrophy;
- fatigue;
- headache;
- chronic pain in the neck, back and shoulder girdle;
- disorders of the digestive process;
- sciatic nerve syndrome;
- breathing problems;
- carpal tunnel syndrome ;
- pinching and compression of nerves.
In order to solve this problem, you need to find its true cause. Often, poor posture is a consequence of an imbalance in the muscles surrounding a particular joint. For example, in people with rounded shoulders, tension is distributed to the pectoral muscles, which pull the shoulders forward and rotate them toward the midline of the body. As a result of this imbalance, overactive muscles compensate for the weakness of the antagonists, and this is the cause of fatigue, discomfort and tension.
The most effective and simple way to eliminate distortion is considered to be stretching tense muscles and strengthening weakened ones.
How to independently identify posture problems?
If you have never paid much attention to your posture before, you can hardly imagine how many distortions there may be in your body. To confirm your guesses about problems with posture or, conversely, make sure that your back is perfectly straight, conduct a self-diagnosis.
We recommend wearing tight-fitting clothing so that you can clearly see the location of all parts of the body. Stand barefoot on the floor, straighten your back, but do not try to stand in the correct, but not natural, position for yourself. To get a reliable result, take a few steps in place while closing your eyes. Then stop, stand up straight and ask the person nearby to take a photograph of you from three angles - front, back and side.
Correct posture should look like this:
Notice how the different body parts and joints are positioned: the ears are in front of the shoulders, the hip joints are in front of the heels, and the ribs are in front of the pelvis. The position of the pelvis and spine remains neutral. If your body looks the same, we can congratulate you, because you have no posture
If your body is elongated, there is one or even several postural . Next, we will look at all existing disorders and tell you how to diagnose them and what exercises/ stretches will help neutralize them.
The root of the problem
To solve a problem, you need to find its true cause. Most postural problems are caused by imbalances in the muscles that surround a particular joint. Simply put, one muscle group is in hypertonicity, and the antagonist muscles are too weakened.
For example, people with rounded shoulders often have tight pectoral muscles, which pull the shoulders forward and rotate them toward the midline of the body. Add weak back muscles to tight pectoral muscles and you have an imbalance that pulls the shoulder girdle out of its normal position. When such an imbalance occurs, overactive muscles compensate for the weakness of the antagonists, resulting in tension, fatigue and discomfort.
The simplest and most effective way to eliminate distortion is to stretch tense muscles and strengthen weak ones.
Causes of superior outlet syndrome:
- Most often, the cause is the presence of an additional (cervical) rib, a fracture of the first rib or collarbone, or muscle weakness.
- The disease occurs if you have to work a lot and constantly with your hands. In this case, the collarbone puts strong and constant pressure on the first rib, which leads to a narrowing of the aperture.
- Very rarely, the cause is one or another diagnostic intervention, angioplasty or pacemaker installation. In this case, a blood clot may form in the vessel, which leads to the development of this disease.
Self-diagnosis
If you haven't been paying attention to your posture, chances are you don't realize how much misalignment there may be in your body. If you're not sure whether your posture is okay or needs some work, do a self-test.
Wear tight-fitting clothing so you can clearly see the location of all body parts. Stand barefoot on the floor, straighten your back, but do not deliberately try to get into a position that you think is correct. To get a reliable result, close your eyes and take a few steps in place. This will allow your legs to take a natural position. Stop and stand straight. Now ask a friend to take a photo of you from the front, side and back.
This is what correct posture should look like:
Pay attention to how individual body parts and joints are located. The ears are in front of the shoulders, the ribs are in front of the pelvis, and the hip joints are in front of the heels. Pelvis and spine in a neutral position. If your body looks like this, you're doing great!
Posture problems: back, shoulders, pelvis and head
If your body doesn't look straight, you may have one or more postural problems. We'll tell you what types of problems there are, how to diagnose them, and what stretches and strength exercises can help correct them.
Violation 1: slouched back
Pelvis moves forward and sits in front of the ribs
Overactive muscles:
hamstrings, gluteus maximus, gluteus medius, erector spinae, and quadratus lumborum (glutes, dorsal thighs, and lower back)
Stretch marks:
runner's stretch, best stretch in the world, seated glute stretch, lying crossover, dorsal thigh stretch and myofascial release (with Pilates roller)
Weak muscles:
iliopsoas, external obliques, rectus femoris (hip flexors and lower abdominals)
Exercises:
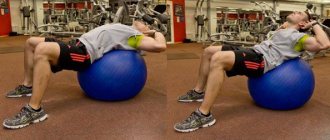
cocoon, fitball crunches, hanging leg raises, scissors.
Disorder 2: Lower Crossed Syndrome
Excessive arching in the lower back, pelvis tilted forward
Overactive muscles:
iliopsoas and spinal erector muscles (hip flexors and low back)
Stretch marks:
pyramid stretch on a fitball, hip flexor stretch, quadriceps stretch and myofascial release, pulling knees to chest
Weak muscles:
abdominal muscles and gluteus maximus
Exercises:
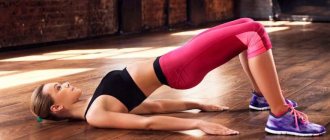
bridge, bridge on the gluteal muscles on one leg, bridge on a fitball, crunches with raised legs, “frog”
Violation 3: Rounded shoulders
Shoulders in front of ears
Overactive muscles:
large and small pectoral (chest)
Stretch marks:
front delt stretch, stretch with elbows back, chest stretch on a fitball, dynamic chest stretch, torso stretch on a chair
Weak muscles:
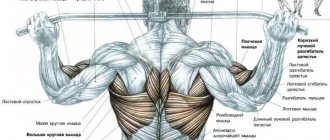
rotator cuff, lower trapezius, serratus anterior (muscles of the back, surrounding shoulder blades, rear deltoids)
Exercises:
seated cable row, expander flyes, shoulder external rotation, rear delt rows
Violation 4: head first
Ears far ahead of shoulders
Overactive muscles:
neck extensors, upper trapezius, and levator scapula (muscles in the back of the neck that tilt the head back)
Stretch marks:
neck myofascial release, chin to chest, sternocleidomastoid stretch (with palms facing up, reach arms back as far as possible, turning head and looking to one side)
Weak muscles:
neck flexors (muscles on the front of the neck that tilt the head forward)
Exercises:
isometric exercises for the anterior neck muscles
Disorder 5: Upper Cross Syndrome
Rounded shoulders with excessive arching in the upper back and forward positioning of the head
Overactive muscles:
trapezius, levator scapulae, pectoralis major and minor, neck extensors (back of the neck, trapezius, upper back and chest)
Stretch marks:
neck myofascial release, chin to chest, front delt stretch, elbow stretch, exercise ball chest stretch, dynamic chest stretch, chair torso stretch
Weak muscles:
rotator cuff, lower trapezius, rhomboids, serratus anterior and deep neck flexors (back muscles, surrounding shoulder blades, rear deltoids and anterior neck muscles)
Exercises:
isometric exercises for the anterior neck, seated cable rows, expander flyes, shoulder external rotation, rear delt rows
Violation 6: head tilt
Tilt of head to one side; can be combined with rotation in the same direction
Overactive muscles:
sternocleidomastoid muscle on the same side (the sternocleidomastoid muscle goes from the ear to the collarbone, its function is to tilt the chin down, push the ear forward and turn the head.)
Stretch marks:
lateral neck stretch, myofascial release, sternocleidomastoid stretch
Weak muscles:
sternocleidomastoid muscle on the opposite side
Exercises:
perform daily activities (chewing, carrying heavy objects, carrying a bag, pulling, lifting objects, talking on a cell phone) evenly on both sides, isometric exercises for this side of the neck
Violation 7: Uneven shoulders
One shoulder is higher than the other
Overactive muscles:
trapezius (muscles running from the back of the neck to the shoulder girdle) on the raised side
Stretch marks:
lateral neck stretch and myofascial release
Weak muscles:
serratus anterior (the muscle that runs from the upper ribs to the shoulder blades under the pectorals) on the elevated side
Exercises:
Perform daily activities (carrying heavy objects, carrying a bag, pulling, lifting objects, talking on a cell phone) evenly on both sides; one arm high rows
Violation 8: pelvic distortion
One hip joint is higher than the other, creating the illusion of different leg lengths
Overactive muscles:
internal and external obliques, hip abductors, erector spinae, and quadratus lumborum on the elevated side (abdominal, lower back, and outer thigh muscles on the elevated side). Many other tissues in the knees, ankles, shoulders, neck and lower back may also be overactive.
Stretch marks:
runner's stretch, best stretch in the world, iliotibial tract stretch, iliotibial tract myofascial release, seated glute stretch, lying crossover, piriformis myofascial stretch, dancer's stretch
Weak muscles:
variable, depends on individual characteristics
Exercises:
Avoid exercises with high impact loads and repetitive movements (running, plyometrics, etc.) until the pelvis is completely aligned. This will reduce the risk of associated injuries to the ankle, knee, hip and lower back.
Complications
If thoracic outlet syndrome is not diagnosed and treated at an early stage, it may become progressive. The most common complication is persistent pain in the hand, sometimes necrosis of the fingers and chronic venous insufficiency of the affected hand develop. When an aneurysm of the subclavian artery forms, thrombosis and acute ischemia of the upper limb with the development of gangrene may occur. In such a case, the conventional approach of removing blood clots is ineffective. Such patients require urgent shunt surgery or resection of the first rib. Amputation of fingers or hands is performed only if there are clear signs of ischemic gangrene.
Posture problems: feet and ankles
Just like your shoulders, hips and back, your feet and ankles should be in the correct position, that is, pointing forward rather than inward or away.
We will focus on the main violations of the position of the feet and ankle joints. If you notice that you are experiencing one or more problems, try stretching and strengthening exercises to resolve the problem.
Violation 9: feet pointing inward
Thumbs facing the midline of the body
Overactive muscles:
tensor fascia lata muscle (on the outer thigh)
Stretch marks:
stretching of the iliotibial tract, myofascial release of the iliotibial tract
Weak muscles:
gluteus medius and minimus
Exercises:
Resistance bridge (with a resistance band around the hips), lateral walking with a resistance band, squats with a resistance band around the hips
Violation 10: One or both feet point outward
The big toes are turned away from the midline of the body
Overactive muscles:
piriformis and other deep rotator cuffs (deep muscles of the pelvis that connect the femur to the sacrum)
Stretch marks:
seated glute stretch, lying crossover, piriformis myofascial release, iliotibial tract stretch, iliotibial myofascial release, dancer stretch
Weak muscles:
hip flexors and obliques
Exercises:
cocoon, fitball crunches, hanging leg raises
Your exit!
Now you know what to look for, it's time to evaluate your own posture. If you find any of these abnormalities, use stretching and strength exercises to correct them.
Integrate the necessary strength exercises into your training program. For example, if you have upper cross syndrome, do strength exercises like rows and shoulder rotations on back day. I recommend 3 sets of 8-12 repetitions.
Save the static stretches for the end of your workout. Perform stretches so that they give a feeling of tension in the muscle, but do not cause pain. Hold each stretch for 15-30 seconds and do 3-5 sets.
Keep it up and you'll soon notice great results: you'll feel better, look better, and lift more weight!
What is the danger of computer neck syndrome and how to avoid irreversible health consequences
Guys, we put our hearts into Bright Side. Thank you for revealing this beauty. Thanks for the inspiration and goosebumps. Join us on Facebook and VKontakte
When working at a computer, many people sit with their whole body bent forward and their heads extended. The same situation applies to those who like to scroll through their smartphone feed, as well as teenagers who spend several hours a day on their gadgets, staring at the screen. Doctors and scientists are sounding the alarm, saying that as a result, the load on the cervical spine increases many times over, and they are introducing the concepts of “computer neck” or “text neck”.
Bright Side found out what computer neck syndrome is and how to avoid irreversible consequences for your health. Spoiler: reading this article causes a reflexive correction of posture.
What is computer neck syndrome
Due to the fact that a person gets used to constantly leaning towards the screen of a computer, laptop or mobile phone in order to better look at what is written, and forgets to return the body to a normal, physiological position, computer neck syndrome is formed. The syndrome is characterized by weakening of the muscles of the middle back and neck, pinching of the upper back muscles, shoulders and pectoral muscles. This syndrome has a detrimental effect on posture: the shoulders, neck and head are pushed forward, the spine is curved, and stooping appears. In addition, the skin of the neck becomes flabby , and a double chin may appear.
You can easily get rid of the syndrome only at the beginning of its development, so you should pay attention to the following symptoms .
- Neck pain and muscle stiffness.
- Pain in the upper back and shoulders.
- Frequent headaches and pain in the back of the head.
- Vision problems.
- Feeling as if the neck was being pushed forward.
- There is a desire to straighten your back, but this process brings discomfort.
Kenneth Hansraj, MD, of New York, is studying this syndrome and believes that the problem has become epidemic . Thus, the weight of an adult’s head in a normal position is about 4–5 kg. But as you tilt your head forward, the load on the cervical spine increases. According to a study conducted by Dr. Hansrai, when the head is tilted at 15°, the load on the spine is approximately 12 kg, at a tilt of 30° it reaches approximately 18 kg, at 45° - 22 kg, and at 60° the load increases to 27 kg (this is an approximate weight of an 8-year-old child).
Thus, when you tilt your head 60° to post a photo on Instagram, you can assume that an invisible 8-year-old child is sitting on your neck . This stress can lead to displaced intervertebral discs, pain and early wear and tear of the cervical spine.
How to sit at the computer correctly
To avoid negative health consequences, you need to properly organize your workplace.
- The computer monitor should not be too low: place it directly in front of you.
- Enlarge text or pictures so you don't have to lean towards the screen.
- It is recommended to sit so that your back is at an angle of 100–135° relative to your legs: this way the spine experiences less stress.
- Your shoulders and neck should be relaxed, so set the keyboard height and angle to a comfortable position for you. Place it directly in front of your body.
- Adjust the height of the chair so that your knees are in line with your hips.
- Place your feet next to each other - do not sit with your legs crossed.
Exercises for prevention
To prevent computer neck syndrome, be sure to do exercises every day, and also, if possible, avoid continuous prolonged exposure to computer monitors, tablets and phones. Take regular breaks to do a short stretch, a walk, or at least stand up for a few minutes to stretch. For prevention in this case, it is recommended to do the following exercises.
- Circular head rotations: perform 5 times clockwise, then repeat counterclockwise.
- Tilt your head back as if you are trying to look behind yourself. Then return to the starting position and lower your chin to your chest. Repeat 5 times.
- Gently turn your head to the right as far as is comfortable for you. Hold this position, then turn your head in the other direction. Do 5-10 reps.
- Tilt your head towards your shoulder, trying to touch it with your cheek (do not raise your shoulders). Feel the neck muscles stretch. Hold this position for 30 seconds, then tilt your head towards your other shoulder. Repeat several times.
- Do the simplest exercises to warm up the shoulder girdle and arms - “scissors” and “hands up and down”.
- Do eye exercises. It may seem that the eyes have nothing to do with the neck and posture at the computer, however, eye fatigue can cause you to slouch and lean closer to the computer more often. Make it a habit to simply look away from the screen for a few seconds every 30 minutes of work.
- Do exercises to strengthen your back and neck muscles 2-3 times a week.
Do you watch your posture when working at the computer?
