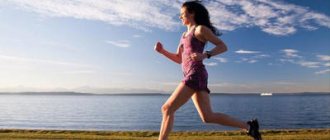
Everyone heard in early childhood that physical culture of the body is the key to the proper functioning of internal organs. But it’s unlikely that any of the men even then thought about the fact that playing sports could affect the functioning of a rather intimate part of the male body - the pelvic organs. And the very concept of “small pelvis” was once associated with completely different images. But with age, a lot changes. Including associations. And it turns out that the knowledge that was previously not needed at all can significantly improve the quality of a man’s life.
The benefits of exercises for the pelvic organs
Training any muscle always has a positive effect on the body as a whole. The same applies to training the pelvic muscles.
Positive effects
Performing specially selected exercises allows you to achieve the following effects:
Strengthening the muscles of the pelvic floor
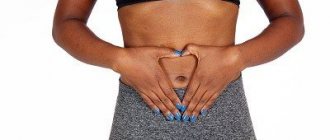
The anatomical area associated with the small pelvis, such as the pelvic floor, deserves special attention. At its core, it is a complex of muscles that bear the weight of all the abdominal organs and, in particular, the pelvic organs. It is they who do not allow these organs to fall down and be pinched by the bones that form the pelvis - this is a kind of hammock that can sag somewhat under the weight of the organ complex, but must have sufficient elasticity so as not to stretch and sag completely.
Particularly important is the fact that the pelvic floor muscles are not smooth, but striated muscle tissue, which means that it can be trained. It is known that the pelvic floor muscles work actively during lifting weights, during bowel movements, urination and sex. The weakness of one of the muscles located in the pelvic floor is associated with such an unpleasant condition in men as the release of a few drops of urine after urination.
Observations show that the muscles on the pelvic floor are quite amenable to conscious control, that is, they can be tensed and relaxed at will.
Usually, strengthening the muscles on the pelvic floor is done on the recommendation of a urologist, however, for all men such gymnastics will not be superfluous, as it will allow you to avoid many troubles that often appear with age.
In addition, performing exercises for the purpose of prevention is much simpler, without pain, which often occurs if the same exercises are performed when some pathological process is already taking place in the pelvic organs.
Anterior pelvic tilt. Exercises.
The final part of a series of articles on the correction of pathological anterior pelvic tilt and accompanying lumbar hyperlordosis, which includes exercises that I use to work with this condition and find really effective.
The theoretical background to this set of exercises is disclosed in the articles “Anterior pelvic tilt. Weak link" and "Anterior pelvic tilt. How to make it functional." In this article I will provide a text and video description of the main part of the exercises.
In addition to the general rehabilitation complex, use:
1. Joint warm-up, I wrote about its importance and main purpose in the article “Joint warm-up”, examples of exercises are also given there.
2. Work with the respiratory muscles, its significance and examples of exercises are given in the article “Physiology of pranayama and exercises to prepare for breathing practices”; do not skip this stage if you want to work efficiently and deeply!
3. A high-quality cool-down - exercises for it can be taken from the article “Intervertebral hernia. Exercises” (Figures 5,8,9 are especially important), this stage should come last, following the main complex given in this article and it is performed to normalize the tone of all skeletal muscles.
4. Relaxation techniques: shavasana, yoga nidra, a block of balancing breathing practices (also an article on pranayama) and meditation will enhance the quality of your therapy significantly and speed up the receipt of visible results. I gave a theoretical basis for these techniques in the articles “Shavasana” and “Shavasana 2”, read and motivate yourself to competent relaxation.
It is important to perform the complex 3-5 times a week; the rest of the time, monitor the tone of the muscles of the internal corset - that is, maintain a healthy posture pattern in everyday movements, at work and when walking.
The complex is aimed at turning on the deep (central) line - the deepest muscles of the body, responsible for maintaining healthy posture and at turning on and normalizing the gluteal medius muscles - the muscles that are the foundation of a healthy spine.
The axial cylinder or internal corset (bandha) is the community of these deep muscles (multifidus, transverse and internal oblique muscles of the abdomen, pelvic floor muscles and respiratory diaphragm), pulling the lower third of the abdomen to the sacrum brings these muscles to the optimal working position, learn not lose them from the picture of the world at the end of the exercises, then your rehabilitation will be as successful as possible.
You may have difficulty breathing during your first attempts to keep the muscles of the inner corset in good shape - focus on the fact that it is the area below the navel that works to maintain posture, and breathing occurs in the area of the collarbones, lower ribs and upper abdomen. Divide the zones into “above the navel” - respiratory and “below the navel” - postural. It will become much easier. There is no need to deepen breathing or complicate its pattern (for example, using the ujjayi technique), as we require the most natural state of the body.
The pelvic floor muscles are usually toned by the same movement - pulling the lower third of the abdomen towards the sacrum, and you should feel it. If this doesn’t work, learn to focus on pulling them up and squeezing them at the same time as pulling up the lower third of your abdomen.
The top of the head stretches upward, the chin tends to the jugular cavity, the shoulders are straightened, the chest is proud.
Set of exercises:
To perform these exercises, it is convenient to use a timer, for example, a Tabata timer, then you will not have to be distracted by counting repetitions and you will be able to better concentrate on the exercise technique.
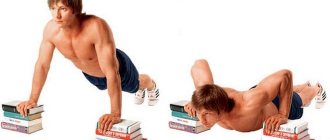
1) Working on the hip joint area: “Michael Jackson” - standing with your knees bent, place one hand on the sacral area, the other on the lower third of the abdomen and perform rocking movements of the pelvis along the axis of the hip joints, gently bending and straightening the lumbar spine slightly amplitude of movement - 30-50 times or 4 sets of 30 seconds after 10 seconds of rest, soft dynamics.
2) Activation of the gluteus medius muscle: Lying on your side, sequentially bend the knee of the upper leg and touch it to the floor in front of you, then straighten the leg and move it back behind the line of the lower leg, then lift the straight upper leg up and bend it again at the knee and touch it floor in front of you 15-30 times or 4 sets of 30 seconds after 10 seconds of rest with each leg, soft dynamics.
3) Turning on the axial cylinder: “Inverted cat rolls” - lie on your back, pull the navel to the spine, the lower third of the abdomen to the sacrum and keep the pelvic floor muscles toned (collect the center), raise your arms vertically up, bend your knees 90 degrees and bring your hips perpendicular to the floor (shins parallel to the floor) - this is the starting position. Starting the movement from the shoulder of the opposite arm, roll onto your side without losing the feeling of the center, then roll to the other side, starting the movement from the opposite shoulder. Slowly, focusing on the feeling of a collected center, roll from one side to the other, always starting the movement from the opposite shoulder. Avoid twisting movements of the pelvis relative to the thoracic region, parallelism of the chest and pelvis is maintained by the coordinated work of the muscles of the internal corset, 30-50 rolls in each direction or 4 sets of 30 seconds after 10 seconds of rest, gentle dynamics.
4) Turning on the axial cylinder: “Locust” - lying on your stomach, pull the lower third of the abdomen to the sacrum, tone the pelvic floor muscles, and resting your lower ribs and hips on the floor, lift your legs above the floor with the help of your buttocks. Do not lose the feeling of composure of the inner corset and a smoothed lower back, the stomach is raised above the floor throughout the exercise, the neck and shoulders are relaxed. 4 sets of 30 seconds after 10 seconds of rest, static.
5) Strengthening the obliques and gluteus medius: “Side boat” - balance lying on your side with your legs raised above the floor, the upper arm can be used as an additional support point, the muscles of the inner corset are tightened and provide a sense of balance. Complication – slow swings of the upper leg up and down in the plane of the lower leg; for maximum complication, you can use an elastic fitness band. 4 approaches of 30 seconds after 10 seconds of rest on each side, static/soft dynamics/dynamics with elastic resistance.
6) Coordination of the work of the gluteus medius muscle and the axial cylinder: “Utkatasana with a brick” is an analogue of a bodybuilder’s tilt with weights (the focus is on the gluteus maximus), but the emphasis in the work is on a slow pace and a small amplitude of movement (the focus is on the gluteus medius). Standing with your knees bent and holding a brick on your outstretched arms above your head, push your shoulders to the sides, push your shoulder blades towards the pelvis, pull the lower third of your abdomen towards the sacrum, tone the pelvic floor muscles and tilt the body down and move back to the starting position ( utkatasana), keeping the lower back straight and smooth (this is important). There is no need to tuck the tailbone, the pelvis is kept in a neutral position, and the lumbar lordosis is smoothed. 30-50 times or 4 sets of 30 seconds after 10 seconds of rest. Soft thoughtful dynamics.
7) Activation of the gluteus medius muscle in movement: “Outlining” - stand facing the wall, move your right thigh to the side, shift your weight to your left leg, tighten the muscles of the inner corset and perform a complex coordination movement: while rising on the toe of the supporting leg, simultaneously describe a circle with the knee of your bent leg , the bent leg works for abduction - external rotation of the hip. 30-50 times or 4 sets of 30 seconds after 10 seconds of rest with each leg.
 Working out the gluteus medius muscle: Standing against the wall with your right side, tone the muscles of the internal corset (lower third of the abdomen to the sacrum, pelvic floor muscles up and squeeze), bend the right knee 90 degrees, extend the right arm parallel to the floor and press the entire right side, arm and leg to the wall - this is the starting position. Push the pelvis to the left, return it back to the wall with the movement of the left hip - repeat in dynamic mode for the entire specified interval, at a slow pace with an average amplitude of movement. 30-50 times or 4 sets of 30 seconds after 10 seconds of rest.
9) EXERCISE OF INCREASED COMPLEXITY. Development and inclusion of the gluteus medius muscle in the motor pattern of walking: Place a yoga belt with a load suspended from it (up to 2 kg) at the level of the middle of the shin on the iliac bones (not on the lower back, but at the level of the upper part of the sacrum). Perform several walking approaches, trying to make it as natural as possible. Keep the muscles of the inner corset toned, relax your shoulders, focus on the feeling of the inclusion of the gluteus medius muscle in maintaining posture when walking. 4 sets of 30 seconds with 10 seconds of rest.
Exercise 9 is performed as a bonus, with high-quality mastery and confident execution of all the rest of the complex.
Attention: these exercises are allowed for you to use if you have discussed them with your doctor (in the case of intervertebral hernia and other pathologies diagnosed by him).
Pregnancy is a contraindication to performing these exercises. Pregnant women should begin muscle training and/or physical rehabilitation strictly under the supervision of a professional certified pregnancy yoga instructor.
If you are relatively healthy, have carefully read all the articles indicated in this one, and especially if you are a long-time thoughtful reader of mine, or even more so a student, you can begin to master it.
#ida will remain with us strength
I look forward to feedback and questions in the comments. Please don’t write in PM, it’s too full for me, I answer in private messages for a long time and reluctantly, and your question can be useful to everyone.
#Ksenia ShatskayaArticle
#yogaviking #yogatherapy #healthyback #posture #innercorset
Workout anytime
To train the pelvic muscles in men, you can use exercises that do not require special time to perform: they are designed for different occasions. Here are three basic exercises:
Training the pelvic muscles while walking: while walking slowly, you need to periodically lift the pelvic floor muscles, that is, strain them to about half the highest level of tension. Having tightened your muscles, take a few steps, relax, and repeat the exercise after a few more steps.
During urination: after urination, squeeze the pelvic floor muscles as much as possible to prevent involuntary leakage of drops of urine. This exercise is especially useful for strengthening the pelvic muscles for men who have problems with urinary retention. In such cases, you can use a complicated version of this exercise: strain the pelvic floor muscles during urination, trying to interrupt it, then continue the process, interrupting it several times.
A truly masculine way to strengthen the pelvic muscles: during sex, tense the pelvic muscles in such a way as to keep the penis in an excited state. Perform the movements slowly and rhythmically. At the second stage, strain the pelvic floor muscles so as to delay the moment of ejaculation. Such exercises can not only strengthen muscles, but also significantly increase the duration of sexual intercourse.
It is advisable to perform simple tension and relaxation of the pelvic muscles as often as possible during the day, both in an upright and in any other position.
Special training system
To perform a specially designed complex, it is necessary to allocate a certain time during the day. For training, you will need a mat (it is convenient to use a yoga mat) and a stable chair with a high, flat back - a classic one, like those that used to be in school classrooms.
The initial position is to lie flat on your back, with your arms parallel to your body. Breathe. With a sharp exhalation, lift your legs off the floor and pull your knees towards your chest, fix your pelvis in the highest position, pointing your tailbone as high as possible. As you inhale, lower your legs and take the starting position. Perform depending on the level of training from 4-6 times to 10-15.
The initial position is the same as in the first exercise. Breathe. As you exhale, lift one leg off the mat, you can slightly bend your knee, raise it to an angle of 45° with the floor, and rotate your leg at the hip joint, first in one direction, then in the other. Lower your leg and repeat the exercise for the other leg. Repeat at least 6 times for each leg.
The initial position is lying on your back, shoulder blades pressed to the floor, arms lying parallel to the torso, legs bent at the knee joints, the lower leg and thigh forming a right angle. Breathe. As you exhale, lift your buttocks as high as possible for three counts, squeeze them and pull in the muscles around the anus. Hold the pose for a few seconds, and return to the starting position for one count while inhaling. Perform at least 6 times.
The initial position is to stand vertically directly behind the chair, with your hands resting on the back of the chair. Breathe. As you exhale, simultaneously rise on your toes as high as possible and squat down, holding onto the back of the chair to maintain balance. As you inhale, rise to the starting position. Perform at least 3-6 repetitions depending on your level of training.
Initial position - lying on your back, arms parallel to the torso, shoulder blades pressed to the floor. Breathe. As you exhale, sharply lift your shoulder blades off the floor, fix your torso (chest and shoulders) at an angle of about 30-45° relative to the floor. Hold in this position for 1-2 seconds and lower to the starting position. When lifting, the head and neck should form an even line with the back, the head should not go forward under any circumstances. Repeat 6 times.
Initial position - standing on all fours, the lower leg and thigh form a right angle, the arms rest on the floor with the hands. Breathe. As you exhale, tilt your body back, while your buttocks fall onto your heels, your arms extend vertically upward, and your back forms a right angle with respect to the floor. It’s good to stretch up, while inhaling, lower to the starting position. Perform at least 6 times.
The initial position is the same as in the exercise described above. Breathe. As you exhale, stretch back and lift one leg so that it forms a straight line with your back. Hold this position for a few seconds, and while inhaling, lower your leg. As you exhale, lift the other leg. One set includes 6 repetitions for each leg.
A more complicated version of the exercise described above: from the same starting position, while exhaling, lift not only the leg, but also the opposite arm, while stretching it forward. Ensure that the arm, back and leg form an even, straight line parallel to the floor. As you inhale, return to the starting position, and as you exhale, lift the other leg and arm. Repeat at least 6 times for each pair of limbs.
The initial position is standing on all fours. Breathe. As you exhale, one leg is pulled back, then, without going down, it is immediately stretched to the side so that the thigh and torso make a right angle. In this case, the leg is parallel to the floor. Then she bends and, while inhaling, lowers herself down, the exercise is repeated for the other leg. Perform at least 4 times for each leg.
The initial position is standing behind a chair, hands placed on its back. Breathe. As you exhale, lift the toes of your feet off the floor, pull them up to your shins as much as possible, the weight of the body moves to the heels, and the stomach is drawn in. As you inhale, transfer the weight of your body onto your toes, rise onto your tiptoes, and pull your buttocks in. Perform at least 6-8 such rolls from heels to toes.
The initial position is lying on your back, legs bent at the knee joints so that the shins and thighs form an acute (about 45°) angle with each other. Feet and shoulder blades are pressed to the mat. Breathe. As you exhale, without lifting your shoulder blades from the floor, turn your legs tightly pressed to each other in one direction, touch the floor, turn your legs in the other direction, touch the floor, return to the starting position. Breathe. Perform from 4 to 6 such twists, depending on your level of training. Make sure that when turning, it is the pelvis that works, and not the chest.
The initial position is standing next to a chair, one leg placed on its seat so that the lower leg and thigh form an obtuse angle. Hands rested on hips. Breathe. As you exhale, bend forward, pulling your thigh towards your shin as much as possible, and while inhaling, return to the starting position. Change legs. Perform 3 to 5 times for each leg.
The initial position is lying on your back, arms parallel to the torso, legs straight, shoulder blades and buttocks pressed to the floor. Breathe. As you exhale, bring your knees to your chest, press them as much as possible, clasping them with both hands. Hold the pose for a few seconds. While inhaling, take the starting position. Repeat 6 to 10 times.
Initial position - lying on your back, shoulder blades pressed to the mat, arms parallel to the torso, legs bent at the knee joints so that the shin and thigh form an acute angle, feet pressed to the floor. Breathe. As you exhale, without lifting your feet from the floor, raise your torso, sit down and clasp your knees with your hands. Fix the position, while inhaling, lower to the starting position. Perform 6 to 8 repetitions.
This complex allows you not only to make the muscles of the pelvic floor stronger and improve the functioning of the pelvic organs, but also to tighten your abs, buttocks, thighs and legs.
Most people equate exercises for the pelvis to intimate gymnastics for women, but such complexes have health benefits and are suitable for men. For men at any age, the issue of his masculine strength and health will be relevant, but few of the stronger sex think that this strength and health can be maintained by simple exercises.
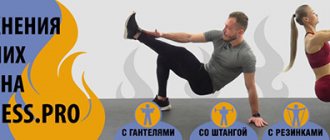
Top 5 exercises for the gluteus medius
To pump up the upper part of the buttocks, in most cases, various abductions are used in a vertical and horizontal position. Such movements perfectly correspond to the function of this muscle.
Leg raise while lying on your side
This is an ideal exercise for the gluteus minimus and gluteus medius muscles. It can be easily done both at home and in the gym, without using any equipment. The main feature of horizontal lifts is that other muscles are switched off from work. This allows you to completely focus the load on the upper buttocks.
Technique:
- Lie on your side, bend your arm at the elbow and place it under your head.
- The second hand rests on the floor to stabilize the body.
- Slowly raise your leg to a 30 degree angle.
- After a short pause, return your leg to the starting position.
It is important that your legs do not lie on top of each other. The leg that performs the movement should be moved back slightly (the supporting limb is forward) so that the toe of one leg almost touches the heel of the other. To pump up your gluteus medius even more effectively, keep your foot on the floor until the end of the set and use a rubber band or leg weights.
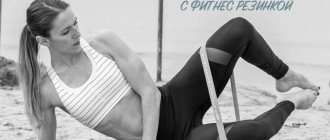
Standing leg abduction
This exercise in the gym is performed in the lower block using a loop handle. At home - using a tourniquet or expander.
Technique:
- Step back 1-2 steps to feel a pronounced tension even in the starting position. Additionally, it is recommended to secure the body by holding onto any ledge or handle.
- With a powerful movement, move your leg back as far as possible (but no more than 45 degrees).
- After a short pause, very slowly return to the starting position.
In this movement, it is important to avoid inertia and abduct the leg not with the whole body, but with a focus on the gluteus medius.
Read more about leg abduction in a crossover →
Exercise "pistol"
Works the target muscle and the entire lower body very powerfully. This is a difficult exercise, because to pump up the upper buttocks without sufficient physical training, use a harness. According to complexity, there are 4 types of “pistol” execution:
- With a chair - place a cabinet or stool under you, this is insurance against falling down. Gradually reduce the height of the support as your muscles strengthen.
- Partial squats - this exercise effectively loads the buttocks and legs, and also prepares the joints and ligaments for more complex execution options.
- Full squats with insurance - the movement is performed in full amplitude, but while holding any support (it is recommended to hold on with one hand).
- Classic “pistols” are the most difficult option to perform with maximum efficiency.
Abduction of the leg in a horizontal position
This exercise combines two similar movements: the fire hydrant and the back swing.
To pump up the top of the butt, it is recommended to perform them together, combining them in series (or alternately, in approaches). The peculiarity of these exercises is that it is very difficult to make technical errors when performing them. If your body and pelvis are stable, the gluteus medius will be heavily involved in abduction.
The technique of execution remains almost unchanged, with the exception of the direction of movement of the leg:
- Place your weight on your knees and palms, keeping your arms straight and your back straight (without excessive arching or rounding). Legs are bent at the knees at an angle of 90 degrees.
- Slowly move your leg to the side, performing movement only at the hip joint (when moving back, the leg rises in the corresponding direction).
- When your thigh is parallel to the floor, take a short pause and return to the starting position.
Technique for the exercise of moving the legs back on all fours.
Climbing
- To pump up the upper part of the butt, the exercise is performed with dumbbells and in strength mode (12-15 repetitions on each leg).
- To increase the efficiency of climbing, alternate the position of your feet when climbing onto the pedestal (once your feet are placed wide, on the edges of the pedestal, and at the next step they are brought together).
Pelvic muscle gymnastics for men
Society is accustomed to recommendations for women to perform Kegel exercises every day to improve the health of their reproductive system and to increase the elasticity of the vaginal walls. It turns out that the principles of this gymnastics can be applied to men.
So what can men train? Men can also train their pelvic muscles using Kegel exercises. It turns out that the space between the anus and testicles in men is responsible for the following processes:
- urination;
- erection;
- ejaculation.
This muscle can be pumped up just like any other. It is called the pubococcygeus.
Set of exercises
All actions should be performed on an empty bladder. Kegel gymnastics for men consists of the following exercises:
- Contract the muscle and hold for 1-2 seconds, relax.
- Reduce it quickly.
- Squeeze the muscle, gradually increase the tension and count to five, relax it gradually, also counting to five.
- Keep your muscles tense for as long as possible. In the future, increase the holding time and tension.
- When urinating, stop it periodically.
During exercises, you need to watch your abs and buttocks, they should remain calm. Naturally, at first this will be difficult to achieve, but as the desired muscle strengthens, the abs and buttocks will no longer participate in the process.
Basic principles of successful exercises
In order for Kegel exercises to bring maximum benefit, you need to adhere to the following principles:
- Perform gymnastics regularly, that is, every day.
- Monitor the execution technique. When performing the exercises correctly, the penis should twitch.
- In order to understand what to strain, stop the process of urination and remember the muscle that contracted.
- The contraction should be performed while inhaling and relaxing while exhaling.
- The number of contractions in one exercise should not be less than 15 times.
- Breaks between exercises should not be longer than two seconds.
- All gymnastics can be performed in different positions, standing, sitting, lying down.
You should not wait for results after the first days of doing the exercises. The process of strengthening the muscle may take several months.
Pelvic opening complex
Practice:
The culmination of this sequence is Padmasana (Lotus Pose), which is often recommended for the practice of meditation and pranayama. Keep in mind the symbolic meaning of the lotus flower. Like the lotus, our spirituality is rooted in the murky waters of life—our mistakes can make us more compassionate, our losses can make us more understanding.
Benefits for mind and body:
Whether or not you can do the Lotus pose, all of the poses in this sequence will help you feel calm, grounded, and relaxed. We invite you to do deep and intense work, especially in the hips, groin and knees, which requires you to relax and breathe deeply. This sequence is an excellent preparation for other seated poses that also require open hips. It is suitable as a practice before bed, as it is quite relaxing.
Key points:
Practicing this sequence opens the hip joints and prepares them for the deep rotation required for Lotus. Remember to be mindful, pay attention to your breath, and respect your own boundaries. Be patient. Listen to your body and don't overexert your knees.
1. Lunge from Downward Facing Dog
From Adho Mukha Svanasana (Downward Facing Dog), step your right foot toward the outside of your right palm. Rotate your left heel and place it on the floor. Don't lower your pelvis. Hold the pose for 5-10 breathing cycles. Repeat the pose on the other side.
2. Twist with lunge and quadriceps extension
From Downward Facing Dog, step your right foot toward the outside of your right palm. Bend your left leg at the knee and grab your left foot with your right hand. Turn your torso towards the ceiling. Breathe. Change into Downward Facing Dog. Repeat on the other side.
3. Forearms on the floor in a lunge
From Downward Facing Dog, step your right foot toward the outside of your right palm. Lower your left knee to the floor and place your forearms on the floor. Hold the pose for 5-10 breaths. Change into Downward Facing Dog. Repeat on the other side.
4. Gomukhasana. Cow head pose.
From Downward Facing Dog, sit on the floor. Place your right knee over your left. Sit on your heels. Clasp your hands behind your back. Breathe. Repeat the pose on the other side.
5. Virasana. Hero pose.
The knees are located close to each other, the feet are parallel to the pelvis. You should sit between your heels with your buttocks down toward the ground. If your knees hurt, sit on a blanket and spread your knees slightly apart. Hold the pose for 1-3 minutes.
6. Baddha Konasana. Bound Angle Pose.
Extend your legs forward into Dandasana (Staff Pose), then bring your soles together. Press your heels against each other. Press the floor with your palms, lift your chest, lengthen your spine. Breathe.
7. Upavishtha Konasana. Bend from a sitting position with legs wide apart, variation.
From Dandasana, spread your legs so they are at a 90-degree angle. Push the floor behind your back with your hands. Lift your chest and spine. Breathe.
8. Bharadvajasana I. Twist of the sage Bharadvaja.
Cross your feet to the left of your pelvis. Bend your right arm behind your back at the elbow and grab your left bicep. Twist to the right and look over your right shoulder (and then over your left). Hold the pose, breathe and move to the other side.
9. Susirandrasana. Eye of a needle pose.
Lie on your back. Place your right ankle on your left leg just above the knee. Grab your left leg with your hands - grab the back of your left thigh or the front of your left shin. Breathe. Do it on the other side.
10. Supta Padangusthasana I. Grabbing the big toe in a lying position.
Bend your right knee and grab your right big toe with the index and middle fingers of your right hand. Push the back of your left thigh into the floor, then straighten your right leg and draw it towards your body. Hold this position.
11. Supta Padangusthasana II. Grabbing the big toe while lying down.
Exhale and lower your right leg to the right. The left leg and left pelvis maintain firm contact with the floor. Maintain elasticity in the outer part of your right leg. Breathe. Repeat poses 10 and 11 on the other side.
12. Supta Parivritta Garudasana. Reclining Eagle Pose.
Bend your knees and place your feet on the floor. Place your right foot on top of your left. Raise your pelvis from the floor and move it 10 centimeters to the right. Lower your knees to the left. Hold the pose, breathe and repeat on the other side.
13. Janu Sirsasana. Head-to-knee pose.
While sitting in Dandasana, place your left leg in Baddha Konasana - the left heel is pressed to the inner right thigh. Rotate your torso so that it is over your right leg and lean forward. Hold the pose for 5-10 breathing cycles. Do it on the other side.
14. Crownchasana. Heron pose.
Place your left leg in Virasana. Grab your right foot and bring your right leg toward your chest, keeping it as vertical as possible. Lift your chest, don't hunch, and keep your leg straight. Hold the position, breathe. Do it on the other side.
15. Bharadvajasana II. Twist of the sage Bharadwaja.
Bend your right leg at the knee and place your foot on your left thigh. Place your left leg in Virasana. Twist and look over your right shoulder (and then over your left). Stay in the pose, breathe. Do it on the other side.
16. Padmasana. Lotus pose.
Place your left foot on the top of your right thigh. If your left knee drops to the floor, do full Lotus pose. If your knee is not on the floor, remain in Half Lotus. Breathe. Do it on the other side.
Completing the workout:
Cool down in Adho Mukha Svanasana (Downward-Facing Dog), Uttanasana (Standing Forward Bend), Balasana (Child's Pose), and Savasana (Dead Man's Pose).
Photo: Richard Cummings
Benefits of intimate muscle exercises
Undoubtedly, the benefits of performing Kegel exercises are very great; they can prevent many problems associated with men's health. With regular implementation of the complex, you can increase the following aspects of male strength:
- increase libido;
- improve erection;
- eliminate premature ejaculation;
- enhance the pleasure of orgasm.
Also, such gymnastics serves as a prevention for the following diseases:
- haemorrhoids;
- BPH;
- congestion of the pelvic organs;
- enuresis;
- encocution.
This gymnastics is especially useful for the prevention of prostatitis in older men.
Important! If any problem is already bothering you, you should consult a doctor for help. Gymnastics is not a treatment for the disease, it only works in combination with the main therapy or as a preventive measure.
The advantage of these exercises is that they do not require additional costs and can be performed anywhere and at any time.
Training system for strengthening the pelvic muscles
This training system will be useful for men with diseases of the pelvic organs. To perform this gymnastics you will need a mat and a chair with a backrest. Gymnastics consists of the following exercises:
- Pulling straight legs to the chest from a lying position. The initial number of repetitions should be 4 times, gradually increase to 15 times.
- Rotation of the leg bent at the knee at the hip joint from a lying position. Repeat on each leg at least 6 times in both directions.
- From a lying position, lift your buttocks up for three counts, squeezing the anus muscles as much as possible. Legs stand on the floor with knees bent. Remain in this position for a few seconds. Repeat at least 6 times.
- Squat down from a standing position on your toes, while holding onto the back of the chair. Repeat 6 times.
- Sit down from a lying position without using your hands. Do not lift your heels off the floor when lifting your body. Repeat the exercise 8 times.
- Get on all fours. The back is straight, the legs form a right angle. At the same time, raise the opposite leg and arm, stretch them forward as much as possible, and hold in this position for several seconds. The leg and arm should form a straight line during this exercise. Repeat at least 6 times on each leg.
- From a standing position, lift your toes off the floor, keeping your heels firmly pressed to the floor. Then roll over and transfer your body weight to your toes. Hold the back of the chair with your hands. Repeat 8 times.
Before you begin the complex, you need to remember the following principles:
- All actions should be performed while exhaling, relaxing while inhaling. Inhale through the nose, exhale through the mouth.
- When lying down, you need to protect your lower back, pressing it tightly to the floor. The shoulder blades and arms are also pressed tightly to the floor.
- When performing the exercise, you should linger at the point of tension for several minutes, tensing the muscles as much as possible.
This complex will be useful not only for the pelvis, but also for the back, abs and legs.
You should always remember that it is easier to prevent a problem than to treat it.
Hello girls. Today a note for you. The topic is intimate and does not involve the participation of men. This article was written to me by a girl, a copywriter - I asked her to cover this topic in general terms, since this is not my element and it’s somehow inconvenient for me to talk about these topics. But there is a problem, and we will discuss it right now.
Many women want to pump up their intimate muscles for a variety of reasons.
- Some people want to improve their personal intimate life.
- Others strive to prepare their bodies as much as possible for having children.
- And those who have already gone through this want to recover and tone their female muscles.
Let's find out how to pump up your vaginal muscles. The article is quite short, as there is not much to say here. Let's consider only the most effective exercises, acquire all the necessary tools - and go into battle.
Exercises for correction
1. Lowering the pelvis while lying down . This exercise performs an important function - it shows a person the correct, so-called “neutral” position of the spine and pelvis, in which the deflection in the lower back becomes minimal.
Starting position: lying on the floor, knees bent, feet firmly on the surface, arms along the body, palms down. Press your back to the floor as hard as possible, using your abdominal muscles in this effort; hold for 20-30 seconds. Relax. Repeat 5-8 times.
***
2. Standing pelvic pull-ups. After you learn to feel the arch of the spine in the first exercise, proceed to performing the exercise while standing. However, take your time - if your spine is “tight”, the first phase may take several weeks.
Stand straight, feet shoulder-width apart. Exhale, turn your knees slightly outward; Squeeze your buttocks as hard as possible while simultaneously pointing your pelvis upward. If your thigh muscles are tight, take a slight semi-squat position (literally 5-10 cm down). Repeat 10-15 times.
***
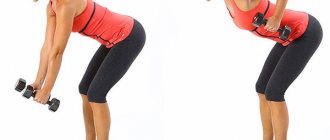
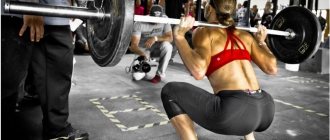
3. Throwing the pelvis forward on blocks. The next step is to repeat the movement of the pelvis when pushing the weight forward and deadlifting. Perform this exercise as a warm-up before each strength training session, doing 3-4 sets with light weights.
Stand with your back to the block, bend over, turn your knees slightly to the sides, and grab the handle with both hands. Look at yourself in the mirror - your lower back should be strictly straight. Lift up using the movement of your pelvis; At the top, squeeze your buttocks as hard as possible.
***
Anterior pelvic deviation is one of the most common postural disorders caused by sedentary work. The consequences are both back pain and the inability to achieve a flat stomach. To correct it, it is important to learn to maintain a neutral pelvic position. Hyperextension exercise can also help correct the anterior pelvic tilt.
Scientific sources:
- Assessment of the degree of pelvic tilt within a normal asymptomatic population, source
- 5 Steps for Dealing with Anterior Pelvic Tilt, source
- Fixing Anterior Pelvic Tilt, source
Why is this necessary?
Training intimate female muscles is called “wumbuilding”
and has many advantages. Very important is a more vibrant sex life for both partners; the woman’s orgasm increases in quality and duration.
It also helps eliminate many gynecological problems, such as menstrual irregularities, polycystic disease, problems with conception. Trained vaginal muscles contribute to easier pregnancy and easier childbirth.
It is also known that with age and after childbirth, the muscles of the female genital organs become more flabby and stretched, which can negatively affect the quality of sexual relations.
By training the intimate muscles, blood circulation in the pelvis and pelvic organs is improved, and prolapse of the uterus and bladder is prevented. Also, women with trained muscles do not suffer from urinary and fecal incontinence.
Causes of pelvic distortion (displacement)
First of all, pelvic distortion is caused by normal muscle imbalance. Technology is developing very quickly and a sedentary lifestyle is one of the main reasons for the development of imbalance, because our body requires a certain amount of movement, which it does not receive. Prolonged sitting and low physical activity are sufficient conditions for the development of muscle imbalance, leading to pelvic distortion and, as a result, the appearance of dysfunctional disorders in the spine and back pain.
Accidents and injuries are common causes of pelvic distortion , such as a side impact, lifting heavy objects while twisting, falling to one side, or carrying heavy objects from the side, such as carrying a child on your hip or carrying a heavy bag constantly on one shoulder. In women, the pelvis is less stable from birth than in men, since a certain flexibility and elasticity of the pelvic structures is necessary for normal pregnancy and childbirth. Therefore, pregnancy is often the main cause of pelvic displacement in women.
Damage to the pelvic muscles is the most common cause of misalignment. Injured muscles typically tighten and shift in order to protect surrounding structures. If the muscles in the pelvic area, such as the sacrum, are damaged, then the tightening of the muscles will lead to an impact on the ligaments attached to the pelvis and joints. As a result, structures such as the sacroiliac joints will also have a certain disposition. Muscle tightening after injury persists until the muscle is completely restored and during this period of time the pelvis remains in an abnormal position.
The difference in leg length can also be a cause of pelvic distortion and in such cases the distortion can be from right to left or vice versa. But the displacement may also be forward or backward, or there may be a twisting of the pelvis.
Many conditions can lead to muscle spasms that cause the pelvis to twist. A disc herniation can cause an adaptive muscle spasm and, in turn, antalgic scoliosis with functional pelvic distortion . Active people often experience tension in the calf muscles, which in turn creates tension around the pelvis. Surgeries such as hip replacement can also cause changes in the position of the pelvis.
Because the pelvis is one of the most stressful areas of the body due to movement and weight support, movements that cause pain and stiffness are a strong indicator of problems with the alignment of the pelvis. Back pain in particular is a common indicator of pelvic obliquity . In addition to participating in movement, the pelvic cavity contains: part of the digestive organs, nerves, blood vessels, and reproductive organs. Therefore, in addition to back pain, there may be other symptoms, such as numbness, tingling, bladder and bowel problems, or reproductive problems. Most often, changes in the following muscles lead to pelvic disposition:
M. Psoas major (psoas muscle) anatomically can lead to extension and flexion of the hip, which leads to anterior displacement of the pelvis.
The M.Quadriceps (quadriceps), especially the rectus muscle, can cause hip flexion.
M.Lumbar erectors can cause lumbar extension.
M. Guadratus lumborum with bilateral compaction can cause an increase in lumbar extension.
M.Hip adductors can cause anterior pelvic tilt as a result of internal rotation of the hip. This leads to shortening of the adductor muscles.
M.Gluteus maximus (gluteus maximus) is responsible for hip extension and is an antagonist of the psoas major muscle.
M.Hamstrings The muscle of the back of the thigh, this muscle can be tightened. The muscle can be weak, but at the same time thicken due to the fact that it is a synergist of the gluteus maximus muscle and this can be of a compensatory nature. The deep abdominal muscles, including the transverse abdominis and internal obliques, may become tight due to weakened lumbar erectors.
How to effectively pump up vaginal muscles?
All these exercises can be performed anywhere and at any time - while in the office, taking the elevator or standing in line. This is completely invisible to others, but nevertheless very effective. Although for the first time it is still better to do it at home, in a relaxed environment and fully understand the technology of implementation.
The most popular method for training the vagina is called Kegel exercises. These activities affect the smooth muscles of the vagina and make them more massive. As a result, a woman will be better able to grasp the male genital organ with them during intimacy.
- Squeezing and holding the vaginal muscles.
Squeeze your vaginal muscles and hold them there for at least five seconds. Gradually increase the hold time. On average, you should do this exercise for at least five minutes a day. - Rapid muscle contraction (blinking).
Tighten the muscles of the vagina and anus strongly, and quickly relax. Start with 20 repetitions, gradually increasing the number of repetitions to 100. - Pushing out.
This exercise is easier to understand for those who have already become a mother. The movement is similar to pushing; for girls without experience, you need to imagine a foreign object in your crotch and try to push it out with force. - Urinary retention.
Also recommended, but for a few seconds. This is an effective prevention of diseases of the genitourinary system, including enuresis. - Breeding the legs in the “birch” stance.
Lie on your back and stand in a “birch tree” stance, like we all did in kindergarten. Then begin to slowly spread your legs to the sides, perform a leg contraction. Perform 6-7 repetitions per set for 3-5 minutes. Do this exercise slowly and consciously, gradually increasing the range of motion of your legs.
Various tools will help enhance the effect of Kegel exercises. Vaginal balls are very effective; they can be inserted and squeezed simply throughout the day, or before training, for example, squats, and combine work on the muscles of the buttocks and vagina.
Many girls are interested in the question of how long it takes to increase the tone of the vaginal muscles and feel the results. This is individual and depends on many factors, but in most cases you will be able to enjoy achieving your goal within 1-2 months.
You can purchase a high quality vaginal Kegel exercise machine HERE.
In addition, some girls use a special gel to contract the vaginal muscles. It helps to recover after childbirth and tone intimate muscles. You can purchase it HERE.
Let's start with anatomy. The ability of the pelvic floor muscles to give you and your partner especially intense sensations during sex is just a pleasant option that they received in addition to their main function - supporting the uterus, vagina and bladder, preventing them from descending. “This is a kind of trampoline: intra-abdominal pressure increases (say, you strain your abs to lift a heavy bag), it contracts and keeps the organs in the correct position,” says Elena Silantyeva, an obstetrician-gynecologist and medical rehabilitation specialist at the Lapino Clinical Hospital. Trained pelvic floor muscles easily stretch during childbirth, and after 45 years they help avoid prolapse of the vaginal walls (its most unpleasant consequence is urinary incontinence). Our grandmothers often didn’t even hear about such problems - thanks to physical work, which was impossible to do without if you wanted to survive. But the lifestyle of many modern girls - sitting in the office from morning to evening - leads to the exact opposite result.
For two
But let's get back to sex. “Strong pelvic floor muscles grip the penis better, which means intimacy brings more pleasure,” assures Ekaterina Lyubimova, founder of the SEX Training Center network. RF".
“Strong vaginal muscles can be compared to pumped up biceps, which simply become denser when they receive a load. That’s why men like the sensations of touching her, even if the girl doesn’t specifically strain anything,” echoes Elena Silantieva.
All by myself
The most accessible way to train the pelvic floor muscles is to squeeze and unclench them yourself, without additional devices. To understand exactly which area should be contracting, try to somehow stop urination and then resume it. Happened? Now do this exercise under normal conditions, without going to the toilet. “Put one hand under your buttocks and the other on your stomach and make sure that these parts of the body do not move. To begin with, it is enough to do no more than 20-25 repetitions of three or four approaches a day, gradually increasing their number,” advises Elena Silantieva.
Popular
In addition, exercises in the fitness club will help strengthen the pelvic floor muscles - bringing the hips together or pushing the legs from a lying position, as well as horse riding, belly dancing, yogic practices (for example, the so-called mula bandha, or “root lock”).
Roll the ball
Everyone has heard about vaginal balls, but not everyone understands how to use them correctly, what are the advantages and disadvantages. Their main advantage is their affordable (compared to exercise equipment) price - on average from two thousand rubles plus a water-based lubricant and antiseptic, which you will definitely need. The downside is that the training system is quite complex:
“On the first day, try walking with the balls for no more than an hour, while squeezing and unclenching your muscles every thirty minutes for sixty seconds; on the second and third days, do everything according to the same scheme, but extend the session for another hour, gradually adding tension to the time vagina for one or two seconds. After about a week and a half, you should be exercising for 7-8 hours straight, doing exercises for three to four minutes. The course itself can be completed for up to six months,” explains Ekaterina Lyubimova.
For “beginners” and girls with very weakened muscles (for example, after childbirth), she advises purchasing large balls - about 3.5 cm in diameter, which are lightweight and have a rough surface, such as are usually made of silicone, plastic or latex. When you feel the results, switch to smaller and heavier specimens, such as metal ones.
The technology has arrived
The sex industry's latest advancement in the fight for our pleasure is pelvic floor trainers. They themselves assess the condition of the intimate muscles and show a “report” on your progress on the monitor. True, for such a “sophisticated” device you will have to pay an amount of ten to twenty thousand rubles. The most popular of them are vibration simulators, pneumatic devices and muscle stimulators.
The first are an “advanced” version of the balls. Firstly, they sync with your phone using Bluetooth and tell you when to tense and relax your muscles. Secondly, a vaginal probe is used, which changes size depending on the force of compression. But myostimulators themselves cause tissue contraction due to weak electrical impulses. The creators of each gadget have already recorded several training programs for them, so you don’t have to invent them yourself. And the time you spend working with them is about twenty minutes a day. Just like when using balls, use a lubricant and antiseptic, and in some cases, condoms for ultrasound. And be sure to consult your doctor. In addition, carefully read the attached instructions and, of course, study the list of contraindications.
Gymnastics for intimate muscles
(intimate gymnastics) are exercises specifically designed to naturally strengthen and restore the muscles of the pelvic organs. Gymnastics for intimate muscles is recommended to be performed for the prevention and treatment of gynecological diseases, preparation for pregnancy, to restore the tone of stretched muscles after childbirth, to increase sexuality and sensitivity during intimacy, and to level out the factors associated with menopause.
You should start training with a Warm-up, in order to prepare and warm up the necessary muscles, disperse blood and lymph through the pelvic organs. Don't skip this step! Then, move on to basic gymnastics exercises for intimate muscles and additional breathing exercises.
Exercises for the pelvis and hip joint at home
Exercises for the hip joint , first of all, serve as a prevention of coxarthrosis and osteoarthritis of the knee. In addition, pelvic gymnastics significantly activates and improves blood circulation in the pelvic area, therefore it is beneficial for women’s health, while at the same time it allows you to tighten the muscles of the buttocks and form a beautiful hip line.
Gymnastics for the hip joint at home
It is useful to perform pelvic exercises two to three times a week for 15–20 repetitions. For training you will need a rubber shock absorber.
Exercise No. 1. "Half-split on a chair"
Place a straight leg on a stationary support of any height standing in front (in our case, a chair), the foot rests against the edge, the other leg is straightened back as far as possible, the foot is turned perpendicular to the foot in front. One hand on the hip, the other on the belt. Try to make a deep lunge towards the leg standing on the chair, bending the latter at the knee joint. Slowly bend and straighten the leg in front of you on the chair. With each subsequent movement, increasing its amplitude. You can perform the movement with fixation at the point of maximum stretch for 5-10 seconds. Repeat, changing I.P. legs.
A more complex version of this exercise is performed with the help of additional support, for example two chairs:
Commentary on the exercise. The exercise is a stretching exercise, so slight soreness in the thigh muscles and groin is acceptable. Increase the degree of stretching of the thigh muscles gradually to avoid pain the next day. Try to keep your back vertical.
Exercise not only helps restore the elasticity of the thigh muscles, but also improves blood flow to the pelvic organs, for example, with prostatitis in men and pelvic floor diseases in women (inflammation of the appendages, amenorrhea, endometriosis).
Contraindications : deforming or dysplastic coxarthrosis, osteoporosis of the joint neck, condition after a femoral neck fracture, condition after replacing a joint with an endoprosthesis (the first three months after surgery), deforming osteoarthritis of the knee joints (II–IV degrees).
Exercise No. 2. Adduction while lying down
I.P. lying on his side, with his head to the FOP (fixed support), to which the exercise machine is attached (for example, to the leg of a sofa), the other end of the exercise machine is fixed to the foot. Perform machine rows with a straight leg from behind the head towards the floor while exhaling “Haa”, 15–20 repetitions.
You can perform this exercise without a shock absorber.
Comments on the exercise . Significantly improves blood circulation in the muscles of the perineum and is also indicated for the treatment of diseases of the pelvic organs. Prevention of cellulite, forms a beautiful hip line.
Exercise No. 3. Standing adduction
The exercise is performed from the I.P. standing sideways to the door, on which one end of the simulator is fixed (the door should open in the opposite direction), the other end of the simulator is attached with a dog collar and a carabiner to the shin. Pull (abduction) with the straight leg of the machine as far as possible to the side while exhaling “Haa”, 15–20 repetitions.
Comments on the exercise . Includes the adductor and abductor muscles of the thigh (abductors and adductors), which are usually very weak. And people in the older age group are often simply in a neglected state. And this is precisely what is associated with the development of hip joint disease with the general name coxarthrosis, especially in the presence of osteochondrosis of the lumbar spine with or without hernias.
Contraindications: deforming
Exercise No. 4. "March Step"
I.P. standing facing the NOP at 2.5–3 meters (fixation of the simulator is the same as in the 3rd exercise). The working leg is raised up by the simulator. Lowering the straight leg to the supporting leg, 15–20 repetitions.
Comments on the exercise . A super useful exercise for the thigh muscles (the back surface where the sciatic nerve passes) and for the knee joint - to strengthen the cruciate ligaments. If 40–50 repetitions are performed, the exercise becomes aerobic in nature and performs an anti-cellulite function.
Exercise No. 5. "Twist"
I.P. lying on his side, with his feet towards the NOP (the simulator is fixed in the same way as in the 3rd and 4th exercises). Hip twist row with knee touching floor in front of chest. When straightening the leg, the foot should be turned towards the ceiling.
Comments on the exercise . Excellent prevention of coxarthrosis and is even allowed in the presence of the first stages of coxarthrosis (deforming or dysplastic).
Contraindications : endoprosthesis in the first six months, femoral neck fracture and impacted femoral neck fracture. The last two cases usually occur with osteoporosis in older people. Relative contraindications to performing this exercise are deforming gonarthrosis and conditions after operations on the knee joint.
Exercise No. 6. "Walking uphill while lying on the floor"
I.P. lying on his back, with his feet towards the NOP - door. The simulator is fixed at the highest point of the NOP. Knee thrust (flexion) of the machine to the chest with each leg alternately for at least 15–20 repetitions. 40–50 repetitions are allowed, but this is already an aerobic exercise.
With good physical fitness, the simulator can be fixed not to the upper, but to the lower point of the LOP, and it is important to monitor the tension of the simulator. In this version, the so-called “lower abs” are actively involved in the work, helping to fight a large belly, and the hip joint in the stage of straightening the leg is perfectly stretched.
Comments on the exercise . The exercise is a decompression exercise. That is, when performing it, the articular surfaces do not contact each other, and the muscles work as if walking uphill. The exercise is also useful for prolapse (ptosis) of internal organs and hemorrhoids. With a large number of repetitions (more than 20), the abdominal muscles are additionally activated.
Exercise No. 7. "Half-split lying on your back"
I.P. lying on his back, head to the lower leg, the simulator is attached to the lowest point of the lower leg and to the lower third of the lower leg. Hands to the side. Straight leg pull from behind the head to the floor. Perform the exercise for at least 15–20 repetitions.
Comment on the exercise : The back of the thigh (the area of the sciatic nerve) is involved here. Useful for cellulite of the thighs (with 40–50 repetitions). Allowed in the initial stages of coxarthrosis, used in rehabilitation after injuries and operations on the knee joint.
Exercise No. 8. "Semicircle with foot"
I.P. lying on his back, side to the LOP, the leg closest to the LOP is fixed to the exercise machine. Raising the straight leg up to the vertical (10–20 repetitions).
Commentary on the exercise : The exercise tightens not only the outer surface of the thigh, but also the stomach and abdominal muscles (obliques).
Exercise No. 9. "Circles with legs"
I.P. on his back, head to NOP. Hands to the side. The simulator is fixed by the lower part of the leg, the other part of the simulator is fixed by the shin. With a straight leg, perform circular movements with maximum amplitude, first in one direction, then in the other. Perform the movement with each leg for 15–20 repetitions. In this case, the ligaments of the hip joint can crunch, and quite loudly. There is no need to be afraid of this; after a few sessions the crunch will go away.
If there is enough space in the room, then for physically trained and coordinated people this exercise can be performed with both legs at the same time. Moreover, the number of movements is not limited to twenty.
Commentary on the exercise : tightens the stomach, improves intestinal motility, helping to fight constipation. Thanks to the work of the muscles of the perineum and abdominal press, blood circulation in the pelvic organs improves, which is a powerful prevention of pelvic floor diseases: in women - endometriosis, uterine fibroids, inflammation of the appendages, in men - prostatitis, prostate adenoma.
Contraindications : hip joint endoprosthesis, deforming or dysplastic coxarthrosis, osteoporosis of the joint neck, condition after a hip fracture, diastasis of the abdominal muscles, uterine prolapse.
Exercise No. 10. "Kick"
I.P. standing on all fours, head to NOP. The exercise machine is fixed at the lower part of the shin and the lowest point of the lower leg. Extending the leg with the exercise machine backwards until it is fully straightened from a position of full flexion (when the thigh touches the abdomen). We try not to touch the floor with our feet. Perform 15–20 repetitions with each leg.
Commentary on the exercise : excellent prevention of coxarthrosis. It affects the muscles and ligaments of the hip joint, eliminates congestion in the pelvic floor, replacing running and squats. In the practice of kinesitherapy, the exercise is also used in the presence of such delicate problems as hemorrhoids and pelvic organ prolapse, since straining is excluded.
Thanks to the work of the leg muscles, venous circulation is activated, which prevents the formation of blood clots. The exercise is also used for multiple sclerosis, ALS, and in rehabilitation after a stroke, as a result of which the functions of the lower extremities suffer and people cannot walk, stand, or squat for a long time. This exercise replaces similar axial loads necessary to restore neuromuscular regulation of the muscles of the lower extremities.
Contraindications : coxarthrosis (deforming or dysplastic), as well as hip joint endoprosthesis and deforming (II–IV) gonarthrosis (knee joint). In all other cases it replaces squats and walking. Technically difficult exercise. It is useful not only for the hip joint, but also for the knee joint (except for the diseases mentioned above).
The article uses materials from the book by S. M. Bubnovsky “Home health lessons. Gymnastics without machines. 60 exercises”
Pain in the hip joint. How to treat?
Pain in the hip joint and buttocks, which intensifies when walking, radiates to the knee - a typical sign of developing osteoarthritis. Quite a common occurrence even among young people, over 30 years old. Unfortunately, it is the hip joint with arthrosis that is destroyed most quickly and ultimately leads to endoprosthetics. In order to stop arthrosis in time and restore health to the joint, it is important to consult a specialist, an orthopedic doctor. We invite you to the Kazan Kinesitherapy Center for a consultation and myofascial diagnosis of the musculoskeletal system (spine, joints, ligaments, muscles) using the method of applied kinesiology.
Special offer. Consultation with an orthopedic doctor + joint diagnostics – 1000 rubles.
Sign up by phone. (843) 570-55-25 or in our VKontakte group .
Even more useful articles in Yandex Zen:
Follow us on Instagram:
Don't miss out on the fun! Subscribe to our news:
Subscribe to news from the Kazan Kinesitherapy Center
Center promotions, therapeutic exercises and useful tips from our specialists on how to independently maintain the health of your joints and spine without medications
Similar articles:
Season of arthrosis. How to avoid exacerbation and how to cope with joint pain in the fall
Therapeutic exercises on a kinesiosimulator. "Brass" (photo and video)
Why does my knee hurt? And why “joint” gels are useless
A set of exercises for beginners
Intimate gymnastics - Basic exercises
Exercise LIFT
The LIFT intimate gymnastics exercise consists of a gradual, 7-step, compression of the vaginal sphincter and also a gradual 7-step relaxation of the vaginal muscle.
1 step. Squeeze the vaginal sphincter a little, just tone it and hold it in this state for about 5 seconds.
Step 2. Without releasing the load, squeeze the sphincter a little stronger, pull it up a little and hold for 5 seconds.
3-6 step. Squeeze the sphincter even more tightly, pull it up and hold it for 5 seconds. Step 7 Squeeze the sphincter as much as possible and pull it up, as if sucking it inside yourself. Hold this position for 10 seconds.
Now gradually, in 7 steps, with a 5-second delay at each step, release the vaginal muscle. Repeat the exercise 5 times without rest.
When straining the vaginal muscle, do not forget to pull it up.
Try to designate “steps” more sharply; at each step there should be a difference between the force of compression of the vaginal muscle. The same goes for the relaxation steps.
While performing this exercise, try not to hold your breath, breathe deeply and freely.
After performing the Lift exercise, rest for 1-2 minutes.
Exercise SOS
This exercise can be performed both standing, lying down and even sitting if you are, for example, at work or in transport.
Perform three strong, fast contractions of the vaginal sphincter, then three strong, prolonged contractions, then three strong, fast contractions again. Repeat the exercise 10 times without stopping.
All contractions should be performed without blur, there should be an interval between them - this is the muscle relaxation phase.
Close your eyes and imagine how your muscle clearly performs this exercise. Count: one, two, three, raaaz, twoaa, threei, and then again one, two, three.
Try to breathe calmly without holding your breath.
Exercise PULSE-FLINKING
Lying on your back, bend your legs slightly at the knees and slightly spread them apart. Place your hands on your lower abdomen.
Place your hand on your wrist and feel your pulse. With each pulse beat, strongly squeeze the vaginal muscle, trying to squeeze it along its entire length, from the sphincter and above, pull it up. At heart rate rhythm, perform 60 contractions, then rest for 30 seconds.
In the second approach, perform 100 contractions, in the third - 120.
The exercise can be performed either with or without pulling the muscle upward, the main thing is to squeeze the muscle precisely as your pulse contracts. You definitely need to feel a period of relaxation. During compression, you should feel the middle part of the vaginal muscle well.
Exercise Ladder
The Ladder exercise consists of a rhythmic, 7-step, compression of the vaginal sphincter and also a rhythmic, 7-step relaxation of the vaginal muscle. Unlike the “Elevator” exercise, there is no 5-second delay between steps.
Lying on your back, bend your legs slightly at the knees and slightly spread them apart. Place your hands on your lower abdomen.
On the count of one, slightly contract the vaginal sphincter and tone it. On the count of two, squeeze a little harder and pull the sphincter upward. On the count of three, four, five, six, with each count, increase the load and tighten the sphincter even higher. On the count of seven. Squeeze the sphincter as much as possible and pull it up.
Then immediately and gradually relax the vaginal muscle, counting in reverse order. For each count, ease the load a little. Release the muscle completely on a count of one.
Repeat 10 times, without interruption.
Your movements should be sharp and deep. Starting with the vaginal sphincter, try to spread the load over the entire vaginal muscle as it increases, i.e. squeezing harder and harder, we pull it higher and higher. When removing the load, rhythmically push the muscle down.
Please note that the “steps” are performed at a fast pace, without delay.
Exercise LIGHTHOUSE
The MAYAK exercise is contraindicated for women with threats and prolapse of the pelvic and vaginal organs. For those for whom such an element as pushing is not contraindicated, the exercise should be performed with caution and very moderately.
Lying on your back, bend your legs slightly at the knees and slightly spread them apart. Place your hands on your lower abdomen.
On the count of times, quickly and firmly squeeze the vaginal muscle and pull it up.
Next, on the count of one, two, three, four, five, six, gradually, slowly and very smoothly try to relax the muscle, gradually releasing the load. And on the count of seven, eight, nine, ten, begin moderately pushing (pushing) the muscle downwards.
Repeat 10 times without a break.
Squeeze the muscle quickly and strongly, and relax gradually, counting from one to six. Then, gradually increasing the load, push the muscle downwards in a count of seven to ten.
Attention! The pushing (pushing) technique should be performed very carefully and moderately.
During pushing, intra-abdominal pressure increases. During compression of the vaginal muscle with pulling up, it elongates in length and becomes narrow, and during pushing, the vaginal muscle becomes wider and much shorter.
Breathing exercises
Breathing exercises
complement special vaginal exercises. They enrich the muscles that we train with oxygen, as a result of which the muscles will be pumped up and strengthened many times faster.
Exercise CAT
This exercise is based on a bodyflex exercise that is already familiar to us.
The exercise is performed only on an empty stomach; at least two hours should pass after eating.
The exercise is performed in a kneeling position, with emphasis on the palms.
Shibasaki Yoshio's exercises will return the correct position to the hip joints
Correction of the pelvic bones using the Shibasaki Yoshio method – Kotsuban diet
Skeletal muscles play a huge and very important role in creating beautiful body proportions.
The pelvis supports the upper body and is a kind of “vessel” for storing internal and reproductive organs.
As a result of pelvic distortion, blood circulation is impaired, which causes swelling of the body. The figure of people with pelvic deformities is always distinguished by a more massive lower half. Even with a slender upper body, such people often have full legs.
Shibasaki Yoshio developed a method for correcting the pelvic bones, which returns the internal organs to their normal position , which naturally reduces, and with prolonged exercise, restores all of the above disturbances in the functioning of the body.
The proposed gymnastics corrects pelvic deformities and brings the hip and sacroiliac joints to the correct state.
At the same time, doing this gymnastics, you can reduce the volume of your hips.
However, no matter how tempting the results may be, do not rush things, exercise carefully, carefully, but regularly. Do not try to get results by force - the effect may be the opposite.
After all, the correction of the pelvic bones, which are already accustomed to deformation, in itself is stressful for your body. Some of you will feel discomfort during the training and refuse further correction.
The creator of the method, Shibasaki Yoshio, guarantees you results only if you practice regularly, adequately in terms of effort, and for a long time. Work out at your own pace, don’t force results, treat your body with care.
According to ratings among similar diets Kotsuban Diet, Shibasaki Yoshio has been a leader in Japan for quite some time.
Types of deformation of the pelvic bones
Pelvic deformations can be different and reflected in one or more of three projections:
- frontal (rear view) – forward curvature of the pelvis or excessive backward deflection;
- sagittal (side view) – right- or left-sided deformity;
- horizontal (top view) – twisting.
Here are some options for pelvic deformation:
You are offered a technique that will not only help correct the position of the pelvic bones, but also remove excess volumes, the cause of which lies in the deformation of the pelvic bones.
What does Kotsuban Diet provide?
As a result of restoration of the correct position of the internal organs:
- the transmission of nerve impulses to the center of appetite becomes correct , as a result of which the person returns to an adequate attitude towards the amount of food consumed, the person stops eating too much;
- strengthening the muscles that accompany the pelvic bones and brings the body into the correct position, which improves the condition of the arms and chest;
- closed pelvic bones allow impulses to pass smoothly through the spinal cord, which improves metabolism . The result is improved skin and hair condition, elimination of swelling, decreased fatigue, composure, and an inner feeling of happiness;
- Returning the correct position of the pelvis eliminates constipation, restores the menstrual cycle in women, improves the muscular work of the pelvis, which means normal blood circulation in the pelvis is restored.
- Gradually accustoming your body to maintaining the correct position of the bones, you return your internal organs to the correct, original position , as a result of which the entire body will function normally - weight returns to normal, body volumes return to normal.
- You get a method to keep your body young and healthy forever .
What other external and internal changes can you get as a result of pelvic bone correction?
1. Your skull will return to a symmetrical shape: the temporal bones will again become aligned with each other;
2. The descending bust will rise;
3. The buttocks will stop drooping “senilely”;
4. X-shaped leg deformity will be eliminated;
5. Correct breathing will be restored, the occipital bone will return to its correct position, and with it the neck will restore its original state. As a result of such natural movement, the causes of facial swelling will disappear;
6. The natural volumes of the upper arms, which “swell” and triceps sag due to the fact that during movement the pelvis is often “turned” back, will be restored;
7. The natural S-shaped curve of the spine will return, as a result of which the “tummy” will be lifted, the stomach will work correctly, without overexertion;
8. The natural size of the internal organs, which usually decrease due to improper functioning of the small pelvis, will be restored; on the contrary, the digestive system will no longer take over the body’s excessive attention.
9. To perform the exercises we will need an unusual device - a rubber band.
What do you need to start classes?
For training, you will need a special tape that will fix the pelvic bones. You can see the ribbon in the image below.
If you do not have this tape (which is very likely), you can use a wide, thick underwear elastic band (at least 7 cm wide) for exercises, or find something more suitable from the materials you have.
How to tie a ribbon:
All exercises must be performed carefully, carefully; during gymnastics there should be no painful sensations caused specifically by the exercise. If, for example, your hip hurts without doing exercises, you can try doing the exercises carefully if the pain does not get worse during exercise.
Exercise 1. Correction of sagittal (lateral) curvature of the pelvis: stretching to the sides with support.
Feet shoulder width apart. The feet are pressed tightly to the floor.
Lift your toe off the floor, lifting your hip, and lower it back to the floor, fixing your foot on the floor.
Place your hands on your hips as shown in the figure to feel the movement of your hips. Rock your pelvis to the right. Repeat the movement 10 times.
Then swing your pelvis to the left.
Repeat the movement 10 times.
Exercise 2. Correction of the frontal curvature of the pelvis.
Feet shoulder width apart. Feet pressed to the floor.
Slowly bend your upper body forward. You will get the maximum effect from the exercise if your fingers reach the floor.
If your spine is not yet flexible enough, try to gently, carefully make several smooth rocking movements, each time as you exhale, trying to bend even lower. Try not to let your pelvis tilt back.
Having reached the floor with your hands, slowly straighten up and take a vertical position. Place your palms on the back of your pelvis, as shown in the figure, and gently bend back.
Repeat the entire exercise 10 times.
Exercise 3. Correction of sagittal deformities of the pelvic bones.
Feet shoulder width apart. Feet pressed to the floor.
In this exercise, it is important that the body does not fall forward or backward. The feet, pelvis, chest and head should be on the same vertical plane during the exercise, as if you were doing the exercise between two close walls.
Place your palms on your thighs as shown in the illustration. Tilt your body to the left, with your right palm press the greater trochanter of your right thigh, resisting further lifting of the hip up and to the side. Using the palm of your right hand, push your right hip outward, using your hands to help contract the pelvic bones.
Change the position of your pelvis by tilting your body to the right. Repeat the same action.
Perform the cycle of movements 10 times.
Exercise 4. Correction of the frontal curvature of the pelvis.
Feet shoulder width apart. Feet pressed to the floor.
This exercise can be done without the band, although you can leave the band on if you prefer.
The first picture shows how to perform the exercise incorrectly - the back should not be rounded while performing this exercise. The spine should be taut all the time, the face should look forward, without going beyond the line of the knees.
Stand with your back straight. Your spine is stretched to its maximum. Grab the back of your head with your palms, elbows open.
Lower your buttocks down, leaning your upper body forward until your body relative to your hips and your knees form a 90-degree angle, as shown in the image.
The elbows remain open, the spine is stretched. The head maintains a single axis with the spine, the face looks forward.
Return to the starting position.
Repeat the exercise 10-20 times.
Exercise 5. Correction of the frontal curvature of the pelvis.
Stand 1 meter away from the wall. Get down on your knees, bringing your feet and knees together.
Place your hands on the wall and, bending the knee of your right leg, lunge forward.
Using strong arms, lift your left leg off the floor, but try to press your heel into the floor, stretching the Achilles tendon of your left leg as much as possible. Hold in the most tense position for 10 seconds, trying to ensure that the muscle tension reaches the thigh, including the inner thigh.
Lower yourself to the floor again.
Repeat the exercise for the other leg.
Exercise 6. Correction of horizontal curvature of the pelvis.
Sit on the floor and extend your left leg in front of you. Bend your right leg at the knee, and place the foot of your right leg at the level of the kneecap of your left leg, as shown in the image.
With your left hand, press on the knee of your right leg as shown in the image so that the knee of your right leg drops to the floor.
Now begin to lift your right knee off the floor, resisting and pushing on the knee with your left hand to bring it down again. Work with maximum resistance for 5 seconds.
After 5 seconds, suddenly stop resisting. Then press firmly on your knee again while counteracting with your knee. Repeat the exercise for one leg 5-10 times.
Then repeat the technique for the other leg.
Tatiana Chekalova