General movement pattern
First of all, we recommend that you watch this one-minute video. Its advantage is that it very clearly shows in slow motion how the legs move :
https://youtu.be/2_NGl5A0S5Q
As you can see, the movements are in some sense similar to the work of scissors (although you shouldn’t go too far with “opening” them, but more on that a little later).
At the same time, the legs do not bend much, but also do not straighten 100%.
The limbs work non-stop, constantly making swings from the hip - strikes, as shown in this illustration:
General scheme of footwork in crawl
A general description of all movements with comments is also given in this short video:
https://youtu.be/WLayHwG0Ol4
Exercises for the lower leg muscles (calves)[edit | edit code]
Bodyweight exercises[edit | edit code]
Standing calf raise
Weight-bearing exercises[edit | edit code]
- Standing calf raise with dumbbells/barbell
- Seated calf raise with barbell
- Single leg raise with dumbbells
- Seated calf raise with barbell
- Seated calf raise with dumbbells
- Standing calf raise
- One leg calf raise
Exercises on simulators[edit | edit code]
- Seated calf raise
- Standing calf raise
- Standing calf raises using a hack machine or toe press
- Standing calf raise in the machine
- Donkey calf raise
- Seated calf raise
- Standing calf raise in the machine
- Standing calf raises using a hack machine or toe press
- Standing calf raise in the machine
- Donkey calf raise
Analysis of the correct technique
Work from the hip
Perhaps the most important thing to understand is that advancement occurs through the work of the hips , and not through the flexion and extension of the legs.
As you probably know, in our front thighs there are muscles - quadriceps, so they must tense, sending the entire limb following them down.
Imagine that you have a whip , which is driven by the muscles of the thighs .
This technique can be experienced very clearly if you stand in the water not horizontally, but vertically and begin to make whip-like movements with your legs. Most likely, in this position you will not be able to bend your knees (otherwise you will go under water), but you will understand very well how the movements are made.
How it looks in a vertical position is shown in this video, be sure to try it in water:
The “scissors” exercise performed on land also allows you to understand the correct technique very well . In the video below you can see him in the second minute of the video:
Knee flexion angle
Despite the above, the work, of course, does not proceed with legs straight as crutches. During swimming, our limbs physiologically bend and extend - but this does not occur due to a special bend of the knee, but as a consequence of whip-like movements from the hip .
The range in which the limbs bend and extend is about 140-160 degrees .
During swimming, the leg does not fully straighten to 180 degrees, but it does not bend much either - it is very far from a right angle of 90 degrees. And the range itself is not very large.
Here, for example, is slow motion footage from the Olympic Games, which clearly shows the angle at which the legs are bent:
Work in an amplitude of 140-160 degrees
Feet and ankles
Correct foot position
When swimming, your feet should be extended as far as possible , as shown in the image to the right.
In this case, they will be a continuation of the line of the body and legs , and not a stopper (if they are in their usual position - at an angle of 90 degrees to the leg, then they will actually slow down the slide through the water).
At the same time, they are located close to each other and, if possible, should be slightly directed inward - to the point that the thumbs are allowed to touch each other.
This is trained with the “thumbs are friends” exercise, which the trainer talks about in this video:
Home workout alternative
For each exercise there are three approaches with 12-15 repetitions. There will be five exercises:
- squats;
- step up;
- adhesive bridge;
- “Morning body weight”;
- "Fire hydrant".
We have already described the first three exercises. Therefore, let’s begin the description of “Hydrant” and “Morning Weight”. The second name of the latest technique is “Good morning”. To perform this, you will need to place your feet wider than shoulder-width apart and bend your torso at a 90-degree angle, sticking your butt out. The back remains straight, the gaze is directed forward, the arms are bent at the elbows, and the palms are directed towards the head. If you feel your hamstrings stretch, the exercise is done correctly. As for the “Fire Hydrant”, it consists of the following steps:
- Get on all fours, supporting yourself on your palms and straight arms.
- The left leg, bent at the knee, is moved up and to the side (the thigh should ideally be parallel to the floor).
- Take your starting position.
- Repeat the same for the right leg.
- Perform the required number of approaches.
As you can see, novice athletes can strengthen their legs and buttocks without even leaving their own apartment. The programs described above will only be beneficial if they are performed regularly. Do your muscles hurt after training? Don't give up and keep working. Soon everything will return to normal, and after a couple of months you will notice the first results.
Why do my feet sink in water?
The answer to this question lies in the physiology and buoyancy of the human body: at the top we have an “air bag” (lungs), which is buoyant, but at the bottom there is no such bag - there is a rather heavy pelvis and equally heavy legs.
If you put a body in water, one part of which is air and the other heavy, then for obvious reasons it will be located vertically in the water: the heavy part will tend downward, and the part with air will tend upward.
In this regard, there is nothing strange or surprising in the desire of our lower body to sink, another question is how to resist this ?
Intuitively, a person who feels that his legs are sinking begins to work with them faster and thereby keep them afloat.
This is not the right approach: energy needs to be (a) saved, (b) spent in order to move forward, and not to stay afloat.
It is more correct to generally balance the position of our body in the water so that it does not begin to tilt.
Since our chest contains air, it in some sense acts as a ball on which we lean, or as a fulcrum. You need to press on this ball (support) - press on the chest to make the whole body tilt more forward, that is, so that the body takes a more horizontal position .
Then, with a fully straightened body, the chest will be more horizontal in the water, the head will become lower, and the pelvis and limbs will be higher.
Work on shells
Work on the paws and with the bag occupies a special place in boxing. If you develop impact force with a heavy bag, then working on your paws allows you to position the equipment correctly. Individual training does this very effectively and quickly, during which the coach can pay a lot of attention to one athlete. Such individual lessons very quickly turn a beginner into a trained fighter. In group classes, the trainer will not physically have time to pay as much attention to each trainee, which is why there is such a difference in the results.
You need to work not only on heavy, but also on light pears, including pneumatic ones. Often, gyms are equipped with wall-mounted punching bags, which allow more students to simultaneously develop punching power. Equipment training can be included in the main part of the training, as well as sparring, which is an integral part of a boxer’s training. Before training, you need to check with a sports doctor - boxing requires good health!
Within the walls of the “YourRevolution1905” club, we are ready to professionally help you learn to box or improve your level as a boxer. Entire sets of exercises developed by certified specialists, nutritional recommendations, “smart” weighing, classes conducted by a Master of Sports in boxing and much more, all this will help you achieve your goal as effectively as possible. For the most effective and quick results, you can train individually (one-on-one with a trainer) or in mini-groups of up to ten people. Come to our classes and we will help you become the best version of yourself!
Basic mistakes
A ride on the bicycle
This mistake consists of excessive leg bending . As noted above, make sure that your movements are more like a whip, and more like a cyclist.
Do not do strong bending!
Amplitude too large
If we imagine our legs in the form of “flexible” scissors, then this mistake consists of opening them too wide , when one leg at its highest point comes out of the water, and the other goes far below the line of flight.
In this case, our limbs disrupt the general gliding of the body and begin to become a parachute - something that stops on the water and slows us down.
The correct amplitude should not be too wide
Most often, this error occurs at the moment of inhalation and is due to the fact that the swimmer at this moment loses balance, begins to float worse on the water and tries to push himself further with his legs - which, perhaps, works, but ultimately reduces the speed.
Excessive force during upward movement
If you are swimming a short sprint distance and your task is to give your all, then there is probably nothing wrong with that.
Otherwise, you need to understand that the main effort should be during the downward kick (here it’s really worth straining the muscles), while to return it up you shouldn’t put in excessive effort - the muscles should receive a certain relaxation, otherwise you won’t be able to swim.
Likewise, you don't want to let your ankle heal too much, especially when lifting your leg up.
Exercises for the back surface (biceps) of the thigh[edit | edit code]
The biceps are located on the back of the thigh and are involved in bending the knee. The exercises are listed in order of decreasing effectiveness.
- Leg curls in the simulator
- Hyperextension
- Romanian deadlift
- Deadlift with a barbell on straight legs
- Lunges - low impact
Bodyweight exercises[edit | edit code]
- Lying leg raises
- Bridge
- Lying hip extension
- Lying leg raises
- Bridge
- Lying hip extension
Weight-bearing exercises[edit | edit code]
- Deadlift with a barbell on straight legs
- Romanian deadlift
- Deadlift
- Deadlift with a barbell on straight legs
- Romanian deadlift
- Deadlift
Exercises on simulators[edit | edit code]
The exercises are listed in order of decreasing effectiveness.
- Leg curls in the simulator
- Hyperextension
- Romanian deadlift on the Smith machine
- Deadlift with a barbell on straight legs in a Smith machine
- Lunges - low impact
- Leg curls in the simulator
- Hyperextension
- Lunges
Adviсe
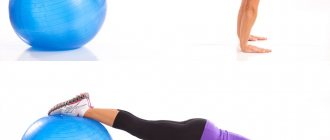
- Do ankle stretches. To ensure that your feet are as extended as possible while swimming, it is recommended to do stretching exercises, as shown in this image:
While stretching, sit on your ankles and lean back slightly.
Basic rules for performing these exercises:- they are performed statically - that is, you must sit in the position shown and spend a certain time in it;
Graduation is very - start gradually, first with a small amplitude and a short time, so as not to get injured.
- Flipper exercises are beneficial. To establish the technique, swimming with fins is recommended:
- it allows you to feel the correct amplitude of movements (at least with fins, it is more difficult to bend your leg too much);
- There is more load on the quadriceps - the muscles become stronger ;
- additionally stretched .
- Try side kicks with both feet
Stand at the wall of the pool, push off from it with your head lowered into the water and your arms outstretched, slide and work your legs as far as you can breathe, then come back and repeat the same maneuver several more times.This allows you to achieve the following:
- your legs are together at the moment of pushing and sliding - their position next to each other is trained;
Due to acceleration, it is easier to start making the correct movements, and besides, attention is focused exclusively on them.
Swimming with fins is a great workout
Circuit training
Circuit training in boxing is a very important element of a boxer’s physical training, as it allows him to develop special qualities that are important in fights. A boxing fight requires good strength training and developed endurance. But it won’t be possible to develop them using traditional methods, as bodybuilders do. Such a sport with its linear training is not suitable for the ragged rhythm of combat, where the position changes every second. We need training in the same ragged mode, when the load changes very quickly.
This is achieved by performing several approaches, in each of which you need to do 4-5 exercises for different muscle groups without stopping. For example, in one approach you need to perform sequentially:
- 10-15 pull-ups;
- 20-30 push-ups;
- 25-35 body twists;
- 20 lunges with the left and right leg;
- jumping rope 100 times.
This is one approach, all the exercises in it are performed one after another without rest, without stopping. Between approaches, the athlete should rest for a minute or two, and then continue. Any exercise on this list can be replaced with another that will load the same muscle groups. For example, a pull-up can be replaced with an exercise in which a block is pulled behind your back. The main thing is that circuit training in boxing loads as many muscles as possible in one approach. Make sure you do the exercises quickly. This is not a weightlifting sport! There is no need to squeeze out a lot of weight; the load should be sufficient to perform the specified number of times.
Circuit training in boxing allows you to develop various sports qualities of a fighter such as speed, strength, endurance, speed-strength endurance and speed strength, not individually, but in combination. If individual classes are conducted, the coach selects special effective complexes for each fighter that allow them to eliminate weaknesses.
Significance compared to hands
In conclusion, we note that recently studies have become popular, proving that leg work does not have such a strong effect on the speed of crawl swimming compared to the hands (in particular, here is a link to an English-language study).
Without disputing the correctness of these tests, we note that they need to be interpreted correctly: they do not mean at all that you need to abandon the development of your legs and work on your arms, or that their technique is not so important.
Firstly , swinging your legs is of fundamental importance for balancing the body and maintaining its correct position in the water - it is extremely difficult to swim on just your arms.
Secondly , correct footwork, without a doubt, gives a noticeable increase in speed - try swimming only with your hands (with a kolobashka clamped between your legs), and then in full coordination.
Legs - exercises and training features[edit | edit code]
The best exercises for legs
Leg training (Alexander Shchukin)
Developing leg muscles is an important task that a bodybuilder should pay special attention to. The muscle mass of the legs largely depends on congenital data, many have naturally developed muscles, while others, on the contrary, have small legs and are very difficult to train.
Leg muscles in bodybuilding are divided into 3 main groups: extensors (quadriceps), flexors (leg biceps) and calf muscles (gastrocnemius and soleus).
Read the main article:
Leg muscles
Leg training in amateur bodybuilding is of a secondary nature, and there are objective reasons for this. Firstly, pumped up legs visually reduce the size of the arms and the width of the shoulders, so amateurs are not recommended to focus on the legs. Secondly, vigorous leg training can lead to joint problems, since lower extremity exercises can contribute to the destruction of cartilage surfaces through the use of very heavy weights.
Features of leg training[edit | edit code]
Correct technique plays a big role in leg training. Failure to comply with the exercise technique most often causes injury and reduces the effectiveness of the training as a whole.
Before performing exercises, always warm up thoroughly - it reduces the risk of injury, improves the elasticity of ligaments and joints, increases blood circulation in the muscles, prepares the joints (the secretion of synovial fluid increases, which lubricates the articular surfaces and prevents damage to the cartilage). In addition, in leg training, special importance is attached to stretching after performing exercises.
For beginners, it is enough to perform 1-2 exercises on the leg muscles. If your primary goal is to increase the muscle mass of the upper half of the body, provided that the condition of your legs suits you, then it is enough to train your legs 2-3 times a month. To develop legs, 3-4 workouts per month are required. The training program of a professional will depend on the goals and type of lagging muscle groups: perform 1-2 basic exercises and 1-3 isolating exercises for lagging groups. The optimal number of repetitions for the muscles of the lower extremities is higher than usual: the thigh muscles require 8 - 10 repetitions, the lower leg muscles - 10 - 15, choose such weights that the set is performed to failure.
It has been established that the leg muscles adapt very quickly to the load, so you need to use super training techniques:
- Supersets
- Drop sets
- Slow negatives
- Constant tension during a set
- Peak contraction
- Forced reps
- General concept of kicking technique
- Kick protection
- Direct kicks and defense against them
- Practicing direct kicks using paws
- Protection from direct kicks
- Side kicks and protection against them
- Practicing side kicks using paws
- Side kick protection
- Side kicks and defense against them
- Practicing kicks to the side using paws
CHAPTER 4
Kick technique
General concept of kicking technique
Any kick is a complex movement consisting of translational movement of the entire body relative to the floor and rotational movement of body parts around various axes in various joints and the whole body as a whole. The blow is constructed in such a way that the movement of the body parts and forces are transferred from the foot to the lower leg and thigh, then to the pelvis, and from the pelvis to the thigh, lower leg and the striking surface of the leg performing the striking movement.
The effectiveness of a kick is made up of a number of factors: the speed achieved by the foot at the moment of contact with the target, the number of muscles involved in the kick, the force developed by the pelvis, the stable position of the body, especially at the moment of contact with the affected surface. Just like in punches, there is a distinction between the basis of the kicking technique and the details of the technique. At the heart of the technique is the leading link - the most important and decisive part of the action. In the kicking technique, the leading link is the striking movement of the leg. Attention is focused most of all on the leading link. It is important to note that the technical details of any combat action are very important. For example, details of a kicking technique (such as the position of the hands or head) protect the fighter from the opponent's counterattacks. In the process of studying the technique of kicking, a number of relatively completed stages can be distinguished, which correspond to certain stages of the formation of a motor skill.
1. The stage of initial learning of a motor action (the stage of formation of the ability to reproduce the technique of kicking in a general form).
2. Stage of in-depth action (at this stage the motor skill is refined, it partially turns into a skill).
3. Stage of consolidation and improvement (formation of a strong and variable skill).
In the process of studying the technique of kicking, many experts recommend building training in the technique within the first, second and only partially the third stages, that is, not trying to memorize the kicking technique “tightly”. This is explained by the fact that much depends on the individuality of the student. By achieving a very stable and strong memorization of the classical execution of movements, the student reduces the possibility of manifestation of individual variability in technical terms, the ability to change the technique of kicks with changing conditions and tasks of the fight.
Kick protection
It is customary to distinguish between four main types of defense against kicks. Defense with hands - stands, rebounds inwards, outwards, overlays; protection with legs (stands), protection with movement (steps back and to the side); protection by body movement (slopes, deflections and dives); also combined defenses, which combine several types of defenses when performing. This or that method of defense depends on the type of blow, on which leg the opponent strikes, and on the target chosen by the opponent for the blow (legs, torso or head). Tactical plans play the main role in choosing defense in battle.
Photo 131. Impact surfaces of the foot and lower leg
Photo 132. Sequence of foot bandaging
Direct kicks and defense against them
Left leg straight kick
Technique: Take a fighting stance. Shift your body weight to your right leg. At the same time, lift the thigh of your left leg up. The foot of the left foot is facing downwards. Perform a striking movement by actively extending the left leg. The foot of the left foot is turned with the pads in the direction of striking. The legs are fully straightened, the stomach is pulled in, the chin is down, the torso is straight. Hands are raised to protect against possible counter or retaliatory actions. Return your leg to its original position along the trajectory of the strike and take a fighting stance.
Photo 133. Direct kick with the left foot
Tactical purpose:
Direct kick to the thigh with the left leg
Direct kick to the body with the left leg
Photo 134. Take a fighting stance and strike straight to the thigh with your left leg
Photo 135. Take a fighting stance and strike straight to the torso with your left leg
Straight left kick to the head
Direct left leg kick to the torso with forearm support
Photo 136. Take a fighting stance and strike straight to the head with your left foot
Photo 137. Take a fighting stance and strike directly with your left leg to the thigh while simultaneously planting your forearm
Direct left leg kick to the thigh with forearm support
Photo 138. Take a fighting stance and strike straight to the torso with your left leg while simultaneously supporting your forearm
Right leg straight kick
Execution technique
: Take a fighting stance. Shift your body weight to your left leg. At the same time, lift the thigh of your right leg up. The foot of the right foot is pointing downwards. Perform a striking movement by actively extending the right leg. The foot of the right foot is turned with the pads in the direction of striking. The legs are fully straightened, the stomach is pulled in, the chin is down, the torso is straight. Hands are raised to protect against possible counter or retaliatory actions. Return your leg to its original position along the trajectory of the strike and take a fighting stance.
Photo 139. Direct kick with the right foot
Tactical purpose:
Direct kick with the right leg to the thigh of the opponent's left leg
Direct kick with the right leg to the thigh of the opponent's right leg
Photo 140. Take a fighting stance and strike straight to the thigh with your right leg
Photo 141. Take a fighting stance and strike straight to the thigh with your right leg
Direct kick to the body with the right leg
Right kick to the head
Photo 142. Take a fighting stance and strike straight to the torso with your right leg
Photo 143. Take a fighting stance and strike straight to the head with your right foot
Straight right leg kick to the thigh with forearm support
Direct kick to the torso with a forearm support
Photo 144. Take a fighting stance and strike directly with your right leg to the thigh while simultaneously supporting your forearm
Photo 145. Take a fighting stance and strike straight to the torso with your right leg while simultaneously supporting your forearm
Practicing direct kicks using paws
Left leg straight kick
Photo 146. Take a fighting stance, jump back and strike straight
Right leg straight kick
Photo 147. Take a fighting stance and strike straight
Protection from direct kicks
Stop kick with left foot
Technique: Take a fighting stance. Shift your weight to your right leg while lifting your left leg and pointing your left foot forward. Hands are raised to protect against possible counter or retaliatory actions.
Photo 148. Stop kick with the left foot
Photo 149. Stop-punch defense
Stop kick with right foot
Technique: Take a fighting stance. Shift your weight to your left leg while lifting your right leg and pointing your right foot forward. Hands are raised to protect against possible counter or retaliatory actions.
Photo 150. Stop kick with the right foot
Photo 151. Stop-punch defense
Stand-block with the shin of the left leg at the lower level
Execution technique
: Take a fighting stance. Shift your weight to your right leg while lifting and pointing your left shin forward.
Photo 152. Stand-block with the shin of the left leg at the lower level
Photo 153. Protection with a shin block at the lower level
Stand-block with the shin of the right leg at the lower level
Execution technique
: Take a fighting stance. Shift your weight to your left leg while lifting and pointing your right shin forward.
Photo 154. Stand-block with the shin of the right leg at the lower level
Photo 155. Protection with a shin block at the lower level
Left-handed defense
Technique: Take a fighting stance. Place the forearm of your left hand at the lower level.
Photo 156. Hitting with the left hand
Photo 157. Defending by hitting with the left hand
Defense with the right hand
Execution technique
: Take a fighting stance. Place the forearm of your right hand at the lower level.
Photo 158. Hitting with the right hand
Photo 159. Defense by hitting with the right hand
Defense by turning the body to the right
Photo 160. Take a fighting stance and rotate your torso while stepping with your right foot to the right
Defense by turning the body to the left
Photo 161. Take a fighting stance and rotate your torso with your left foot stepping to the left
Side kicks and protection against them
Side kick to the thigh with the left leg (low kick)
Execution technique
: Take a fighting stance. Perform a backward jump. Shift your body weight to your right leg. At the same time, lift the thigh of your left leg up and forward, turn your torso and foot of your right leg 90°. Strike with an active forward movement of the pelvis and extension of the left leg. Legs are fully straightened. The pelvis is brought forward, the stomach is pulled in, the chin is lowered. The arms and left shoulder are raised to protect against possible counter or retaliatory actions. The striking surface is the shin of the left leg. Return your leg to its original position along the trajectory of the strike and take a fighting stance.
Photo 162. Side kick to the thigh with the left leg
Side kick with the left leg to the thigh with a 360° torso turn (low kick)
Execution technique
: Take a fighting stance. Perform a backward jump. Shift your body weight to your right leg. Lift the thigh of your left leg up and forward, turn your torso and foot of your right leg 90°. Strike with an active forward movement of the pelvis and extension of the left leg. The pelvis is brought forward, the stomach is pulled in, the chin is lowered. The arms and left shoulder are raised to protect against possible counter or retaliatory actions. The striking surface is the shin of the left leg. Without stopping the movement, perform a 360° turn with your body and take a fighting stance.
Photo 163. Side kick with the left leg to the thigh with a 360° torso turn
Tactical purpose
: side kick to the thigh with the left leg
Photo 164. Take a fighting stance and deliver a side kick with your left leg to the thigh of the opponent’s near leg
Side kick with the left leg to the thigh with a slant to the right
Photo 165. Take a fighting stance and deliver a side kick with your left leg while simultaneously leaning to the right
Side kick with the left leg to the thigh with a forearm support from the side kick with the left hand
Photo 166. Take a fighting stance and deliver a side kick to the thigh with your left leg while simultaneously planting your forearm
Side kick with the left leg to the thigh with a forearm support from the side kick with the left leg
Photo 167. Take a fighting stance and deliver a side kick to the thigh with your left leg while simultaneously planting your forearm
Side kick with the left leg to the thigh with a forearm support from the side kick with the right leg
Photo 168. Take a fighting stance and deliver a side kick to the thigh with your left leg while simultaneously planting your forearm
Side kick with the left leg to the thigh while grabbing the opponent's attacking left leg
Photo 169. Take a fighting stance, grab the opponent’s leg with your left and at the same time deliver a side kick to the thigh with your left leg
Side kick with the left leg to the thigh while capturing the attacking right leg of the opponent
Photo 170. Take a fighting stance, grab the enemy’s right leg and at the same time deliver a side kick to the thigh with your left leg
Side kick with the right leg to the thigh (low kick)
Technique: Take a fighting stance. Shift your body weight to your left leg. At the same time, lift the thigh of your right leg up and forward, turn your torso and foot of your left leg 90 degrees.
Strike with an active forward movement of the pelvis and extension of the right leg. Legs are fully straightened. The pelvis is brought forward, the stomach is pulled in, the chin is lowered. The arms and right shoulder are raised to protect against possible counter or retaliatory actions. The striking surface is the shin of the right leg. Return your leg to its original position along the trajectory of the strike and take a fighting stance.
Photo 171. Side kick to the thigh with the right leg
Side kick with the right leg to the thigh with a 360° torso turn (low kick)
Technique: Take a fighting stance. Shift your body weight to your left leg. At the same time, lift the thigh of your right leg up and forward, turn your torso and foot of your left leg 90°. Strike with an active forward movement of the pelvis and extension of the right leg. The pelvis is brought forward, the stomach is pulled in, the chin is lowered. The arms and right shoulder are raised to protect against possible counter or retaliatory actions. The striking surface is the shin of the right leg. Without stopping the movement, perform a 360° turn with your body and take a fighting stance.
Photo 172. Side kick with the right leg to the thigh with a 360° torso turn
Side kick with left leg
Execution technique
: Take a fighting stance. Perform a backward jump. Shift your body weight to your right leg. At the same time, lift the thigh of your left leg up and forward, turn your torso and foot of your right leg 90°. Strike with an active forward movement of the pelvis and extension of the left leg. The legs are fully straightened, the pelvis is brought forward, the stomach is pulled in, the chin is lowered. The arms and left shoulder are raised to protect against possible counter or retaliatory actions. The striking surface is the shin or foot of the left leg. Return your leg to its original position along the trajectory of the strike and take a fighting stance.
Photo 173. Side kick with the left leg
Practicing side kicks using paws
Side kick with left leg (low kick)
Photo 174. Take a fighting stance, jump back and deliver a side kick with your left leg
Side kick with right leg (low kick)
Photo 175. Take a fighting stance and throw a side kick with your right leg.
Side kick with the left leg to the body
Photo 176. Take a fighting stance, jump back and deliver a side kick with your left leg
Side kick with the right leg to the torso
Photo 177. Take a fighting stance and throw a side kick with your right leg.
Side kick to the head with left leg
Photo 178. Take a fighting stance, jump back and deliver a side kick with your left leg
Side right kick to the head
Photo 179. Take a fighting stance and throw a side kick with your right leg
Side kick protection
Stand-block with the shin of the left leg at the lower level
Execution technique
: Take a fighting stance. Shift your body weight to your right leg while simultaneously lifting the thigh of your left leg and pointing the shin of your left leg forward.
Photo 180. Delivery block with the shin of the left leg at the lower level
Tactical purpose
: stand-block with the shin of the left leg at the lower level
Photo 181. Take a fighting stance and perform a block block with the shin of your left leg at the lower level
Stand-block with the shin of the left leg at the middle level
Technique: Take a fighting stance. Shift your body weight to your right leg, while simultaneously lifting the thigh of your left leg up towards the elbow of your left hand and pointing the shin of your left leg forward.
Photo 182. Stand-block with the shin of the left leg at the middle level
Photo 183. Protection with a shin block at the middle level
Stand-block with the shin of the right leg at the lower level
Execution technique
: Take a fighting stance. Shift your body weight to your left leg while simultaneously lifting the thigh of your right leg and pointing the shin of your right leg forward.
Photo 184. Stand-block with the shin of the right leg at the lower level
Tactical purpose
: stand-block with the shin of the right leg at the lower level
Photo 185. Take a fighting stance and perform a block block with the shin of your right leg at the lower level
Stand-block with the shin of the right leg at the middle level
Execution technique
: Take a fighting stance. Shift your body weight to your left leg, while simultaneously lifting the thigh of your right leg up towards the elbow of your right hand and pointing the shin of your right leg forward.
Photo 186. Stand-block with the shin of the right leg at the middle level
Photo 187. Protecting the shin of the right leg with a block stand at the middle level
Defense with a left foot step back
Photo 189. Take a fighting stance and step back with your left foot
Defense with right foot backwards
Photo 189. Take a fighting stance and step back with your right foot
Defense with a straight left hand strike to the head with a hip support
Photo 190. Take a fighting stance and strike straight to the head with your left hand while thrusting your hip
Defense with a straight right hand to the head with a hip support
Photo 191. Take a fighting stance and strike straight to the head with your right hand while simultaneously planting your hip
Tilt-back protection
Photo 192. Take a fighting stance and lean back
Defense by grabbing the opponent's attacking leg
Photo 192. Take a fighting stance and grab the enemy’s attacking leg
Defense by grabbing the opponent's attacking leg with a forearm support
Defense with a side blow to the head with a left hand with a forearm support
Photo 194. Take a fighting stance, support your forearm and at the same time grab the enemy’s attacking leg
Photo 195. Take a fighting stance and deliver a side blow with your left hand to the head while simultaneously supporting your forearm
Defense with a right hand side kick to the head with a forearm support
Photo 196. Take a fighting stance and deliver a side blow with your right hand to the head while simultaneously supporting your forearm
Defense by grabbing the leg and throwing the opponent's torso to the left
Photo 197. Take a fighting stance and grab your left leg, while simultaneously grabbing your opponent’s head with your left hand.
Step to the side and twist your opponent's torso to the left to throw him off balance.
Defense by grabbing the leg and throwing the opponent's torso to the right
Photo 198. Take a fighting stance and grab your right leg, while simultaneously grabbing the opponent’s head with your right hand. Step to the side and twist your opponent's torso to the right to throw him off balance.
Response action from grabbing the attacking left leg
Photo 199. Grab the opponent's head with both hands. Bend your left leg at the knee and place it on the opponent’s thigh, while simultaneously pulling the opponent’s head toward you
Response action from grabbing the attacking right leg
Photo 200. Grab your opponent's head with both hands. Bend your right leg at the knee and place it on the opponent’s thigh, while simultaneously pulling the opponent’s head toward you
Response action from grabbing the attacking left leg
Photo 201. Grab your opponent's head with both hands. Place your left leg between the opponent’s legs, at the same time pull the opponent’s head towards you
Response action from grabbing the attacking right leg
Photo 202. Grab your opponent's head with both hands. Place your right leg between the opponent’s legs, at the same time pull the opponent’s head towards you
Protection of the right forearm with a stand
Photo 203. Take a fighting stance and place the forearm of your right hand at head level
Protection of the left forearm with a stand
Photo 204. Take a fighting stance and place the forearm of your left hand at head level
Side kicks and defense against them
Side kick with left foot
Technique: Take a fighting stance. Shift your body weight to your right leg, and at the same time lift the thigh of your left leg up. Turn your torso and foot of your right leg 90°. Perform the striking movement by actively extending the hip of the left leg. The pelvis is brought forward, the stomach is pulled in, the chin is lowered, the arms and left shoulder are raised to protect against possible counter or retaliatory actions. The striking surface is the outer edge of the foot, the heel or the entire plantar part of the foot. Return your leg to its original position along the trajectory of the strike and take a fighting stance.
Photo 205. Kick to the side with the left foot
Tactical purpose: kick to the side with the left leg in the torso with a step
Photo 206. Take a fighting stance, take a step and strike to the side with your left leg in the torso
Side kick to the torso with the left leg
Photo 207. Take a fighting stance and strike to the side with your left leg in the torso
Side kick with right foot
Execution technique
: Take a fighting stance. Shift your body weight to your left leg, and at the same time lift the thigh of your right leg up. Turn your torso and foot of your left leg 90°. Perform the striking movement by actively extending the hip of the right leg. The pelvis is brought forward, the stomach is pulled in, the chin is lowered, the arms and right shoulder are raised to protect against possible counter or retaliatory actions. The striking surface is the outer edge of the foot, the heel or the entire plantar part of the foot. Return your leg to its original position along the trajectory of the strike and take a fighting stance.
Photo 208. Kick to the side with the right foot
Tactical purpose
: kick to the side with the right leg to the torso
Photo 209. Take a fighting stance and strike to the side with your right leg in the torso
Kick to the side with the right leg with a torso turn of 180°
Technique: Take a fighting stance. Shift your body weight to your left leg and turn 180°. At the same time, lift the thigh of your right leg up. Perform the striking movement by actively extending the hip of the right leg. The pelvis is brought forward, the stomach is pulled in, the chin is lowered, the arms and right shoulder are raised to protect against possible counter or retaliatory actions. The striking surface is the heel or the entire plantar part of the foot. Return to the starting position along the trajectory of the strike and take a fighting stance.
Photo 210. Side kick with the right leg with the torso turned 180°
Practicing kicks to the side using paws
Practicing a side kick with the left foot with a step
Photo 211. Take a fighting stance, take a step and strike to the side with your left foot
Practicing a side kick with the right foot
Photo 212. Take a fighting stance and kick to the side with your right foot
Practicing a side kick with the right leg with the torso turned 180°
Photo 213. Take a fighting stance and strike to the side with your right leg, turning your torso 180°
Protection from side kicks
Stand-block with the shin of the left leg at the middle level
Turn the torso to the left with a step to the side
Photo 214. Take a fighting stance and perform a stand-block with the shin of your left leg at the middle level
Photo 215. Take a fighting stance and turn your body to the left with a step to the side
Defense by turning the body to the left with a step to the side
Photo 216. Take a fighting stance and turn your body to the left with a step to the side
Table of contents
"Scissors effect"[edit | edit code]
«Scissor effect
" is one of the most common mistakes in swimming. Our records show that the “scissors effect” was observed in almost 70% of swimmers who attended Swim Smooth master classes. Spreading your legs causes a lot of drag and harms your body position in the water. However, the “scissor effect” rarely occurs precisely because of incorrect leg position. As a rule, the real cause is your hands. "Laying" the arms helps swimmers who spread their legs excessively to maintain balance. If you eliminate placing your hands behind the longitudinal axis of the spine (see Swimming to correct posture), then, as a rule, the “scissors effect” will disappear on its own, without special intervention.
The “scissors effect” provokes strong water resistance. This can be compared to an open parachute.
How to pump up your legs
However, the point is that it takes a lot of time and effort to develop your leg muscles, and it's not enough to just do squats.
Of course, squats are an extremely important part of your leg training, but if that's the only thing you do, then you could get a lot more out of your time in the gym.
In this article, I want to share what I know about how to get bigger, stronger legs, including...
- the most effective way to create a leg training program;
- the best exercises and techniques for performing them;
- my favorite workout program that you can start using right away.
If you don't want to train in the gym, read how to pump up your legs at home.
Let's start!