Author: Timko Ilya - the ruler of the entire site and fitness trainer | more details >> Rod. 1984 Trained since 1999 Trained since 2007. Author and creator of the site tvoytrener.com. CCM in powerlifting. Champion of Russia and South Russia according to AWPC. Champion of the Krasnodar region according to IPF. 1st category in weightlifting. 2-time winner of the Krasnodar Territory championship in t/a. Author of more than 700 articles on fitness and amateur athletics. Author and co-author of 5 books.
Place in the author rating:
out of competition
(become an author)
Date:
2015-03-04
Views:
247,574
Rating:
5.0
| All articles by the author >> | Medals articles >> |
Articles are loading...
| Article medals: | more than 100 thousand views |
Why medals are given to articles:
| Bronze medal: | |
| 1. The article is in the TOP 100 2. The article has more than 3. The article has more than 100 | |
| Silver medal: | |
| 1. The article is in the TOP 50 2. The article has more than 3. The article has more than 500 | |
| Gold medal: | |
| 1. The article is in the TOP 10 2. The article has more than 1 3. The article has more than 1,000 | |
Main muscles - latissimus Additional - rhomboids, teres, rear deltoid, biceps and trapezius Difficulty - medium
Horizontal pull-ups
The name “Australian pull-ups” was given to this exercise by the Americans.
It corresponds to the slang name for Australia - “down there”. It is not known for certain who invented this wonderful exercise. But it has been used in physical therapy, children's gymnastics, crossfit and fitness training for many years. The movement will help develop the latissimus dorsi muscles for those who do not yet know how to do hanging pull-ups, or do it technically incorrectly - with swinging. In gyms, the exercise is performed by fixing the Smith machine bar at a level below the athlete’s waist, or in a power rack, using a regular bar as a crossbar for support. You can also do the exercise on parallel low bars with a reverse grip or a specialized horizontal bar. The movement is sometimes performed in training loops, on gymnastic rings, or while hanging on a thick rubber shock absorber. This allows you to activate your back muscles a little differently, engage stabilizers, and reduce the load on your lower back.
Execution technique
Initial position
- The crossbar is installed at waist level, or slightly higher if a beginner is pulling himself up, and it is difficult for him to perform the movement from a lower position;
- It is necessary to fix the projectile so as to prevent it from falling;
- The grip is straight, slightly wider than shoulder width or adequate shoulder width;
- The body is straightened, the pelvis is tucked, the hip joint is extended, the muscles are tightened;
- The fingers clasp the bar, the palm lies on the bar;
- The abdomen is tightened and neutralizes excess deflection in the lower back
Movement
- Squeeze your shoulder blades toward your spine and move your shoulders away from your ears;
- Pull your chest toward the bar, continuing to squeeze your shoulder blades and tense your lats;
- Touch the bar, then lower your body back down;
- Contract your muscles as you exhale, lower as you inhale;
- Do the required number of repetitions, maintaining a straight body position and toned buttocks.
Attention
- A pause at the peak of the contraction will help you strengthen the latissimus muscles better and eliminate unnecessary movements;
- The descent should be relatively slow, simply relaxing your muscles and lowering yourself under the weight of gravity is a bad strategy;
- Upward jerks and pelvic thrusts are not allowed;
- It is necessary to turn off the legs as much as possible, do not involve the pelvis, hip joint and do not push with the legs
Cross lunges in Smith for girls
The modified version further develops the mobility of the hip joint. The difference is in the position of the legs, the position of the spine.
- We turn the toe of the front leg inward by 45 degrees.
- With the abducted leg, we step to the side, place the foot symmetrically first, and fall slightly forward with the body.
- We perform moderately deep squats 6 times on each leg.
Lunges in the Smith machine for girls in video format:
Recommendations
- Rest your toes against a barbell plate or plyometrics box, this will help remove inertia and prevent slipping;
- Pull your chest to the bar; in terms of biomechanics, the movement is most similar to an inverted bench press; the exercise will therefore be useful for beginner benchers, and simply for those who want to learn how to engage their back muscles and press more;
- Stay at the top statically, this will strengthen your core muscles faster. The back is naturally quite strong, it just needs to be included in the work, statics will help the athlete progress and quickly move on to more complex exercises;
- Rise smoothly, and try to lower in 4 counts, that is, twice as slow;
- If you have problems with your grip, try to place your palm completely on the bar, make your grip deeper, and do not work in a manner that involves “extra” muscles in the movement;
- Do not try to tighten your biceps; working them is not the main purpose of parallel or horizontal pull-ups;
- Eliminate kicking off the ground to progress faster
Complicated variations of pull-ups[edit | edit code]
There are quite a few variations of pull-ups - by and large, a pull-up can be called any movement performed while hanging on a bar, in which the head rises above the hands. The exercises presented below are no exception. We deliberately left out of the book extreme (explosive/plyometric) pull-ups (where the hands come off the bar) as too dangerous. To be honest, the person doing them in the gym is looked at as crazy (trust me, I tried).
All of these options will allow you to test your strength and effectively work the muscles of your back, chest, arms, shoulder girdle and midsection.
Variations
- Pull-ups with a narrow reverse grip . This movement involves more of the biceps and forearms due to its biomechanical nature. The exercise allows you to strengthen your arms and forearms in equal measure with your back, but does not contribute to long-term progress in the development of back muscles;
- Pull-ups with a narrow straight grip . They engage the serratus muscles and force the shoulders to work, but at the same time they work better on the latissimus;
- Australian wide grip pull-up . The most common option, which is used only for developing the lats. This option can be performed with either a forward or reverse grip, and involves the back most actively. Working out the back muscles will be even more active with a reverse grip, since the athlete’s elbows will automatically be pulled towards the waist;
- Pull-ups in training loops . This option is convenient because those who wish can include the rear bundles of deltoid muscles, as well as the latissimus dorsi muscles, in the work. Pull-ups in loops are well suited for those who are just starting to exercise, because you can stand close enough to the place where the projectile is attached and reduce the load so that it is optimal for a beginner. It is enough to perform the movement, pressing your forearms to the body, and you will achieve maximum activation of the latissimus dorsi muscles.
Types of grips for pull-ups
Pull-ups can be performed in different ways. In this case, methods mean changing the grip: its width, the location of the hands on the crossbar. There are other ways to vary the load when performing pull-ups. For example, changing the time of the negative and positive phases, using additional weights, the technique of incomplete amplitude (partial repetitions). But it is precisely working with different grips of the bar that allows you to optimally redistribute the load between individual muscle groups and effectively avoid the occurrence and development of muscle adaptation. There are 4 main grips: regular (aka upper, medium in width), wide, parallel and reverse grip (narrow).
A short list of grips and muscles involved
Depending on the width and method of grip, you can practice on the horizontal bar as follows:
- narrow overhand grip (brachialis, serratus anterior and lower lats)
- narrow reverse grip (biceps, lower lats)
- medium straight grip (muscles of the back, shoulders and chest)
- medium reverse grip (lats, biceps)
- wide grip to the chest (top of lats, trapezoid, round)
- wide grip behind the head (trapezius, upper and middle part of the lats, round)
- neutral grip (lats, triceps, brachialis, serratus anterior)
The wider the grip, the more the back muscles work. The narrower the grip, the more the muscles of the arms and chest are activated.
Now let's look at the basic grips in more detail.
Regular grip pull-ups
Width – slightly wider than shoulder width, overhand grip (palms facing outwards). At top dead center, the arms are fully bent at the elbow joint, the chin is above the bar. At bottom dead center, the arms are fully extended. The exercise should be performed without swinging, the negative phase (lowering of the body) is a controlled descent. Typically, the negative and positive phases of the exercise are performed at the same speed, however, the biceps are more sensitive to the negative phase of the load, so many athletes recommend performing the negative phase approximately twice as long as the positive phase. If an athlete cannot pull himself up on his own, then a partner helps him with this, lifting him up and allowing him to slowly lower himself (using the controlled descent method) - this is one of the ways to learn how to pull himself up. In regular grip pull-ups, the biceps, trapezius and latissimus dorsi muscles are evenly loaded.
Reverse grip pull-ups
There are two methods of execution: with a regular wide grip (slightly narrower than in pull-ups with a regular overhand grip) and a narrow grip. In both cases, the grip of the hands is lower (reverse), so that the palms look inward. The exercise primarily targets the biceps and lats. Moreover, the narrower the grip, the greater the load on the biceps
A distinctive feature of the exercise is that here, like nowhere else, the amazing property of pull-ups is manifested - the muscle on which attention is focused is subjected to training. Reverse close grip pull-ups are considered one of the best ways to pump up your biceps.
Wide grip pull-ups
In contrast to the previous movement, here the muscles of the back are mainly loaded - the latissimus. At the top point, the head is behind the bar in such a way that the trapezius muscles of the back and shoulders almost touch the bar. If the exercise is performed, trying to touch the bar with your chest, then the front deltoids will develop (in combination with the barbell press, this technique gives amazing results in increasing the mass of the pectoral muscles). Similar to the previous exercises, wide-grip pull-ups should be performed slowly, with a controlled descent.
Parallel (neutral) grip pull-ups
The exercise is focused on developing the lower sections of the latissimus muscles, while the range of motion is shortened, and the bar is touched with the chest, not the chin. When moving through the full amplitude and/or until the chin touches the bar, the pull is carried out primarily through the strength of the biceps, rather than the lats. Hands are placed as narrow as possible. Serves as an excellent finishing exercise in lat training.
Analysis of the exercise
What muscles work
In programs for beginners, the exercise is included as one of the stages of preparation for the classic pull-up. The movement creates an athletic V-shaped torso. The exercise helps to activate not only the back muscles, but also the muscles of the forearms and palms, strengthens the grip, and prepares for all traction movements.
Working muscles:
- Latissimus and rhomboid muscles of the back;
- Trapezius and round muscles;
- Biceps and forearm muscles;
- Abs, buttocks, and leg muscles as stabilizers
Advantages
- Suitable for beginners. They are often the first horizontal row in terms of strength training, and allow you to learn not only how to work with your own weight, but also how to properly engage your back muscles. The movement is better for a beginner than pulling a barbell to the belt due to the fact that it eliminates even a static load on the thoracic spine and cannot cause a back injury;
- Australian pull-ups are good for rehabilitation. After an injury, this movement will help restore muscle tone, strengthen your back, and improve muscle function in general. The exercise does not create a torsional or compressive load,
- Australian pull-ups allow you to create a beautiful silhouette, are suitable for bodybuilding purposes, and can be used by intermediate athletes to pump up their back muscles at the end of a workout. The higher the legs, the greater the load on the lats, so the variation with the legs raised on the support allows even the advanced to get the load;
- Pull-ups on a low bar are ideal for women's training; they strengthen the muscles that are “lagging behind” in most women and eliminate postural disorders;
- The movement can be performed by children and teenagers, and does not require a gym membership; in any yard there is a horizontal bar on which you can successfully do pull-ups, and parallel bars or a ladder for honing the skill of Australian pull-ups.
Preparing for the exercise
Unlike the classic hang, which is inaccessible if you have limited mobility in the shoulder joint, this version of the exercise is accessible to everyone. Before starting your workout, you need to warm up, do a general cardio warm-up, a joint warm-up, and 1-2 sets of pull-ups using a lightweight technique.
For this, beginners can use an almost vertical stance on the ground and a high support, continuing the usual technique, but without a pause at the top.
The exercise can be included not only as the first back movement, but also at the end of the workout, in which case it can be performed after the other movements have been done. Then joint warm-up is not necessary.
For beginners, it makes sense to do 1-2 sets of push-ups at the beginning of parallel grip pull-up training. The idea is that the inclusion of antagonist muscles contributes to better functioning of the back muscles.
Proper execution
- It is important to keep your spine and legs straight. The knees do not need to be “pushed” forward, they should remain in a neutral position so that the ligaments do not experience discomfort;
- The height of the bar cannot be the same for all people. The average starting position is at waist level, and most people should perform the movement from there. But for beginners, higher bars are also suitable, and for intermediates and those who are trying to correct their posture, pull-ups literally from a lying position on the floor;
- The one who performs it technically correctly is the one who feels the contraction of the shoulder blades to the spine, and consciously brings them together, and does not simply bring the body with the biceps to the bar;
- The starting point of the exercise is characterized by emphasis on the heels, but if the athlete’s hamstrings experience discomfort, standing on the foot with pointed toes, or using various types of supports is allowed;
- Exhale while pulling up, inhale while slowly lowering the body down;
- You need to strive to ensure that both halves of your back work equally, with your forearms parallel to each other. This will promote equal muscle involvement and help you move actively.
Crossfit complexes
The main method of rope climbing used by athletes from all over the world in CrossFit is without legs. There is, of course, a certain logic in this: the more complex the exercise, the more effective it is. It is this version of rope climbing that requires maximum concentration and dedication from the athlete, especially if it is necessary to perform it within the framework of complexes in an explosive manner and with a minimum rest interval. However, if your training does not imply consistently good results in climbing without legs, you can replace this method with one that you are better at.
Below are several complexes, by performing which you can check whether you are ready for truly difficult functional training. Extreme load on all muscle groups, very high level of intensity. Do not forget to warm up thoroughly before performing these or similar complexes.
| SDH | Perform 3 vertical rope climbs, one minute of horizontal rope “waves”, one minute of planks. Only 5 rounds. |
| Machine Head | Perform 10 classic deadlifts, 10 pull-ups, 5 vertical rope climbs. Only 3 rounds. |
| Sheppard | Perform 12 barbell thrusters, 15 sit-ups, 20 push-ups and 6 rope climbs. Only 3 rounds. |
| Warrior's Sign | Perform 10 ring push-ups, 20 dips, 30 push-ups, 30 pull-ups and 6 rope climbs. Only 4 rounds. |
Exercises on the topic
Handstand
Double jump rope
Bear crawl in crossfit
Author Yaroslav Khvatov
Training experience - more than 8 years. Winner and medalist of All-Russian powerlifting and deadlift tournaments. Candidate for Master of Sports in deadlift.
Inclusion in the program
The place of the exercise in the training program depends on the athlete’s preparedness. If an athlete cannot perform 10-12 parallel pull-ups, he is given this exercise in 2-3 approaches for a feasible number of repetitions.
If he is able to perform more than 12 repetitions, he should gradually move on to more complex movements. First, the feet are raised onto a support to ensure maximum amplitude. Then they gradually move from parallel pull-ups to performing the exercise in a classic hang on the horizontal bar.
The Australian pull-up can remain in the plan for as long as the lifter can perform it for only 20-25 reps. As soon as he can do more, it is necessary to add weights. A weighted vest is ideal for this purpose, but you can also use a backpack if you exercise at home.
Smith Lunges: Workout for Men and Women
An alternative to classic lunges were similar exercises in the Smith machine. The effectiveness of the universal technique is confirmed by regular training in the simulator for bodybuilders and powerlifters, including practices on the lower body. The isolated exercise is technically difficult. Maintaining balance requires coordination of movements.
It is recommended to do lunges at a calm pace with a sufficient number of repetitions. To thoroughly load large muscles, they are included in the program at the beginning of a comprehensive workout.
The work involves focused pumping of the quadriceps femoris muscle with indirect loading of the posterior surface, buttocks, and trapezius. The abdominal, long back muscles serve as stabilizers.
Horizontal pull-ups
Horizontal pull-ups are a fairly simple exercise for developing the muscles of the back, shoulders and arms. It is used both by beginner athletes who have not yet mastered the correct technique of pull-ups on the horizontal bar, and by more experienced athletes to achieve maximum pumping. When working with your own weight, it is quite easy to focus on stretching and contracting the target muscle group, so this exercise will fit perfectly into any, even the most intense back workout or functional training in CrossFit.
In this article we will tell you what the benefits of horizontal pull-ups are and how to do them correctly.
Lunges in Smith. What, why and why?
Very often in the hall you can observe family or “about to” contracts. This is when someone brings their significant other by the hand and they train together. In this article we will look at a real version from our room, when a young man acted as a mentor to the lady of his heart. It’s always interesting to see from the outside how a person performs an exercise and how he teaches it to others. In our case, the mentoring was incorrect (regarding the position of the back), so we decided to analyze the exercise, lunges in Smith, which the couple did. This is what we got out of it.
Note: For better assimilation of the material, all further narration will be divided into subchapters.
Muscle atlas
The exercise belongs to the class of conditionally basic and is aimed at working out the lower body. The muscle ensemble includes the following units:
- targeted – quadriceps/anterior thigh;
- synergists – gluteus maximus, adductor magnus, soleus;
- dynamic stabilizers – hamstrings, calves;
- stabilizers - back extensors.
A complete muscle atlas looks like this (variant with a barbell):
Advantages
By performing the Smith Lunge exercise, you can expect to receive the following benefits:
- increasing the volume of the buttocks;
- changing the shape of the butt;
- developing glute strength;
- increasing hip flexibility;
- tightening the muscles of the inner thigh and legs in general;
- development of core muscle strength;
- elimination of muscle asymmetry/imbalance in the development of muscle groups (for example, one buttock is larger/smaller than the other).
Execution technique
Smith lunges are an exercise of medium difficulty. The step-by-step execution technique is as follows:
Step #0.
Place the bar on the machine in the highest position. Load the barbell with the required weight. Take a central position in the machine, placing the bar at the bottom of the trapezius. Get into a cross-legged position with one leg slightly forward. Statically tighten your abs. Direct your gaze forward. This is your starting position.
Step #1.
As you inhale, keeping your back straight, begin to lower yourself down, bending your knee joint. At the bottom point, hold for 1-2 counts and then, while exhaling, straightening the knee joint, return to the IP. Repeat the specified number of times. Change your leg. Do the same for the other side.
In the picture version it looks like this:
In addition to the standard version of the Smith lunge, there are several variations of the exercise:
- with placing your foot on the step platform;
- cross forward/backward.
Benefits and contraindications
Beginners use this exercise as an aid to more complex strength exercises for the back. Most experts recommend starting to learn pull-ups with this one. It is enough to simply learn to feel the back muscles, completely stretching them at the bottom point and contracting them at the top point.
By performing simple exercises such as horizontal pull-ups, push-ups and bodyweight squats, you will build a certain muscle base, which will become the basis for further productive sports activities.
Experienced athletes can use this exercise as a warm-up or as a finishing exercise to maximize blood flow to the back muscles. With the warm-up, everything is clear: with the help of pull-ups you can safely stretch all large muscle groups, all joints and ligaments. This way the body will be ready for more serious work.
As a final exercise, it is used to give the joint-ligamentous system a little rest after working with heavy weights. For example, doing 3-4 sets of horizontal pull-ups after heavy bent-over barbell and dumbbell rows will have a great impact on your progress, as you continue to dynamically load the target muscle group and do not overdo the load on the spine.
By the way, there is no axial load on the spine in this exercise, so it is perfect for those who have a hernia in the lumbar region and various curvatures of the spine. This is one of the few exercises for which there are no serious contraindications, and it can be performed by anyone.
Crossfit complexes with push-ups
Push-ups are the basis of many functional complexes aimed at developing the speed and strength qualities of the muscles of the shoulder girdle. CrossFit was originally closely associated with push-ups, as many basic movements and elements, such as burpees, are built on the basis of this exercise.
The table below shows 4 functional training programs containing push-ups, with which you can work large muscle groups in your body and improve skills such as endurance and explosiveness.
| SWAT | Perform 25 pull-ups on the bar, 90 push-ups, 100 sit-ups, 10 bench presses (the weight of the bar is equal to the athlete’s own weight), a 1 km race, 30 jumping jacks with alternating legs. Only 3 rounds. |
| Strange Pyramid | Perform 21-18-15-12-9-6-3-3-6-9-12-15-18-21 two-handed kettlebell swings and push-ups. |
| Susan | Complete a 200m sprint, 10 push-ups and 10 bodyweight squats. Only 5 rounds. |
| Football Workout | Perform 10 barbell presses, 10 burpees, 10 ring pull-ups and 10 push-ups. Only 5 rounds. |
| Meat Grinder | Perform 15 push-ups and 10 classic deadlifts. Total 10 rounds. |
Author Yaroslav Khvatov
Training experience - more than 8 years. Winner and medalist of All-Russian powerlifting and deadlift tournaments. Candidate for Master of Sports in deadlift.
What muscles work?
Before moving on to describing the technique of performing the exercise, let's look at which muscles work during horizontal pull-ups:
- The main part of the load falls on the latissimus dorsi, biceps and forearms.
- Depending on the range of motion, you can also focus the load on the rear deltoids or trapezius.
- The stabilizer muscles are the spinal extensors, gluteal muscles, quadriceps and hamstrings - they are responsible for our stable position during the exercise.
Pull-up table “30 times in 30 weeks”
Experts have developed a pull-up scheme that will allow even a person with poor training to perform thirty pull-ups in thirty weeks. But before you start this scheme, get rid of excess weight and strengthen the muscles throughout your body. Try to lift six days a week, taking one day off. It's best to rest on Sunday so you can start the next week on Monday.
Will help you achieve your goal faster. Find a program online that you like best and stick to it every day. This way, you won’t feel sorry for yourself and will learn to pull yourself up faster. If you have chosen a program for people who do not know how to do pull-ups at all, then first, just hang on the horizontal bar for several weeks to strengthen your hands. If you want to increase endurance, make all the muscles of the upper body beautiful and strong, then use different grips.
Follow the diagram, but not completely. If you can't do five pull-ups as written in the program, then do as many as you can. And based on this result, make a table yourself. During your workout, listen to pleasant, motivating music. This way, you will improve your mood and your workout will be more effective. Try to pull yourself up correctly. The further result will depend on the technique with which you perform the exercise. And don’t be upset if something doesn’t work out for you. The main thing is to train regularly and do not forget about proper rest. And very soon you will become strong and resilient, and your muscles will receive the desired relief.
Horizontal bar
is a universal simulator that uses a large number of muscle groups. Depending on the method you use when doing pull-ups, you can adjust the load on one or another muscle, but all the main muscle groups will still be involved, no matter what type of pull-up you choose.
Pull-ups on the horizontal bar are very useful for the body, they keep your muscles in good shape, and in combination with push-ups and parallel bars, your body will quickly acquire definition, and your muscles will become much easier to cope with heavy work or other exercises.
To achieve the maximum effect from pull-ups on the horizontal bar, they must be performed efficiently and cleanly. With a normal pull-up, it should look like this: take hold of the horizontal bar shoulder-width apart, grab the bar from below with your thumb, keep your legs together, pull yourself up smoothly without jerking, touch the bar with your chest, lower yourself slowly, as if holding your body and fighting the force of gravity. Lower yourself, straightening your arms completely. Pull-ups without following these instructions will significantly reduce the effectiveness of the exercise.
As mentioned above, with the help of a horizontal bar, several muscle groups are pumped at once. Depending on the pull-up method you choose, you can adjust the load on a particular muscle. But first, let's still find out which muscles swing when doing pull-ups on the horizontal bar.
When doing pull-ups on the horizontal bar, the following are used:
- Trapezoid;
- Latissimus dorsi muscles;
- Triceps;
- Biceps;
- Delta;
- Shoulders;
- Forearms;
- Press et al.
Variations of horizontal pull-ups
There are many ways to perform this exercise: on low-hanging rings, on a horizontal bar, on TRX loops, on parallel bars... Let's take a quick look at the benefits of each option.
One point needs to be clarified right away. Not only the position of our hands is important, but also the position of our legs. If your feet are on the floor, the exercise becomes much easier to do, since the amplitude of the movement is short. But by doing horizontal exercises with support from your legs, you can increase the range of motion by 10-15 cm and stretch the latissimus dorsi muscles more strongly at the lowest point. You can use anything as a support: a step platform, a bench, a stack of discs, etc.
Horizontal ring pull-ups
The great thing about horizontal ring pull-ups is that you can constantly vary the biomechanics of the movement. The rings can be rotated in any direction, brought together and apart. This gives us the opportunity to pronate and supinate the hand at any time. Plus, you can do something like combined approaches: first use a shoulder-width grip and swing your back, then spread your arms wider and shift the emphasis of the load to the rear deltoids. It's exactly the same story with TRX loops.
Horizontal pull-ups
Horizontal pull-ups with a barbell placed on racks are perfect for finishing back exercises in the gym. You need to adjust the racks so that the bar is approximately at the level of your lower abdomen. You can use both narrow and wide, both forward and reverse grip. The static position of the projectile allows us to better focus on the work of the back muscles.
You can also perform horizontal push-ups with a reverse grip, focusing on the biceps. To do this, you need to move your legs a little more forward and try to move so that at the top point you can reach the bar with your chin. A very unusual but effective exercise. For convenience, you can replace the barbell and racks with a Smith machine, this does not matter.
Horizontal pull-ups on parallel bars
Horizontal pull-ups on parallel bars are the most amplitude variety of this exercise. However, not everyone will find it convenient, since the diameter of the pipes used for street bars is quite wide. There may simply not be enough grip strength. There is also a more complicated variation of the exercise - pull yourself up on parallel bars with your feet on top of them. This is much more difficult to do, since the center of gravity changes, and it seems that you are working with more weight. The main thing in this exercise is not to arch your back or lower your buttocks.
Smith machine squats: options
With a device like the Smith, squats can be performed in different ways. So, they may differ depending on how you place your feet. This will affect the pumping of certain muscles.
- Feet together. In this case, the front parts of the quadriceps femoris receive the maximum load. Also, the load goes to the knees, so this option is only allowed for those whose knees are definitely healthy.
- Feet shoulder width apart. A classic option that allows you to pump up the lateral parts of the thighs and their inner surface. Squats are often performed in this position on the Smith machine for girls.
- Smith squats with wide stance. This is a classic women's option that helps work out the inner thighs.
To pump up your buttocks, you can place your legs a little further forward, while leaning on the bar with your back. As we have already said, there is no need to be afraid of falling.
There are also the following variations of exercises:
- A difficult and rare exercise - knee squats in Smith . It is used in powerlifting and weightlifting to further develop the lower phase of the barbell squat. This squat puts an unusual load on large muscles, and also affects a number of small muscles that generally do not receive load in other variations of the exercise. The kneeling squat is used not for building muscle mass, but for complex muscle development. Please note that the load on the knees in this case is very high, so beginners should not perform these squats. It is also better to use soft knee pads to protect your joints.
- Another option is the Smith front squat . They differ in that the barbell is not located on the back muscles, but on the chest and deltoid muscles. Due to this, the back will be in an almost vertical position, and this will radically change the load and muscles that are used during the exercise. Although this exercise is quite rare, it is effective, since in addition to the legs it also affects the upper body, including helping to form strong abs.
- Plie or sumo squats . Assume a wide foot placement. The load on the quadriceps is lightened, but the inner thighs are pumped very well. The legs should be spread as wide as possible, the toes should be pointed to the sides at an angle of approximately 45 degrees. The knees should not bend inward. Tighten the abdominal and buttock muscles during the exercise.
- Squats with lunges. Such squats with a Smith machine also assume the same position as classic squats, but one leg must be pushed forward and the other bent until the thigh and shin form a right angle. Then climb back up. In this exercise, the front leg receives all the load, and the second only maintains balance, so you need to change legs.
Exercise technique
The technique for performing horizontal pull-ups is as follows:
- Hang from a low bar (bar, rings, TRX loops, etc.). Take a couple of steps forward and straighten up completely. The horizontal bar should be approximately at chest level. An acute angle should form between the floor and the body.
- Place your hands slightly wider than your shoulders. The wider the grip, the more the rear deltoids and trapezius work. Accordingly, for the latissimus dorsi and biceps, a grip approximately shoulder width is more suitable. Use a middle ground. It is better to hold the horizontal bar with a closed grip and use magnesium, since the time under load will be quite long. You should not use straps here; learn to feel the work of your back in such simple exercises with your own weight.
- Begin to pull your body towards the horizontal bar, bringing your shoulder blades together. If you reach the horizontal bar with your chest before you have completely retracted your shoulder blades, it means that the amplitude of movement is too small. In this case, you need to take it one step further or use the foot support we talked about in the previous section. Lifting the body should be done while exhaling. At the same time, you should keep your elbows closer to the body, so the tension will not go away from the back muscles. if you move them apart, the load will transfer to the rear bundles of the deltoid muscles.
- If you did everything correctly, then at the top point there should be literally 3-5 cm between the horizontal bar and the solar plexus. At this moment, you should statically tense your back muscles as much as possible for greater effect. To do this, bring your shoulder blades together completely. Stay in this position for 2-3 seconds.
- Smoothly lower yourself down while inhaling. Fully straighten at the bottom. At this point, many people make the mistake of relaxing the spinal extensors. This causes the thoracic spine to “sag” downwards. It is not recommended to start repeated pull-ups from this position. This is not dangerous, but you are unlikely to be able to effectively work out your back muscles.
Types of pull-ups
12 variations, ranging from classic to super heavy on a towel, to progress with this popular exercise. When you learn to do 6-8 repetitions, try to increase the difficulty - approximately you need to add one pull-up per week.
Negative pull-ups
Stand on the bench in the top position of the exercise (chin above the bar). Go down as slowly as possible. What it's used for: It's quite difficult to do a full set, but this exercise will completely fatigue the muscles and help develop the strength necessary to perform the movement. Difficulty: 1/10.
Pull-ups with swinging (kipping)
It is performed exactly the same as the classic version, except that you swing your legs to create momentum (inertia) to move upward. What you need it for: strengthens the back muscles at the initial stage of training. Difficulty: 2/10.
Reverse close grip pull-ups
Grasp the horizontal bar as narrowly as possible, with your palms facing you. What is it for? This option maximizes the work of the biceps brachii muscle (biceps) and reduces the load on the back. This makes the exercise easier. Difficulty: 3/10.
Classic
Hang on the horizontal bar with an overhand grip, hands slightly wider than shoulder-width apart. The elbows are fully straightened and the body is straight. Pull your weight up and contract your latissimus dorsi until your chin is over the bar. Then lower yourself down without rocking. This is a traditional technique that will give more load than the first three options. Difficulty: 4/10.
Tarzan Pull Up
Grab with an overhand grip, your hands almost touching each other. Pull yourself up. At the top point, lean to the right and slightly up. Get down. Repeat the same on the left side.
This requires better coordination at the top and also strengthens the torso (core) musculature, which prevents the body from swaying.
Difficulty: 5/10.
Pull-up on both sides
Grab it with a different grip, your hands almost touching each other. In this exercise you need to lift yourself higher to touch the horizontal bar with your shoulder. First you need to train your body to pull yourself up as high as possible, ideally try to touch your chest. As you become stronger in this exercise, you will pull yourself even higher, while tilting your head alternately in each direction. This type requires a more explosive "thrust". More demands are placed on the core musculature to stabilize the body during this quick exercise. Difficulty: 5.5/10.
Pull-ups with knee rotations
At the top of the exercise, lift your knees toward your chest and twist to the left, then to the right. Return to the starting position. Goal: The muscles of the entire torso (core) are worked during knee rotations, as well as the rectus and oblique abdominal muscles. Increased load on the muscles of the back and biceps. Difficulty: 6/10.
Pull-up with leg raise
At the top of the movement, raise your legs in front of you until they are parallel to the floor. Then return to the starting position. What does the exercise do? Loads the abdominal muscles and slows down the pull-up. Therefore, the back muscles work harder.
Difficulty: 7/10.
Walking pull-ups
Standard grip, shoulder-width apart. Move your legs back and forth, imitating walking as you rise and move down. To perform the “walk” slowly, you need to have very developed, strong upper body muscles. Therefore, first you need to do a lot of pull-ups with turning your knees and get stronger in this type of movement. Purpose: This is a very heavy type of load. The slower you do it, the more difficult it is. It also engages the muscles of the torso and abdominal muscles. Difficulty: 7.5/10.
Weighted
Attach a barbell plate to your belt or grab a dumbbell between your legs before starting the exercise.
Goal: when you are already strong enough and can do a lot of pull-ups on the horizontal bar in the classic version, adding weight additionally “shocks” and makes the muscle fibers grow stronger and larger.
Difficulty: 8/10.
Around the world
Pull yourself up on the horizontal bar. Then move your body first to the left and then to the right before returning to the starting position.
What the exercise does: it requires a lot of strength in the entire upper body to move the torso sideways under control (without swaying).
Difficulty: 9/10.
On towels
Wrap one or two towels over the bar. Grab a hold. Pull yourself up and lower yourself slowly. Purpose: Using towels requires a lot of grip strength. It puts a lot of stress on the forearm muscles, as well as the entire upper back and biceps.
Difficulty: 10/10.
Practice and you will succeed! Good luck!
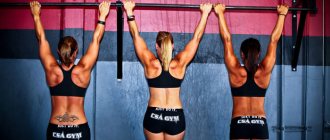
Hanging pull-ups lying on a low bar - technique
The material was prepared by the site team with the support of our experts: athletes, coaches and nutrition specialists. Our team >>
- Reading time: 3 min.
- Working muscles
- Crossbar height
- Execution technique
The hanging pull-up while lying on a low bar can be used as an independent exercise, or as a lead-up to more complex traditional pull-ups. It allows you to prepare muscles, ligaments and joints for increased load and is suitable for beginners. Experienced athletes can use this exercise to tone their back and biceps muscles after their main workout. Let's take a closer look at horizontal pull-ups.
Working muscles
By performing horizontal pull-ups, or Australian pull-ups as they are also called, you develop all the same muscles as with regular pull-ups. In total, these are the back (lats) and biceps. The emphasis of the load can shift depending on what grip you use and how wide you place your hands.
- The wider the arms are, the stronger the back works and the smaller the biceps. The narrower it is, the more intensely the biceps is loaded. A medium grip width works your arms and back evenly.
- When using a direct grip (overhand grip), the back works to a greater extent, and when using a reverse grip (from below), the biceps takes on the load.
If you want to work the latissimus dorsi or wing muscles, use a wide overhand grip to pull up. If your goal is to develop biceps, place your hands narrowly and turn your palms up, that is, use a reverse grip. Each athlete chooses a specific grip width for himself so that it is convenient to perform the exercise.
Crossbar height
If you train horizontal pull-ups for yourself, and do not pass, say, GTO standards, then the height of the crossbar is not fixed.
Having assumed the hanging position while lying down (on straight arms), you should not touch the ground with your shoulder blades. This is especially true for tall athletes. The higher the bar, the easier it will be to perform the exercise, since most of the body weight will go to the legs.
Accordingly, if you want a more difficult task, choose a horizontal bar, hanging from which you will practically touch the ground. The main thing is that there should be at least 10 cm between your back and the surface. If you are a beginner, it is better to prefer a higher horizontal bar. This will allow you to get used to the movement, practice technique and strengthen your muscles.
When passing the GTO standards, the height of the crossbar is 0.9 m for steps 1–3 and 1.1 m for steps 6–9.
In the gym, it is convenient to do the exercise in a Smith machine. This machine is most commonly used for squats, but it is great for many exercises. The height of the crossbar (bar) in the Smith machine is easily adjustable.
Contraindications and precautions
Please note that lunges are contraindicated in some cases. You should not do them if you have recently suffered a spinal injury or meniscus injury or have problems with your knee joints. If you regularly experience joint or lower back pain, you should not do lunges with weights, replace them with other exercises.
At first it may seem that the technique of performing lunges in Smith for girls and not only is very simple, but this is not entirely true. Beginners are recommended to first do the exercise under the supervision of a specialist and with light weight. First, you can master classic back lunges without weight, and only then start training on the machine. Also, in order for Smith machine lunges to be as effective and safe as possible, consider the following points:
- The barbell should not rest on your neck.
- Make movements slowly, watch your breathing and synchronize it with your movements. The work of the muscles also needs to be strictly controlled - you should feel their tension.
- The center of gravity should be the heel of the working leg. The foot should be completely on the floor, do not tear off the toe.
- Make sure that the knee of the working leg does not leave the toe line.
- For training, wear comfortable shoes with flat soles. This will make it possible to stabilize the position of the torso and prevent injuries that may be associated with loss of balance.
- Fix the position of your knee and do not move it to the side. Throughout the entire half-stroke, the knee and toe should be directed in one direction.
- Smith machine lunges are recommended as a support exercise on days when you are working your legs or quads.
- When you reach the top of the exercise, try not to straighten your entire knee. This will improve the effectiveness of the exercise and help relieve stress on the knee joints.
Execution technique
So, find a horizontal bar or crossbar of the required height. If you are doing the exercise on a Smith machine, place the bar at the desired level.
Come close to the bar, grab it with your hands and squat until your chin is on top of it. Walk your feet forward until your body is straightened into a string; there should be no deflections in your body - an absolutely straight line. Extend your arms and assume a lying down position. Your feet should be stable and not slip.
- As you exhale, rise from the starting position by bending your arms. At the top point, your chest almost touches the horizontal bar, and your chin rises above the bar. The body remains straight throughout the entire movement.
- As you inhale, straighten your arms and lower yourself under control to the lowest point. Repeat the exercise.
Horizontal pull-ups should be performed 10–12 times per set. The number of approaches is from three. Do the exercise slowly and under control, avoiding jerking and “throwing” your body down.
https://youtu.be/fCaF9WBlLZ8
Gradually training the muscles of your arms and back, you can move on to a more complex option - classic pull-ups. Horizontal or Australian pull-ups on a horizontal bar or in a Smith machine will be a good base - they will strengthen the ligaments and prepare the muscles.
Additionally, to develop your back muscles, you can use exercises such as T-bar rows, overhead pull-downs, and lever rows. For biceps, dumbbell hammers, concentrated raises, or Scott bench curls are suitable.
Execution diagram
The exercise can be performed in two ways:
- Back lunges with both feet on the floor. This is a classic option.
- Place your supporting leg on a bench or other elevated platform. These are actually Bulgarian lunges in Smith. With this exercise, the muscles of the working leg are maximally loaded, since the supporting leg is not involved in the movement. The gluteal muscle of the working leg is also stretched more strongly, which improves its development.
Let's move on to execution. To begin, adjust the machine and set the appropriate working weight by hanging weights of the required diameter. Set the barbell at a height just below your shoulders.
- Stand directly under the machine. Feet should be shoulder width apart. Conveniently place the barbell on the trapezius muscles of the back - just below the neck. If the bar is still pressing, place a soft terry towel on your shoulders.
- Bend your back slightly at the lower back and look forward. Step your working leg forward a little so that when you lunge, when your thigh is parallel to the floor, the angle at the knee joint is 90°. You may need to adjust your leg position as you move - this is normal when using the machine.
- As you inhale, move your supporting leg back and do a squat. Select the step width depending on your goals. A wide step focuses on the buttocks, a normal step focuses on the quadriceps. The distance between the feet should be such that the supporting leg bends at an angle of at least 90° when squatting. The body weight always falls on the heel of the working leg.
- As you exhale, rise up and put your supporting leg back. Do not straighten your knees completely. This will not only protect your knee joints, but also give the muscles additional static load.
- Perform the required number of repetitions and change legs. After changing legs, start working without a break.
The exercise can be performed 12–15 times with each leg. Subsequent approaches are done without rest and change legs. The recommended number of approaches is 3–4; in the first month of training, beginners can limit themselves to 2 approaches.
You can eliminate the “stepping” of your supporting leg back by locking your legs in a lunge position. This is also called a scissor squat.
When using a support, “stepping” is also eliminated. You simply place the toe of your supporting leg on the bench and perform squats on your working leg. Using a Smith machine in this case significantly helps balance and prevents you from leaning your body forward. After doing a few test lunges, select the optimal location for the bench.
Exercises in Smith. The most complete list.
I am glad to welcome you, my dears! Recently, I have become more and more focused on writing articles based on requests from workers. Today’s post is just from this series. Dear readers (you), the following questions were asked: what Smith exercises can you do in the gym, what should beginners pay attention to, and what is suitable for girls? We will have to answer all this in the very near future.
So, if everything is assembled, then the key is to start, let's go!
Smith simulator and exercises in Smith: learning the pros and cons.
Actually, I would like to start with the fact that this is not the first essay on the topic of simulators. In general, such topics find quite a lively response among visitors to the project (you), which, of course, cannot but rejoice. In particular, in the ABC of Bodybuilding article pantheon there are already such notes as [Types of exercise machines], [Gym equipment for women] and [Smith machine]. Today, another one will arrive in their regiment called Smith machine exercises.
You may ask: “why do we pay so much attention to some typewriters?” Everything is very simple, they are the ones who make up the backbone of the gym, and it is with them that the main combat units of physically low-power weaklings work :). But seriously, I think that in the gym you need to know two things: where the barbell is and where the Smith machine is. The ability to find an approach to these two projectiles will allow you to develop your body to the desired condition quite well and safely.
Now let's dive into some technical details.
Exercises in Smith: Theory
As you know from geometry, the shortest distance between two points is a straight line. In relation to bodybuilding, this means that if a person has two points: the start - good genetics (thick wrists, voluminous knee joints, relatively wide and heavy pelvis) and the finish (the final goal) - extreme muscle mass, then in order to move along this as quickly as possible way, you need to use the simplest and most effective power tool - the barbell. There is no need to reinvent the wheel and waste your time on trivial exercise equipment or isolated blocks, but a critical amendment - you cannot do without an additional assistant in the form of a Smith machine.
Smith Squats: Features and Benefits
The Smith machine works great on the buttocks and legs, and also works additional muscles. Smith squats are very popular for girls, since working with a regular barbell is not always safe for them, and it is not always advisable.
When we just start playing sports, our muscles are not yet ready to perform classic squats. Try to perform the exercise with an empty bar if you have had little to no experience with the sport before. It will be hard for you. The knees will move, the pelvis may lean forward or fall back, and the bar will slide onto the shoulder blades. The good thing about the Smith machine is that it allows you to minimize all these problems.
Smith machine squats have the following benefits :
- Beginners can perform the exercise in the simulator, one of the goals of which is targeted muscle training. Having mastered such squats, in the future you will be able to work with free weights without any problems.
- Exercises can be performed without a partner. At any time, you can independently rotate the bar and lock it in the required position. This is convenient if you cannot ask someone for help.
- When doing Smith squats, you won't be able to fall because you'll be leaning on the bar, which is in a clearly vertical position. Therefore, you don’t have to worry about balance - just lean on the bar and do the exercise.
- The squat technique in Smith will be more precise than when working with free weights.
- Such exercises can be performed even if you have problems with your knees, since you can adjust the depth of the squats and the placement of your legs.
- With the Smith machine, you can perform several exercises on different muscle groups at once, which allows you to provide an effective workout at once.
- The risks of getting grass are minimized, which again makes using the machine a good choice for beginners.
