Execution technique
Step 1:
Stand straight and bring your feet together: your big toes should touch each other, you can spread your heels a little if necessary. Roll onto your heels, lift your metatarsals and spread your toes, then gently return them to the mat, extending your toes along the mat.
The entire area of your feet should be pressed against the mat - try to fit even the spaces between your toes and metatarsus into the mat. Roll your feet back and forth, left and right until you feel that absolutely the entire surface of your foot is pressed to the floor.
Step 2:
Tighten and pull up your thigh muscles, pull up your knees.
Push through the inside of your ankles to tighten your inner thighs. Curl your upper thighs slightly inward. Also tuck your tailbone inward (towards the floor), while raising your pubis towards your navel.
Step 3:
Rotate your shoulders in a downward circular motion. Press your shoulders down, releasing and lengthening your neck. Pull your upper chest up without lifting your lower ribs.
The arms are calmly extended along the body, but are in good shape and do not hang down. The fingers are gathered together.
Step 4:
Keep your head straight. Imagine that you are being pulled up by the top of your head. The chin should be perpendicular to the floor - not down or tilted back. The throat is soft, the tongue in the mouth is relaxed.
Step 5:
Hold the pose for 30 seconds to 1 minute, breathing lightly. Tadasana is usually the starting asana for all standing poses. But it is useful to practice the mountain pose on your own.
Effect
The benefits of Tadasana are due to its ability to relieve individual muscle groups from overload. It is recommended for arthritis and stooping, numbness of the limbs, cramps in the calves, as well as when the toes are insufficiently supplied with blood or the bone structure and mobility of the joints of the elbows, shoulder girdle and hands are impaired.
Thanks to the exercise it is possible to:
- improve muscle tone;
- cope with stagnation;
- eliminate constipation;
- achieve abdominal elasticity;
- strengthen the psycho-emotional background;
- stop the development of osteochondrosis;
- increase energy flow and cope with fatigue.
Variations
- You can change the position of your hands in various ways:
A . stretch your arms up, perpendicular to the floor and parallel to each other, palms facing inward (Urdhva Hastasana - standing arm extension);
B. _ interlace your fingers, extend your arms straight in front of your body, turning your palms away from you, then stretch your arms up, perpendicular to the floor, so that your palms are facing the ceiling (Talasana - Palm Tree Pose);
IN . Cross your arms behind your back, holding each elbow with the opposite hand (be sure to switch arms and repeat the asana).
- Light version
If you find it difficult to maintain balance, place your feet a short distance apart. You can perform the asana near a wall to control your back. Stand with your back to the wall, touching it with your heels, sacrum and shoulder blades.
Tadasana (Samasthiti)
Mountain Pose (Upright Pose)
Attention! The description of the exercises is aimed at a healthy person familiar with safety precautions. It is better to start yoga classes with the help of an instructor. Inept independent practice can be useless and even destructive for the body.
Execution technique
1Stand up straight with your feet together so that the outer sides of your feet are parallel.
2Distribute your body weight evenly across your feet.
3Tighten your knees, pull your kneecaps up.
4Pull your stomach up, stretch your spine, straighten your neck.
5Hands (three options):
- pull up through the sides, turning your palms towards each other and, pushing the floor with your feet, stretch your whole body up following your hands;
- lower down the sides of the body;
- Fold into prayer mudra (Namaste).
6Maintain the position for 30-60 seconds, breathe evenly.
Tuning
Feet together, toes extended.
Legs are straight and tense.
your body straight and pull your solar plexus toward your chin.
The chest is raised and “opened”.
The chin is pointed down so as to straighten the neck.
Subtleties
Balance your body weight on your feet. Just for fun, look at which side your shoes wear down the most, perhaps in Tadasana, you are also unnecessarily loading some parts of the feet without using others.
Wrong
- Don't "sag" your lower back
- Don't lift your chin
- Do not point your toes out to the sides.
How to make it easier
If it is difficult to keep your legs together, it is difficult to maintain balance, leave a small distance between your feet, but no more than the width of your foot.
How to deepen
Balancing on the tips of your feet, lift one leg and extend it back or forward, maintaining balance. Then repeat with the other leg.
Effect
Tadasana helps you wake up in the morning, raising your tone; strengthens abdominal muscles: external and internal; improves posture, ensures proper growth of vertebral bones; promotes the release of spinal nerves; helps eliminate constipation (this effect can be enhanced by first drinking six glasses of water and taking 100 steps in Tadasana), helps keep the spine, as well as the joints of the arms and legs young and flexible.
Indications
Arthritis and poor mobility in the neck, shoulders, elbows, and hands. Hump, stoop. Numbness of the feet (due to poor blood supply), congestion in the calf muscles and thigh muscles.
Contraindications
Headaches, migraines, eyestrain, low blood pressure, osteoarthritis of the knees, bulimia, diarrhea, insomnia.
Tweet
Benefits of Tadasana for the human body
When performed over a long period of time, the technique has a positive effect on the nervous system and the condition of the joints, helps strengthen the back muscles, thereby reducing pain in the spine, strengthens the hips, knees, ankles, abdominal muscles and buttocks. It is recommended to perform tadasana for people suffering from flat feet and lumbosacral radiculitis.
Exit from asana
As you exhale, lower your heels to the floor and place your hands on the top of your head, palms facing your head. This is the exit from the final position and also the end of one cycle.
Relax for a few seconds, keeping your hands on your head, then repeat the pose, while inhaling, stretching your arms and whole body up, turning your palms towards the ceiling, and rising onto your toes.
Practice 5 to 10 cycles. Then, as you exhale, lower yourself onto your heels, lower your arms to the sides of your body (you can also lower your head a little), and relax.
Contraindications and restrictions
Performing Mountain Pose requires caution when:
- migraines;
- pressure changes;
- osteochondrosis of the cervical spine;
- eye strain;
- insomnia;
- diarrhea.
You should not completely exclude the practice of yoga. Listen carefully to yourself at every stage of execution.
Additional Tips
- For many people, the heels should be slightly offset from each other, but the inner bones are still together.
- To help lengthen and widen your toes, your entire foot, or to make your legs stronger, you can momentarily lift your toes up. Then the toes will lengthen and stretch, the base of the toes will widen, the insides of the feet will increase, elongating the middle of the foot, and the kneecaps will rise even more.
- Stand and distribute the load evenly on each foot. The inner and outer edges, the forefoot and the back of the foot should be equally loaded.
- Press the inside edge of your heel into the ground as hard as possible, where the heel ends and the dome of the sole begins.
- Just as you press evenly on the four corners of your foot, distribute the force to evenly extend your legs on all four sides: inside, outside, front and back. You must be aware of these actions.
- When feeling and improving your legs or other parts of the body, keep your feet in your awareness as well. Make contact with the ground. This stabilizes the mind. Feel how the work done in one place moves to other even very distant places.
- The inner and outer sides of the knees should be equally open, with the inner sides stretching upward.
- Work from your feet to lift your chest bone straight up, widen your collarbones and shoulders while tucking your shoulder blades inside and widening your shoulders. Don't push out the front lower ribs
How to breathe correctly when performing Tadasana
Tadasana is the initial pose, so the quality of the entire subsequent complex depends on its implementation. The apparent simplicity of the asana should not be misleading: the main thing to do in Tadasana is to distance yourself from unnecessary thoughts and worries, and tune in to further practice. Breathing in Tadasana helps you come to a peaceful, calm state. It is necessary to concentrate on breathing and take full yogic inhalations and exhalations at least 3-7 times. When you inhale, the air fills the lungs completely, and when you exhale, it completely empties them. There is no need to rush: breathe very slowly.
Stop the flow of consciousness, after your breathing is leveled, concentrate on the pose itself. Imagine a mountain: its foot rests on the ground, is rooted in its depths, and its peak pierces the sky. The mountain stands unshakably, connecting heaven and earth. Feel the calm power of the mountain; human problems are small and insignificant in comparison. The mountain is above all this, you are the mountain. Visualize how you are pumping the energy from the depths of the earth upward: from your feet, further along the spine and out through the crown beyond the limits of your aura. Imagine this flow of energy that passes through your body. You can try to combine this with breathing: as you inhale, imagine that the air enters through your feet, rises up and exits through the top of your head. This helps you feel like you are in a strong energy circulation system. Tadasana allows you to receive energy recharge for all subsequent practice.
Where to start classes
Many beginners do not even realize that they performed some asanas for beginners in physical education classes at schools. It’s just that teachers rarely emphasize that such warm-ups are yoga poses.
There are a lot of asanas in yoga. But which of them to choose for a beginner can be decided by the instructor or the attending physician.
Before classes, you must prepare and adhere to the following recommendations:
- undergo a medical examination and obtain the doctor’s consent, especially if you have chronic diseases;
- people with high blood pressure should not include poses that involve their heads down;
- It is necessary to start classes only with an instructor, even if there are no prohibitions;
- home lessons are allowed after several with an instructor;
- you cannot perform asanas just by looking at a picture;
- before performing it is necessary to take comfortable, simple poses (Siddhasana, Sukhasana);
- no external stimuli should distract;
- get ready to do it, and if you are in a bad mood, give up.
Trust your own body, improve your personal practice daily.
Groups of asanas and their meaning
There are quite a lot of them. Only a few manage to study and master everything. It is better to choose the most optimal options and include suitable yoga poses in your complex.
When creating an individual complex, it is necessary to include various groups of asanas:
- standing;
- sitting;
- lying down;
- bridges;
- for balance.
But if fatigue is present, then the exercises must be stopped or replaced with an easier asana.
Normalization of breathing, restoration of muscle tone, improvement of all organs and systems - this is the main purpose of yoga.
Reviews
Olga, 28 years old, Moscow : At first the effect is created that there is nothing complicated in Tadasana until you start doing it. I practiced standing next to a wall for several weeks so that my body would line up in a straight line, and then it took me another week to position my fingers and feet correctly without thinking. But I received a reward for my torment - the asana always maintains a good mood and improves overall well-being.
Anna, 34 years old, Murmansk : This is my favorite asana, with which I always start my day. Performing it several times after waking up means getting a great boost of energy and vigor for the whole day. And if you do it in the evening, you can perfectly relax after a hard and stressful day at work.
Irina, 38 years old, Ufa : Tadasana opened the world of yoga for me. I performed this pose regularly to relieve tension and correct my posture. Gradually I moved on to more severe versions of it. Over time, I became so addicted that I began to slowly study other asanas, began visiting a yoga center, studying in a group, and changed my diet and attitude. Thus, a simple asana changed my life for the better.
Tadasana pose: beneficial properties
First of all, mountain pose forms correct posture and develops the habit of standing correctly.
Thanks to the even distribution of weight across the foot, the habit of incorrect foot placement is gradually eliminated.
Correct distribution of weight along the foot helps eliminate problems such as stooping, spinal deformity, sagging abdomen, and maintaining breast shape in women (in combination with other techniques). And:
- Flexibility improves, lightness appears in the body and mind.
- The normal flow of energy is restored in the body.
- The muscles of the body are well stretched and toned.
- There is a good effect on the neck and shoulder girdle, which is especially useful during sedentary work.
The mountain pose provides such beneficial effects, allowing you to “simply” restore correct posture.
Advanced Pose Practice
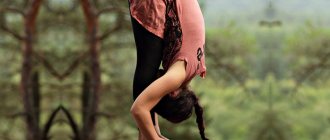
If you have mastered the asana in question, then to further stretch your back and legs, you can correct the next pose after Padangusthasana - Padahastasana (the difference is in the variations in the placement of the hands: in the first case, the big toes are grabbed by a ring of three fingers, in the second, the backs of the palms are placed under the feet) .
The transition from Padangusthasana to Padahastasana is described below:
- first, follow all the steps described above (1-4);
- After holding Padangusthasana for the recommended time, release your toes, lift your toes and arches of your feet (gently roll back a little on your heels) and place your right palm with the back of your hand on the floor under your right foot, and your left palm under your left;
- in the final stage, the feet should completely overlap the palms, the toes rest on the hands on the inside of the arms;
- Shift your weight from your heels to the arches of your feet, actively pressing with your balls of your feet and your toes into your hands;
- stay in the pose for 15-30 seconds;
- To exit the pose, lift your toes and arches of your feet, release your hands, place them on your hips, and, continuing to lengthen the front of your body, lift your body and head back to a vertical position.