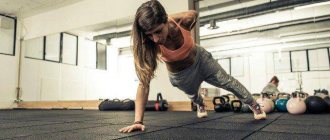
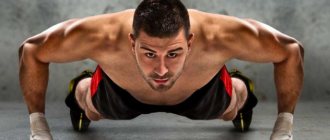
Why should a girl, girl or woman learn to do push-ups?
If you often suffer from colds, and your lungs react to any climate change, then by learning how to do push-ups you can perfectly maintain your health. During push-ups, blood flows to the chest and lungs, the respiratory system develops and heart function improves.
According to fitness instructors, working on bending and straightening your arms while lying on the floor (as push-ups are called in professional language) can replace almost the entire gym, because during it several important muscle groups of our body are involved.
The flat stomach that every woman dreams of is perfectly formed with the help of push-ups. Those who do a lot of push-ups strengthen their abdominal muscles, and they are the ones who help give the ideal shape to the abdomen.
These exercises perfectly correct the shape of the breast, making it more elastic and toned. Of course, you won’t be able to increase your breast size with push-ups, but even small, toned breasts look much more seductive than larger, but unkempt and saggy breasts.
Now that you know everything about the benefits of this exercise and are determined to learn how to do a lot of push-ups on the floor, we will tell you about the sequence by following which you will understand how to quickly learn how to do push-ups from scratch for a girl or boy.
If you want to learn how to learn how to do pull-ups on a horizontal bar, be sure to read the article on this topic on our website.
How to learn to do push-ups
You can master the technique from scratch in a short time. The main thing is to be patient and persistently pursue your goal. Those with weak hands and beginners, spending only 30 minutes a day on training, can achieve good results in a month.
There are several types of push-ups for beginners:
- from the wall;
- from the table;
- from your knees
Experienced athletes recommend starting training with light loads - push-ups on a vertical surface.
To learn how to do push-ups to benefit your body, remember these rules.
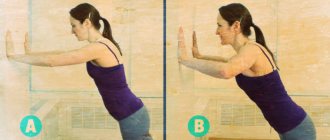
From the wall
Such exercises are suitable for people without training. Any girl and even a child can handle them. Thanks to the classes, boys and girls will strengthen the muscles of their arms and shoulders.
The starting position is to stand opposite the wall at a distance of about 1 m. Your legs should be joined, your back should be straight.
Technique for performing wall push-ups:
- Place your outstretched arms against the wall.
- As you inhale, lean toward the wall, slowly bending your elbows until your forehead rests on a vertical surface.
- As you exhale, return to the starting position.
You need to perform the exercise 10-15 times a day, 3-4 approaches. Between each approach you need to take a break of 1 minute.
Once the technique is mastered, you should move on to push-ups from a bench or table.
You should do 3-4 approaches a day.
From the table
The higher the surface, the easier it will be to do push-ups. Starting position - arms at shoulder distance rest on the table, legs joined together.
Push-up technique:
- Touch your chest to a hard surface, bending your elbows.
- Return to starting position.
The number of exercises at a time is 10-15, 3-4 approaches. You can use a chair or bench.
You can use a table or bench for the exercise.
From my knees
This variation is best performed on a mat to minimize pain in the knee area.
Starting position - lying down, hands positioned shoulder-width apart, legs bent at the knees, raised up and crossed at the ankles.
Technique:
- Lightly touch your chest to the floor, bending your elbows.
- Return to starting position.
Number of repetitions: 10-15 times, 3-4 approaches.
When doing push-ups from your knees, place a mat under your feet.
Description
Regarding cooperation, write here: VK ►https://vk.com/st_skochko ———————————————————————————————— — VKontakte group – https://vk.com/httpvk.comst_skochko
Tags: How to pump up your shoulders at home? How to pump up your legs at home? How to pump up your abs at home? How to pump up your arms at home? How to pump up your pectoral muscles at home? How to pump up your back at home? How to pump up a trepezius at home? Video coming out: shaking your shoulders at home! Video coming out: pumping up your legs at home! Video coming out: pumping up your arms at home! Video coming out: pumping up your abs at home! Video coming out: pumping up your back at home! Video coming out: swinging the trapeze at home! Video coming out: pumping up your chest at home! A set of exercises for the pectoral muscles A set of exercises for the Back muscles A set of exercises for the Legs A set of exercises for the abdominals A set of exercises for the Shoulders A set of exercises for the arms A set of exercises for the Trapezius Workout at home! Complex of Exercises for beginners! How to build muscle mass? Training program on the horizontal bar and uneven bars Training on the bench press, Training on the Deadlift, Training on the Squat with a barbell How to pump up your Arms on the horizontal bar? Exercises on the horizontal bar for beginners How to build muscle on the horizontal bar? guide on how to build muscles at home How to Build up your CHEST MUSCLES at home Training your chest muscles at home how to build muscle mass How to eat right? Nutrition program to gain weight and build big muscles How to increase muscle mass Workouts to gain muscle mass How to get pumped up? how to get pumped up for a skinny person? how to lose excess weight? How to pump up without exercise equipment? How to increase the number of pull-ups? A set of exercises on the horizontal bar. Denis Borisov, Yuri Spasokukotsky, Vasily Ulyanov, Mikhail Boratov Denis Minin, Evgeny Kozyr, Evgeny Kocherga, Eric, Shade, Savchuk Alexander Shchukin, Meat according to GOST, Golubochkin, Sergey Badyuk, How to quickly pump up your chest without iron. Three exercises
Deadlift, Bench Press, Pumping up the Chest, Pumping up the Arms, Denis Minin, Workout, iPhone6, Evgeniy Kocherga, Horizontal bars, Yard Sports, Workouts, Exhibition Performance, World Workout, Horizontal Bar School, How to pump up on the horizontal bar, Strength Elements, Workout is POWER, Strong Guy, +100500 Home Workout, Workout, Strength elements on the horizontal bar, Workout Motivation, Workout PRO, Exercise with Kettlebells, Exercises with dumbbells, Exercises with your own weight, How to become Strong, Complex on parallel bars, complex on the horizontal bar, Complex of push-ups, Complex of exercises on the press
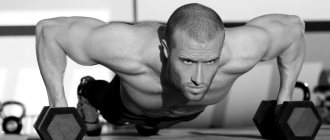
How to do push-ups correctly and why you need it
Even without any special equipment, improving the physical qualities of muscles is very simple. And the most effective exercise for developing almost all muscle groups is push-ups while lying down.
Benefits and Applications
. First of all, push-ups are responsible for the development of various muscle groups in the arms and chest. But when done correctly, the muscles of the abdomen, back and legs are significantly strengthened. Of course, like all physical exercises, push-ups stimulate the human body to work harder and it is necessary to calculate its capabilities.
Be careful with loads
.
Do not practice if children are unwell. Most types of respiratory diseases, including infectious ones, place a serious strain on the heart, and, accordingly, any physical activity is strictly contraindicated. If a child has a heart condition, even the slightest overload of the circulatory system should not be allowed .
Execution System
. It is best to do push-ups in several approaches with a short break - the more, the better, and you should try to have approximately the same number of movements in each approach. If you know your norm, then reduce the number of push-ups performed by about 20%, and each new day increase your quantitative productivity by one. Don't push yourself to the point of exhaustion at first. It’s better to do four times 25 push-ups than two times 50. But you shouldn’t relax completely - do the exercises until you feel moderate fatigue in your muscles. For busy people, of course, it is best to perform the maximum load once or twice, for example in the morning or evening. But if possible, then it is better to do this all day - at different intervals and according to your mood - you can determine for yourself a daily norm calculated for 24 (16) hours.
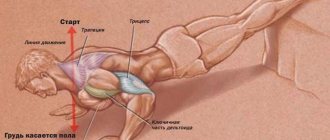
Proper execution
. There is hardly much new to say here. The main thing is that the body is straight throughout. You must try to ensure that your back does not arch downward and your buttocks do not stick out upward. The head looks to the floor. The deeper the landing, the better; ideally you need to touch the support with your chest or nose (just be careful). Breathing is systematic: when lowering the body, inhale, when lifting, exhale.
Execution technique
. Be that as it may, push-ups are an exercise that can be performed in different ways - let’s first look at the position of the supporting parts of the arm - the hands. Small children and girls usually perform push-ups on the inside of the palm; the simplest type is that if the fingers point forward, the hands automatically become in the most comfortable position. But when doing this, there is practically no benefit for the muscles of the hand itself. The simplest and most common hand position among guys is push-ups with fists. In this case, the fist is placed on two or three phalanges. Here there is a development of the muscle group of the fingers and the side of the palm that is closer to the thumb. Well, and, of course, the skin on the joints and phalanges hardens, the fist acquires the most favorable position for striking - this greatly helps people who have to fight (at least in the long term).
A more complex type is push-ups on the edge of the palm (in this case, the side of the palm opposite the thumb develops) and on its back side. Of course, doing push-ups on the back of your hand is painful at first, and it takes practice to get used to it. But over time it will become easier. This type of push-up helps to significantly strengthen the muscles in the area of the metacarpal bones, and the hand itself will become hard and less sensitive to external influences, which is extremely useful in extreme and difficult (physically) situations, be it a parachute jump, mountain climbing or kayaking .
Well, the very last level – finger push-ups – is really quite difficult. At first it is better to use all five fingers, gradually removing one at a time. Most likely, the entire body weight will act on the thumb, and the fingers themselves will bend downward - you will get something like a “spider”. But try to keep your fingers straight or rounded upward. You can consider yourself a very persistent person if you manage to do push-ups or at least take a lying position without the participation of your thumb.
And push-ups on one finger (middle or index) are aerobatics, which not everyone can do. By the way, finger push-ups are very helpful for people who play the guitar, violin, piano or deal with typing on the keyboard - trained fingers will acquire hardness, flexibility and speed, and they will hurt less when pinch the strings. Push-ups on the fingers are ideal for training a direct blow - the fist becomes “iron”.
Now about the position of the rest of the hands. Since push-ups are an exercise similar in effect to the bench press, in addition to the arms, the pectoral muscles are also involved. Therefore, what will swing depends on the position of the arms (among the muscles of the arm, the triceps are trained the most, although most of the load goes on the shoulder and a little on the biceps). Standard position - hands shoulder-width apart, elbows directed at an angle of 45 degrees from the body - this is the easiest way to do push-ups, the load is distributed evenly. If you place your hands wider than your shoulders and spread your elbows to a right angle to the body, the deltoid muscle and pectoralis major will be involved. But if, on the contrary, you place your hands as close as possible, with your elbows parallel to your body, then the load will go to the triceps and pectoralis minor. You can also change the inclination of the body relative to the surface to achieve different results. At the same time, if the head is higher than the legs, the lower part of the chest sways, and if lower, then the upper part along with the abdominal muscles.
Alternative push-up methods. It is very useful for the development of arms to do push-ups on one arm - it is difficult if you are not used to it, but the training is worth the results (a little advice: the wider you spread your legs, the easier it will be). Also, the effect of the exercise is enhanced several times if a person sits on your back, or if you put one leg on the other. You can also practice push-ups with clapping - first one clap, then you can do two, three, clap behind your back, etc. This develops reaction and dexterity. If you want to focus on breathing training, then do push-ups while running, and consistently do about 15-20 push-ups over a certain distance.
Play sports with your children, develop strength, agility and reaction - and their body will only say “Thank you”!
Now in more detail
. Push-ups greatly strengthen the body and especially the arms. If everything is done correctly. The most common form of push-ups is on the palms. Do as many push-ups as you want, just for your health!
Let's start in order
. For unprepared children, it is better to start with the least load. The simplest implementation is push-ups from the wall. Take a step back, arms forward just below shoulder level. In width - the wider, the more the pectoral muscles are involved.
The smaller the step from the wall, the less the load. And if you still need a RESULT, then the load should be noticeable. It is advisable to touch your chest to the wall.
Breath. When bending your arms, inhale; when straightening, exhale.
If you've never done push-ups with your fists, it's best to start on a softer surface than just the bare floor. This could be a carpet or a special travel rug. On delicate hands you can wear off the skin very quickly, which is quite unpleasant.
As your hands and skin on the phalanges become stronger, you will be able to painlessly do push-ups simply on bare asphalt. If you are going to do push-ups on your fingers, consider these recommendations too. In all exercises, you can use your fingers instead of your palms or fists! If you need to load the pectoral muscles more, then when lying down, you need to turn your hands inward by about 45 degrees, and place your hands about one and a half times wider than your shoulders. You can do more - experiment!
If it is still difficult to practice on the floor with a straight body, then an easier option is to start doing push-ups from your knees. Don't forget to put something under your knees, kneecaps are very easy to injure! We don't need injuries! The body must be kept straight and not sag. Straight line - from knees to head.
There are really a lot of options for push-ups. The deltoids and trapezius work more if your hands are placed on a line at head level. Another option is to place your hands on a line above your head. Here they can again be positioned shoulder-width apart, or you can place both hands together. Try it!
If you have prepared enough and the load is not enough, there is a way to increase it. We take a lying position and throw our legs on a sofa or chair. The higher your legs are, the harder it is to do push-ups. Again, you can vary the width of your arms. Don't forget about the straight body!
There is another interesting method: timed push-ups. Very slowly, very evenly down. It's better to look at the stopwatch. Just once, but 30 seconds - one minute down (up to 2-3 minutes). And up is good if you go up at all! The load is just super!
If you do two approaches, then in five minutes you will be very loaded! Be sure to rest between sets of this slow push-up, but don't overdo it! Breathing and heart rate have been restored - and forward! The break should not be so long that the muscles forget that they are in training!
If your muscles shake during push-ups, then this is their reaction to a very “interesting approach”! Everything is fine, soon everything will be under control, under yours! In this exercise, breathing is voluntary. For some reason, many people are delaying him, which is extremely wrong!
And finally, for those who are prepared and very persistent - just an extra way to do push-ups! Stand on your hands near the wall. That is, the legs are, accordingly, at the top. Then everyone already guessed what to do! Yes, yes, do push-ups too! The loads are large, and there is also an inverted body position! So, let’s be careful and careful about what is most priceless – your health! Please do not do all these exercises after eating for an hour and a half to two hours.
.
And further…
Push-ups are perhaps the least favorite exercise by some. It is quite difficult to do it correctly; moreover, many people associate it with a purely male workload. Today I will try to reveal to you all the secrets of push-ups - describe all the known options and their effectiveness.
Almost all muscle groups are involved in push-ups. Some muscles perform dynamic work, while others are in static tension, as they have to maintain a straight body position. How the load will be distributed between the main target of push-ups - the pectoral muscles and triceps - depends on the position of the hands and many other nuances.
Sometimes women place their hands in a way that is comfortable for them, and do not think that the distribution of the load, for example, depends on the position of the hand.
- Narrow push-ups with straight legs.
Hands are placed close, fingers wide, thumbs touching each other. A difficult exercise, especially for beginners. At first, you will be able to bend your elbows only 2-3 centimeters. The goal is to work the inner pectoral muscle. Especially useful for those whose breasts are located far apart from each other. Visually, this can be smoothed out by working on the inner part of the pectoral muscles, in particular. It is important to pause at the top point of this push-up. - Push-ups with wide arms on straight legs
This option uses the entire pectoral muscle, especially its outer side (closer to the arm). Try it and feel how much it stretches. The technique allows the palms to be spread 45 degrees so as not to injure the shoulder. - Push-ups with the head down on straight legs.
A very useful option for girls, since the emphasis is placed on the upper pectoral muscles. Over the years, it will sink lower, hang down, and strong upper muscles will make the chest higher in advance. The exercise is difficult because the arms bear most of the body weight. The main rule is to place your hands slightly in front of your body line. - Head-up push-ups with straight legs
The head is higher than the feet, for example, you are leaning on a step or bench (or push-ups from the wall), and the load, accordingly, shifts to the lower pectoral muscles. This option is perceived as less difficult, since the main weight falls on the legs. Judge for yourself whether you need it or not. In men's bodybuilding, the lower pectoral muscles should clearly “cut through” for a beautiful chest relief, and in women, perhaps, this option should not prevail in training, although due to its simplicity it is often replaced with ordinary push-ups on the floor. - Knee push-ups
This is a purely female lightweight version. Everything described above regarding the placement of the arms and the tilt of the body (head below the feet or, conversely, head above the feet) applies to this type of push-ups too. In the technique of performing the exercise from the knees, the main thing is to keep the body straight (do not bend your back down or round it).
There are many more options for push-ups, but for those who are more prepared, for example, push-ups on one hand, push-ups with clap, push-ups on fingers, on fists, push-ups supported by two steps with hands. These “explosive” methods need to be done only with certain preparation and under the supervision of a sports coach.
And finally, a small set of exercises for younger children under the general title - “Rocking chair for children” from Alexander Nevsky
.
Let's list the main muscle groups
: chest, back, shoulders, arms, legs, stomach. To start, I recommend doing one exercise for each muscle group. And let's understand the terminology! A training movement is called an exercise. Push-ups are an exercise. One-time execution - repetition. Athletes increase the impact of the exercise by performing it in several repetitions. So, performing several repetitions is called a set. A child (8 - 10 years old) should start with one set of several repetitions for each exercise. When he feels stronger, you can increase the number of repetitions and move on to two, and later three approaches for each exercise. You need to rest twenty to thirty seconds between sets. And a few more tips:
- Try not to hold your breath while doing the exercises (breathe freely).
- If certain muscle groups begin to experience pain after exercise, you should do other types of exercise (until the pain goes away) and do not attempt to exercise the sore muscle or muscle group.
- You need to learn to concentrate on each exercise. This is one of the secrets to training effectiveness (thinking about the muscles that are working at the moment and focusing on doing the exercise correctly).
- Children should not expect significant muscle growth (from the exercises we'll cover here). Increases in muscle size and shape will not occur until puberty. But endurance and muscle strength will definitely increase, and this is precisely what is important for health and further success in sports.
- Never strain your muscles to the point of pain. Increase the number of repetitions gradually.
Remember: the secret to getting the most out of exercise is to exercise regularly. Choose two days a week (when you can set aside thirty minutes to train your child, or even better, train with him!) and try to practice without skipping. Keep a training diary (for self-control), that is, take a regular notebook and write down the results of each lesson in it. For example: “October 1st. The child performed exercises for the chest, arms and abs. Push-ups are good, but leg raises are not so good. In total, so many approaches were performed with so many repetitions in each.” And so on. Such a diary will help you figure out which muscles of the child’s body are clearly weaker than others (and, naturally, you will need to devote more time to them). Now let's move on to the exercises. Today we will look at exercises for the chest muscles.
a) Push-ups
. This is one of the best exercises for strengthening the muscles of the entire upper half of the body. It develops not only the muscles of the chest, but also the shoulders and arms (especially the triceps - the muscles in the back of the arm). Lie on your stomach with your toes extended and your hands under your shoulders at the same level as them. Lift your stomach and hips off the floor so that only your chest touches the floor. Now, keeping your back straight, rise until your arms are completely straight. Return to the starting position (don't fall, keep your body straight). Do as many reps as you can, but add one rep for each subsequent workout. Do this exercise in three sets;
b) Modified push-ups
. If you are unable to complete the previous exercise, you can replace it with this one. Take the position described above, but rise with your knees and your hips bent (back straight!). Do as many push-ups as you can, and when you feel strong enough, move on to normal push-ups;
c) Table push-ups
. Find a support - a table, a bench, a bedside table - any object that is about half your height. Stand in front of him, moving your legs seventy to ninety centimeters and spreading them slightly; rest your hands on the support, keeping them apart from each other at a distance equal to twice the width of your shoulders. Keeping your back straight, slowly lower yourself, bending your arms so that your chin touches the support, then just as slowly return to the starting position. The farther your feet are from the support, the more difficult the exercise will be. Perform the exercise in three approaches with the maximum number of repetitions in each;
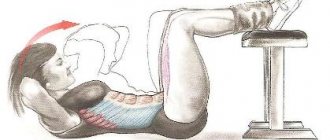
d) Wiring through the sides
. Lie on your back with your knees bent and holding two books of equal weight (or tin cans, or whatever) in your arms extended upward. With your arms slightly bent, spread them out until the books touch the floor, then lift them back up, as if you were hugging someone, until the books touch each other. Perform the exercise smoothly, in three approaches (twenty repetitions each);
e) “Pullover” - swings over the head
. This is a good exercise to strengthen the muscles of the chest and upper abdomen. As in the previous exercise, you need to lie on your back with your legs bent and holding two books of equal weight in your arms extended upward. Then, keeping them together, lower your hands behind your head as far as you can and return to the starting position. Three sets of twenty repetitions.
Precise fixation of the time of any of the “routine moments” (be it food, games or activities) creates in the child an internal preparedness for this particular activity. If at the same hours he does one thing today and another tomorrow, he has to tune in internally each time, and this is not always possible (especially in relation to physical education and performing other tasks). The fact is that the resources of composure, attention, and will among children of junior units are not so great.
Rest should also be a subject of special concern. Especially sleep. It is he who restores the energy reserves of substances in the nervous system. Unfortunately, sleep disturbances occur not only in adults, but also in children - due to non-compliance with the daily routine, excessive physical and other stress.
The same question is often asked: “How much time do you really need to sleep?” There is only one answer: this figure is not the same for adults and children.
Observations by the English biorhythmologist A. Webb showed that the normal duration of sleep in children can fluctuate: up to two years - within 10-12 hours, from two to four - within 5-6 hours. For school-aged children - within 4–6 hours. But, of course, there is a personal hour norm that everyone needs to know. Installing it is easy. For children it is defined as follows.
The child is allowed to fall asleep at his usual hours. Don't wake him up, let him wake up on his own. The average duration of sleep (over a period of at least 5–7 days) gives the desired figure. It should be determined at least once every two to three years.
An effective means of relaxing and disconnecting from the worries of the day is a 20–30-minute evening walk, which can be replaced by light gymnastic exercises. It must be borne in mind that late exercise associated with intense physical activity, despite muscle fatigue, more often excites than leads to relaxation. But exercise during the day or early evening (4-5 hours before bedtime) helps improve sleep.
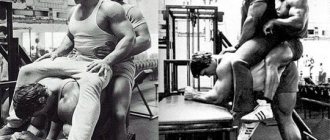
The greatest promoter of a healthy lifestyle, Arnold Schwarzenegger, notes that physical training for children 6–7 years old is based on three things:
- Balanced diet.
- At least 15 minutes of general strengthening exercises at least 3 times a week.
- Development and improvement of motor skills.
He suggests taking approximately the same priority recommendations into account when drawing up physical training programs for children aged 8 to 10 years:
- Balanced diet.
- 20 minutes of general strengthening exercises or outdoor games at least 3 times a week.
- Some exercises to train flexibility and strength.
- Development and improvement of motor skills.
Well, now, after a small portion of “edification”, let’s continue our acquaintance with exercises that will help 7-10 year old children strengthen various muscle groups.
Exercises for back muscles:
a) Lower back stretch
. This exercise strengthens the muscles of the lower back and buttocks and improves the flexibility of the lower spine. Lie on your stomach, lift your arms off the floor, keeping them slightly apart to the sides. Now begin to bend, lifting your legs and upper body towards each other (leaving only your stomach and upper thighs touching the floor) as far as you can, and hold in the extreme position for about three seconds. Do twenty reps. I will add that this exercise is very useful for adults who experience lower back pain;
b) Modified pull-ups
. This exercise strengthens the muscles of the upper back. In order to complete it, you will need two fairly strong and reliable objects about 60 cm high (for example, two chairs). Place the stick as shown in the picture and make sure it is well secured. Lie on your back and (with your arms spread wide) grab the shelf. Keeping your body straight and your heels only touching the floor, pull yourself up to touch your chest to the stick, then slowly lower yourself down. Perform the exercise in three sets (10 repetitions each). Exercise for shoulder muscles:
c) Shoulder push-ups
. This exercise is important for strengthening the deltoid muscles of the shoulder. Find a table (bench or chair) that is approximately mid-thigh height. With your legs spread wide and stepping back sixty to ninety centimeters from the table, place your hands on the table (shoulder-width apart or slightly wider). Keep your back horizontal, at the same level as your outstretched arms. Now (still keeping your back horizontal) lean forward, touching your head to the table. When performing the exercise, bend your elbows should look down and not to the sides. Smoothly return to the starting position. Do three sets (twenty reps each). The exercise can be made more difficult by standing further away from the table.
Exercises for arm muscles:
a) Pull-ups
. This is a good exercise not only for the biceps, but also for the muscles of the shoulder, chest and back. Keeping your hands approximately shoulder-width apart, grab the bar with a front grip (that is, the back of your hand should be above the bar) and begin to smoothly pull yourself up until your chin touches the bar, then lower yourself just as smoothly. If you can do it, then do two sets of ten repetitions;
b) Dives
. One of the best exercises for the triceps (the muscles in the back of the arm). Stand as shown in the picture, placing your hands on a chair pressed against the wall. Smoothly lower your pelvis until the middle of your chest is level with your palms, then just as smoothly return to the starting position. Do 2-3 sets of 12 repetitions each per workout;
c) Deep dives
. If the previous exercise seemed too simple to you, then do this. Place your hands on one (pressed against the wall) chair, and raise your legs on the second chair. Perform 3 sets of 12 repetitions.
Links - video...
- Push-ups for children
- How to do push-ups correctly
- Videos on RuTube on the topic of push-ups
BASIC Types of push-ups
Narrow push-ups
Difficulty: medium
Muscles Worked: Similar to the close-grip bench press, this movement places emphasis on the triceps while targeting the inner pecs.
Technique for push-ups with narrow arms: Take a position with straight arms, placing your hands so that your thumbs and index fingers touch each other. First, slowly lower yourself to the bottom position, and then with a powerful effort push yourself up. At the top point, statically tighten your triceps for a one-two count and only then lower to the bottom position. This technique will increase the beneficial load on the triceps.
Push-ups with wide arms
Difficulty: medium
Muscles Worked: This push-up variation primarily targets the pectoral muscles, stimulating the mid-chest area. At the same time, the upper and lower pecs, deltoids, and triceps work to a lesser extent. The entire back muscles are statically tense.
Technique for push-ups with wide arms: Take a support position with your arms straight. Don't lift your head up or down. Keep it strictly in line with your spine. Place your hands slightly wider than your shoulders. First, lower yourself to the bottom position, and then use your pectoral muscles to push yourself up into straight arms. In the upper position, statically tighten your chest muscles for a one-two count. Only then lower yourself to the floor. Do not straighten your elbows all the way. Leave them slightly bent. Keep your abs tense. Don't bend over backwards.
To stretch your pectoral muscles more, do push-ups on dumbbells - this will allow you to go lower in relation to your hands.
Head down push-ups
Difficulty: medium
Muscles Worked: This variation shifts the focus to the upper pectoral region. The exercise is difficult because the arms bear most of the body weight.
Head-down push-up technique: This is exactly the same movement as a regular push-up, with the difference that your toes rest on the surface of the bench rather than on the floor. The hands should be placed slightly in front of the shoulder line. This will not affect efficiency in any way, but will help balance in the starting position.
Knee push-ups Difficulty level: easy
Pros: This push-up variation is quite easy, making it ideal for women.
Technique for push-ups from your knees: Take a support position with your arms straight. Place something soft under your knees, like a gymnastics mat. Keep your back extremely straight. Do not lift your pelvis up - the torso together with the hips forms a straight line.
Jump push-ups
Difficulty level: high
Advantages: The goal of any plyometric exercise is not so much to increase muscle mass or endurance, but to develop their explosive power; a quick and powerful reaction mobilizes the nervous system and recruits more muscle fibers to work. This is very useful for bodybuilders. This load stimulates nerve innervation. Simply put, the nervous network becomes denser and denser. This is reflected in mass gain when performing basic exercises with weights.
Jump Push-Up Technique: To avoid damaging your hands or wrists, perform this movement on a soft, springy surface. In the starting position, rest your palms on two supports 15-20 cm high. Push up, push off the supports and “land” on the floor between them. The hands should be at the width characteristic of regular push-ups. Immediately bend your elbows and gently lower your chest toward the floor. From the bottom position, explosively push yourself up and “jump” onto the supports again. The secret is not to divide the movement into phases and perform it in one breath.
One-arm push-ups
Difficulty level: very high
Advantages: This circus version perfectly increases the strength of the shoulder girdle. It acts on the pectoral muscle, as they say, from top to bottom. At the same time, the triceps are extremely heavily loaded.
Execution: First, take the usual starting position for push-ups, then move one leg to the side. Shift your body weight to your opposite hand and place your other hand behind your belt. When you can confidently maintain your balance, start doing push-ups. You may not get them right away. Then start small - go down 10-15 cm, not deeper. As soon as you confidently master this “depth”, try to go lower - another 5-10 cm.
Contraindications and precautions
Although the exercise is very difficult, it has quite a few contraindications. Essentially, they are the same as in the case of regular push-ups. Thus, exercise is prohibited for injuries in the shoulder, elbow, or wrist joint.
Hold off on one-arm push-ups until you feel any pain or discomfort in your muscles or joints. Otherwise, the benefits of the exercise may be negated, but there can be quite a lot of harm.
In addition, your physical fitness plays a role. If you are new to the sport, you should not start with one-arm push-ups. First, it is recommended to master classic push-ups, and then gradually approach your goal - how to learn to do push-ups on one arm. To ensure that the exercise brings you only benefit, consider the following recommendations :
- You should not experiment with transferring the load to one hand until you can, with the correct technique and easily, do at least 30 regular push-ups on both hands. You need strong shoulders and triceps to perform this exercise, especially if you are fairly heavy.
- To gain the necessary core strength, you can do push-ups on your elbows, while trying to use the one-arm push-up technique.
- If you get tired with only a few reps left in your set, be patient and push through to the end. Pushing yourself in this way is the best way to train your muscles, and in the future they will thank you for it.
- It's normal to be tired, but if you feel like you can't continue at all, stop. If your arm cannot support the load placed on it, you may fall and hit your face on the floor.
If you suddenly feel a sharp, severe pain, you should also stop. And if the pain does not stop, it is important to consult a specialist, as there are risks of injury.
Heroes do push-ups upside down 6 best workouts using HSPU
Not everything is going smoothly for our brothers CrossFitters with shoulder girdles, smart people won’t let you lie. The situation can be corrected by a grave or handstand push-ups: we don’t know about you, but our editors choose the second option.
In the article “Handstand Push-Ups (HSPU): A Master's Guide for Mere Mortals,” we analyzed:
- benefits of handstand push-ups;
- progression of mastering the exercise;
- individual moments of handstand push-ups;
- handstand push-up technique;
- recommendations for improving performance.
We hope you are inspired, read the material and mastered the skill, so today will be dry practice. We will offer you several WODs that use such a miracle exercise as the handstand push-up (HSPU).
1. MARY
Simple and uncomplicated, but tasteful. It does not include complex structures or elite skills, so it can be used by athletes of different levels of preparedness, starting with confident beginners.
20 minutes for time
- 5 Handstand Push-ups (HSPU)
- 10 Pistol Squats
- 15 Pull-Ups
2. DAVID BLAKE MCLENDON
This workout is dedicated to the hero David who died in the war. God rest his soul, and give us strength and don’t forget about the breathing apparatus.
The complex, without any special frills, as they say, is accessible to everyone.
4 rounds against the clock
- 30 meters of walking lunges with a 20 kg plate above your head (Walking lunge with 45lb plate);
- 30 jumps on a 60 cm box (Box jump);
- 20 Wallball shots;
- 10 head-down push-ups (HSPU)
Boys use a 60 cm box, girls use a 50 cm box.
3. SAUCER WITH BLUE EDGE
Unprecedented variety: assorted dishes and stews in one bottle. Stock up on food supplies, patience and let's go. An excellent complex for some breathing room. Something started to ripple in your eyes early: breathe, not die!
For a while:
5 rounds
- 5 pull-ups
- 10 push-ups
- 15 air squats
4 rounds
- 8 head-down push-ups (HSPU)
- 15 kettlebell swings
3 rounds
- 15 box jumps
- 15 knees to elbows
2 rounds
- 20 wall balls
- 30 sit ups
1 round
50 burpees
4. WORKOUT “FRIENDLY”
This WOD is designed for a team of 2 people with an above average level of training. If you have not yet mastered all the skills, scaling will help you! And God!
- 50 clean & jerk (clean &jerk), 70/50 kg
- 50 ring muscle ups
- 100 wall balls 9/6 kg
- 50 Head Push Ups (HSPU)
- 50 squat snatch 70/50 kg
5. OVERPUSHUP 21-15-9
The principle of constructing WOD 21-15-9 is as follows: the athlete performs 21 repetitions of each exercise in a circle, then 15 repetitions of each exercise, then 9.
- Overhead squat, 45/30 kg
- Head-Up Push-Ups (HSPU)
- GHD sit-ups
6. REGIONAL 10.4
Since time immemorial in 2010, this workout was performed by the CrossFit elite. And now this WOD is a piece of cake for most athletes in all CrossFit boxes in the country. Let's make progress!
For a while:
- 10 Ring Outs (Muscle-Ups)
- 15 head-down push-ups (HSPU)
- 20 Squat Cleans
Let's promote crossfit to the masses, friends!
“Do a hundred push-ups against all odds” OR how to do 100 push-ups
https://youtu.be/8D4o_OTAbV4
For many people, performing a proper push-up, let alone doing 100 push-ups, can be extremely difficult.
But, if you want to get stronger, then this 12 week plan will help you. In fact, it will help you learn to do 100 push-ups without stopping in 12 weeks!
The difference between this plan and the previous one is that here you perform the movement consistently and smoothly, without paying attention to technique.
I recommend this plan for those who are able to perform at least one full push-up. If you are still working on it, then it is too early for you to use this training plan.
You probably think it's impossible to do 30 or 50 push-ups, let alone 100 in one set, but trust me, anyone can do it! All you need is the right training plan and repetition.
Let's move on to the diagram of how to do 100 push-ups, starting with one repetition per set. You are ready?
| Mon | W | Wed | Thu | Fri | Sat | Sun | |
| Week 1 | 5 x 1 | 5 x 1 | Rest | 4 x 2 | 4 x 2 | Rest | 4 x 3 |
| Week 2 | 5 x 2 | 5 x 2 | Rest | 4 x 3 | 4 x 3 | Rest | 4 x 4 |
| Week 3 | 4 x 5 | 4 x 6 | 4 x 6 | Rest | 3 x 8 | 3 x 9 | 3 x 10 |
| Week 4 | Rest | 2 x 12 | Rest | 3 x 10 | Rest | 4 x 8 | Rest |
| Week 5 | 2 x 15 | 2 x 16 | Rest | 3 x 15 | 3 x 15 | Rest | 4 x 10 |
| Week 6 | 2 x 20 | 2 x 22 | Rest | 3 x 20 | 3 x 20 | Rest | 2 x 25 |
| Week 7 | 4 x 18 | 4 x 20 | Rest | 2 x 38 | 2 x 40 | Rest | 3 x 30 |
| Week 8 | Rest | 3 x 55 | Rest | 4 x 30 | Rest | 5 x 25 | Rest |
| Week 9 | 2 x 45 | 3 x 45 | Rest | 2 x 50 | 3 x 50 | Rest | 2 x 60 |
| Week 10 | 3 x 55 | 4 x 50 | Rest | 3 x 60 | Rest | 2 x 65 | 3 x 65 |
| Week 11 | 2 x 70 | 4 x 65 | 2 x 80 | Rest | 2 x 80 | 3 x 75 | 2 x 85 |
| Week 12 | Rest | 2 x 90 | Rest | 2 x 95 | Rest | 3 x 90 | 1 x 100 |
The same training table in the picture to download to your computer.
How to use this program
In the 12-week push-up program, each workout is described by the numbers "2 x 10", for example.
- First digit = number of approaches
- Second digit = number of repetitions
The shorter your rest between sets, the better, but in later weeks, when you have to do almost 100 push-ups for a certain number of sets, increasing the rest time is simply necessary. There is no need to take a long break. Rest 5 minutes between sets to complete the required number of sets and reps.
If you cannot complete the target number of repetitions in one set, give yourself a few seconds to rest and continue until you complete everything.
I repeat, this program is for those who can do at least one push-up. It is designed specifically for beginners. If you do everything as expected, then by the end of week 12 you will be able to perform up to 100 repetitions.
Handstand push-ups
We will classify this beautiful exercise as a strength exercise, and by doing it, you will gain strength and be able to build muscle mass. But how do you learn to do handstand push-ups?
Before we move on to the exercise itself, I want to say a few words about the muscles that are involved during this exercise.
The deltoid muscles receive the maximum load, but the upper pectoral muscles and triceps are also well loaded. A lot of muscles are involved, but not all are included in strength work. It is clear that all arm muscles, without exception, are involved in strength work, but still the triceps to a greater extent.
There are two options for performing this exercise.
The first option is handstand push-ups against a wall.
This has already been written about on the blog, and here is this article: “Vertical push-ups against the wall: effective strengthening of the deltoid muscles.” This is an easier option, and to perform handstand push-ups against a wall you do not need to be able to stand and walk on your hands. This exercise requires less energy, since the stabilizer muscles that are involved in handstand push-ups without support are not involved. Also, due to the fact that you can maintain a more vertical position, the load on the deltoid muscle bundles is distributed more evenly.
The second option is handstand push-ups without support.
This is a more complex and more spectacular version of the exercise, which will take you time to learn, and how much time you need depends only on you and your lifestyle.
To learn how to do this exercise, first you just need to learn how to stand on your hands. And in order to stand on your hands, you need to learn to walk on your hands, since it’s easier to learn to walk. To learn to walk on your hands, you will need a place to practice, and this place should not be too hard or too soft. The training surface should be so hard that if you fall on it, you won’t break anything. Of course, the ideal option would be a gym. Although, this is not always an ideal option... It is very good to learn to walk on your hands in a clearing where grass grows, and it is especially pleasant to conduct training in the spring.
As you can already understand, you will have to spend time on the handstand, but if you already have the strength in your hands, then all that remains is to find your balance. To catch your balance, don’t be afraid to throw your legs further, and that’s why we don’t need a hard surface. If you are afraid, your feet will fall on the same side from which you returned, and nothing will come of it. And if you overcome fear, you will be surprised how quickly you will find your balance. If you feel like you're falling, shift your center of gravity to the side and smoothly lower yourself onto one of your legs, and you won't fall. Naturally, training should be carried out with gloves so as not to injure your hands.
Having learned to walk, try standing on your hands in one place, and then try doing push-ups. This exercise is wonderful and completely replaces the standing press. Now you know what handstand push-ups are and how to perform this exercise.
And finally, I would like to recommend a few articles:
- Push-ups with extra weight
- Planche. How to learn to do push-ups without legs
- Reverse push-ups
Benefits and Benefits of Exercise
The exercise is beneficial because it helps develop strength and endurance in the muscles of the upper body. One-arm push-ups work the same muscles as classic push-ups, but they also have certain differences, which include the following:
- The load is placed on only one hand. Because of this, the intensity of muscle work will be twice as great as with classic push-ups. This exercise can only be performed by a really strong athlete.
- In addition to a fairly large load on the muscles, when performing this exercise we need to maintain balance, which will be quite difficult. You will have to use all the core muscles. It will be especially difficult to maintain balance while moving. This, of course, is much more difficult than classic push-ups, so the benefits of the exercise for muscles are higher. And in order to withstand this kind of load, you need to use the muscles of almost the entire body.
This challenging workout strengthens muscles and ligaments, increasing endurance and agility. Regular exercise makes it possible to eliminate excess weight and improve metabolism, improve the respiratory system, and strengthen bones. But for the exercise to bring only benefits, it is important to master its correct technique and not overdo it with the number of repetitions.
Why do you need to do push-ups?
Firstly, this exercise perfectly develops the shoulder girdle and upper limbs. It is similar to the standing barbell press, which is used to pump up the shoulders. And here the muscles of almost the entire body are involved in the work, which, one way or another, are responsible for upside-down balance. Simply put, the energy consumption is large, the range of muscles involved is also large, and the “exhaust at the exit” is even greater.
From such push-ups, as you understand, not only your shoulders, but also your body as a whole will become stronger. Moreover, physical qualities improve. For example, the same coordination. For some, just standing in a handstand is difficult, and then you also need to do push-ups.
Secondly, such a non-standard exercise is a great way to diversify your set of exercises, “surprise” your muscles with a non-standard load, or even overcome a “plateau” (stagnation). In addition, this exercise is something of a bridge between regular push-ups and push-ups without support of the legs (when an athlete with an almost horizontal body, but without support on the legs).
Such exercises are considered the height of professionalism and mastery of one’s own body.
How to do handstand push-ups
First of all, I’ll say that to start, try doing push-ups against a wall (heels resting on the wall) or with the help of a partner (he holds your ankles so that you don’t fall). This will help you initially focus on push-ups, and not on maintaining balance. A little later, having understood how it works, you can perform these push-ups on your own and not near the wall.
So, you have taken a handstand. What's next? Your task is to constantly look at your brushes. Now gradually bend your arms, lowering your face almost to the floor (or what are you doing push-ups from?). You need to bend your arms not away from yourself, as it may seem at first glance, but along the body (your forehead and both arms should form an imaginary triangle when lowering, as if you were trying to move from a handstand to a headstand). Naturally, there is no need to touch your forehead to the floor.
Now simply straighten your arms and take the starting position. Basically, that's it.
Oh yes! Choose the width of your arms yourself, although I would recommend slightly wider than shoulder width. And it is not necessary to pull your socks up: here we are not talking about the beauty of execution, but about the number of times. By the way, your legs can be spread to the sides. This technique is used by artistic gymnasts to better control their balance.
How else can you do push-ups in a rack?
Handstands can be done not only on the floor, but also on parallel bars (both full and training), various platforms, bars. In such a stance, you can go lower than when doing handstand push-ups from the floor (your head simply won’t allow you to do this). And here the amplitude of movement increases, which affects the development of muscles.
Training bars are a shortened version of the regular bars, both in length and height. You can easily move them to the wall and do push-ups against the wall. In addition, many, as it turned out, find it more convenient to do push-ups upside down on parallel bars rather than on the floor. The whole secret is that you only need to balance with your hands back and forth, and not in all directions.
Doing push-ups on various platforms (such as step platforms) is also a great option. The main thing is to make sure that they do not slip during the exercise.
By the way, it is possible that your partner can help you do push-ups. Well, you know, when you can’t seem to do even one bench press, but with the help of a partner you press it a couple more times. This “event” is called forced repetitions. Why not use them in the exercise we are discussing?
You just need to have your friend stand on some kind of height (his head is at the level of your feet when you are in a handstand). He simply grabs you by the ankles at a certain point and pulls you up, helping you do a couple more repetitions. An excellent help for increasing the number of push-ups in the future.
In conclusion, I will say this: the main thing is that you start, and then everything will go by itself. My friend actually started doing push-ups on the uneven bars with eight reps, and now this is his favorite exercise.
Want more information like this? Subscribe to blog updates, comment on articles and share them on social networks on your accounts. Everyone is happy.
- 5
- 4
- 3
- 2
- 1
Rating: 5 out of 5 (1 vote)
Subscribe and be the first to know about new articles on the site, directly in your email:
One-arm push-ups: video
One-arm push-ups, we already know which muscles work when performing them, are a difficult exercise, but it’s worth it. The exercise is not easy both physically and in terms of coordination, but athletes know that nothing is impossible. And if you manage to master this version of the exercises, you can easily prove that your level of training is up to par. And the video of one-arm push-ups, which you will find below, will help you master the correct technique.
https://youtu.be/lzr9wGUow-g
https://youtu.be/VLBBvh291PA
At what age can you do push-ups?
So, we hope we have convinced you that it is worth teaching your child to do push-ups. However, parents who doubt the advisability of this exercise are also, in their own way, right. Meanwhile, the correct position on this issue depends on the age of the child. It is important to do everything on time - and there is also a recommended age threshold for push-ups.
Let's find out at what age a child can do push-ups - we'll give a comprehensive answer to this question:
- From 3 to 6 years old, it is important to focus on flexibility and plasticity, that is, do stretching exercises. With age, a person loses the elasticity of muscles and ligaments, so it is important from childhood to teach a person to love stretching, to form the right foundation;
- From 6-7 years old you can begin to introduce cardio exercises into the complex. Include abdominal exercises, push-ups, squats, running, pull-ups.
- From the age of 10, you can start training with light weights, or complicate the previous complex. You should work under the strict guidance of a trainer; only he can teach you how to do all the elements correctly. The articular-ligamentous apparatus is not yet fully formed; accordingly, the load should be minimal.
- From the age of 12, teenagers can safely use light weights.
Thus, we can conclude that it is worth teaching a child to do push-ups from the age of 6-7, that is, from the moment he enters school. By the age of 10, regular push-ups can be complicated by more complex subtypes (explosive, on fists, with legs raised to an elevated position). A 12-year-old teenager can begin strength training, do push-ups with weights, and practice the most complex variations of push-ups (on one arm, on the fingers).
Where to start learning?
Often it is not immediately possible to teach a boy to do full push-ups. Don't worry, everything will work out, just a little later. Try teaching your child easier variations of the exercise:
- Wall push-ups – unload the pectoral muscles. We recommend gradually moving away from the vertical support, eventually moving to the bench;
- Push-ups from a bench - the higher the horizontal support, the easier it is to do push-ups. Gradually lower the bench height;
- Push-ups from the knees - this method reduces the load on the lower back. As soon as you feel that the muscles of the child’s arms and chest are stronger, try full push-ups from the floor.
The technique for performing these variations is no different from the classic one: straight back, bend your elbows to 90°, lower/inhale, lift/exhale. Do each exercise 15-25 times in 2 approaches.
At the same time, to strengthen your muscles, do the plank with your arms outstretched - every day for 40-90 seconds in two approaches.
It is important for children 7 years old to do push-ups correctly, which means pay special attention to eliminating errors in technique. Remember, it’s easier to teach than to relearn, so nip in the bud attempts to cheat: rounding your back, sticking out your buttocks, laying your body on the floor, touching your knees to the floor, etc. Make sure that the child is breathing correctly and do not set the load too high.
Push-up technique
So, let's get down to business directly - here's how to do push-ups correctly for boys 6-12 years old:
- Be sure to do a warm-up. Stretch your arms, body, and do circular rotations to warm up your joints;
- Starting position: lying on outstretched arms, legs resting on your toes. The entire body from head to toe forms a straight line;
- Tighten your stomach and buttocks;
- As you inhale, let your baby begin to bend his elbows, lowering his torso down;
- As soon as the elbows form a right angle, the lowest point is reached, and the chest practically touches the floor;
- As you exhale, lift up using the strength of your arms;
- The parent must ensure the correct position of the body - the back is not rounded, the fifth point is not protruding, and we do not lie with our chest on the floor.
https://youtu.be/XpS8msbdi9c