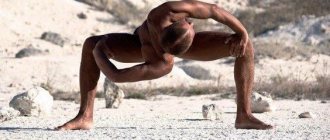
Why is it necessary to stand on your head?
What are the benefits of headstand?
A person who is full of energy, protected from disease, feels cheerful and energized. Asana helps to accumulate energy. Yogis claim that by performing asana daily for 30 minutes for three years, you can get rid of all diseases.
In yogic sacred texts, Sirsasana is defined as a royal pose. Because in the headstand (elbows) energy is accumulated.
The elbow stand has a great effect on the body. The inverted position of the body will already have a great effect. It is known from physics that the force of attraction occurs constantly. In Shirshasana, the body position is unusual for the body. But the force of gravity will increase blood circulation in the brain and the heart muscle will be relieved.
By performing Shirshasana correctly, the body will receive invaluable benefits:
- The body will become healthier and rejuvenated, wrinkles will decrease, and the face will become fresher.
- Blood circulation to the head will increase. By feeding, the brain does not get so tired, memory, concentration, and perseverance improve.
- Hair will become strong and beautiful. By performing Shirshasana, their natural color will be preserved, delaying the appearance of gray hair.
- Since blood flow increases to the pituitary gland, the work of the thyroid, gonads, adrenal glands, and pineal gland is activated. The body begins to function without interruption, depression is eliminated.
- The lymphatic system will actively circulate throughout the body, cleansing cells of toxins.
- When performing a hands-free stand, the adrenal glands are cleansed of toxins, which improves mood, eliminates negative thoughts, and improves heart function.
- Headstand combats the problem of varicose veins and swelling of the legs.
- The activity of the gastrointestinal tract increases, metabolism goes away.
- The risk of stroke is reduced.
- If you breathe deeply while standing, the blood will be saturated with oxygen, which helps improve brain activity.
- Headstand has a positive effect on the spine. It becomes more flexible and tension in the lower back is relieved.
Yogis claim that standing on your elbows gives you energy throughout the day and improves your mood.
Why is “birch” useful?
Asana Sarvangasana strengthens the entire body as a whole. The benefit also lies in increasing the practitioner's attentiveness. This pose helps stabilize the nervous system.
It is this asana that helps restore and accumulate energy resources. The pose is great for people returning after a hard day at work. Thanks to its effect on the thyroid gland, the asana helps maintain youth for as long as possible.
For women, this pose is recommended to strengthen the pelvic floor muscles. Regular exercise makes it easier to endure pregnancy and childbirth in the future.
Sarvangasana helps restore metabolic processes in the body. Weight is normalized and the likelihood of obesity is reduced. This asana is also useful for diabetes. Helps regulate the entire endocrine system.
For hypothyroidism, asana is recommended as an addition to the main treatment. Helps normalize hormone levels.
With regular training, the pose helps normalize blood pressure.
Another pose of this asana is the prevention of varicose veins. Helps cope with venous stagnation, which can be the result of pregnancy, childbirth, a sedentary lifestyle, bowel movements, etc.
Asana Sarvangasana prevents the development of anemia. Normalizes blood circulation and eliminates the likelihood of cramps and numbness. This pose also restores the functioning of the cardiovascular system. The asana is also an excellent prevention of pelvic organ prolapse.
With regular training, it alleviates disorders of the urinary system. During epidemics, it increases the body's protective functions and reduces the likelihood of colds.
The pose also has a positive effect on the female reproductive system. The only limitation in this case is menstruation. During critical days, you will have to abandon the pose.
The effectiveness of the asana has also been proven for men. This pose helps improve potency and normalize libido.
Preparing for a headstand
Shirshasana is not an easy asana. How to do an elbow stand? This process takes some time and requires preparation, which should be step-by-step:
Stage 1. While lying on your back, lift your head from the surface 1-2 centimeters and try to hold it that way longer. This strengthens the neck. The ultimate goal is to hold the pose for 2-3 minutes.
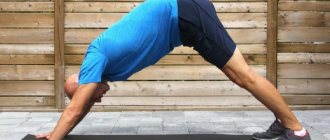
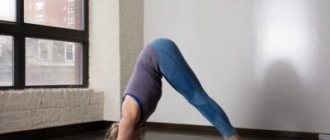
Stage 2. Learn to perform inverted asanas: downward-facing dog, birch tree.
Stage 3. Gradually performing a headstand:
- Practice kneeling for a week (lower your head on the surface, hands behind your back) and move to position No.5.
- Perform position No. 6 for a week.
- After this, try to perform Shirshasana.
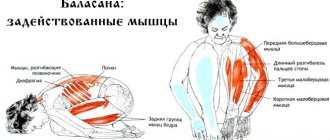
What muscles work
During a stand, a person uses almost all of his muscles. Mainly during the position, the muscles of the core, abs, deltas are involved - the upper, middle and lower calf muscles and back muscles.
The back muscles are completely strengthened, using both the upper and lower sections, including the lower back. The abs are also used during elbow stands, including the obliques. The arms hold the weight of the whole body, so they actively strengthen during exercise.
The legs bear a significant part of the load during the plank, so not only the calf muscles are involved, but also the muscles of the thighs and buttocks. By using the rack as often as possible, you can strengthen the buttocks area and make them more toned. In this case, you can change the position of your legs, making them wider or narrower, as well as alternately raising and lowering them. In this case, they will strengthen more actively. It is believed that the plank allows you to get rid of the initial manifestations of cellulite in a short period of time.
Execution technique
In order to stand on your head, you must adhere to the following technique:
- Fold the blanket into fours and place it in front of you.
- Focus on the asana, but do not strain.
- Kneel down and lower your buttocks onto your heels.
- Bend over, connecting your chest to your knees, place your head on the blanket, spread your elbows shoulder-width apart.
- Interlace your fingers and place them in front of you to maintain balance.
- Place the top of your head on the blanket, touching the back of your head with your palms.
- Raising your pelvis with your hips, straighten your knees, do not bend your body. Slowly move your legs towards your head so that your back is perpendicular to the floor.
- While inhaling, with a slight jerk, simultaneously lift both soles from the surface, slowly lifting them towards the chest.
- Transfer your body weight to your elbows, bending your knees, pressing your heels to your buttocks.
- If you feel stable, gradually begin to align your legs so that you get a straight line, pulling your toes up.
- Relax in the asana. Stay in the pose for as long as you feel comfortable, without overexerting yourself.
To exit the pose, bend your hips and knees and smoothly lower to the surface.
There is no need to get up immediately; it is advisable to rest a little in a bent position so that blood circulation normalizes.
For beginners, try to maintain a headstand for 5 to 20 seconds, gradually increasing the time.
In order to better understand and see how to stand on your head, it is recommended to watch the video “Shirsasana for beginners”
Mastering Sarvangasana
Your neck will remain safe and sound if you strictly follow two rules while performing Sarvangasana . Firstly, do not turn your head, and secondly, enter the pose extremely carefully. Several evenly folded blankets for support under the shoulders will help maintain natural cervical lordosis and avoid neck strains and other injuries.
So, take 3-4 blankets and fold them neatly. The finished shoulder support must meet three necessary conditions. Firstly, you need to choose a stand that is wide and long enough so that your shoulders and elbows can fit freely on it. Secondly, high enough to take the strain off your neck. And thirdly, it should be even and smooth so that there are no folds left on it, since your hands should be kept at the same level! When laying blankets one on top of the other, just try to perfectly align the edge of the support where your neck will be located.
Place the blankets about 60cm from the wall, with the stack edge facing the wall. Lie on your back so that your shoulders are on the stand 2-3 cm from the edge, and your head is on the floor. The distance between the blankets and the wall may vary. Try moving them closer and further from the wall to find the ideal distance for your height.
Bend your knees and extend your arms at your sides, palms up. Gently press the back of your head to the floor and your shoulders and arms to the blankets. This will help maintain the natural curve of your neck. Make sure that there is a gap between the neck and the floor - only now can you move on.
| correctly to maintain the natural curves of your neck | incorrect You cannot spread your elbows wider than your shoulders | wrong Don't let your legs relax and move apart |
Inhale calmly and exhale, move your legs behind your head so that your toes are on the wall. Bend your elbows and place your palms on your lower back, fingers pointing up. The legs and torso should form an obtuse angle, as the form of the pose is ideal for both beginners and more experienced students who experience neck discomfort while performing Sarvangasana . This version of the pose allows you to shift the weight of the pelvis onto your elbows - and relieve your shoulders and neck from unnecessary pressure.
Now focus on the base of the asana - elbows, shoulders and back of the head. The main load should be borne by the elbows, a little less by the shoulders, and only a small part of it should fall on the head. In the next two variations, the weight will be distributed slightly differently, but this position is safe for beginners.
If you are comfortable and do not feel discomfort in your neck, stay in the asana for 5–10 breathing cycles. If you feel tense, leave early.
Making a variation of “Birches”
In the next variation, the body weight is increasingly transferred to the shoulders. While in the previous pose, rotate your upper arms from the inside out and move your shoulders away from your head. Feel how your neck lengthens thanks to these actions. Now expand and lift your chest until it reaches a vertical position. At the same time, move your palms closer to your shoulder blades.
Observe the sensations in your neck and throat. If you feel tension, relax your temples, eyes and lower jaw. Then lift your toes off the wall and bend your knees, pointing your feet toward your buttocks. Imagine that you want to reach your knees to the ceiling and intensively lengthen the front of your thighs. Gradually move your palms down your back to better lengthen your thoracic spine and open your chest.
Gently draw in your lower abdomen. Once your body is upright, return your focus to the base of the pose. Since the pelvis is now located not above the elbows, but above the upper parts of the arms, the shoulders are pressed closer to the support and the body weight will shift towards the head. Regardless, don't let your neck tighten. Distribute your body weight evenly between your elbows and shoulders and gently press the back of your head toward the floor to maintain the natural curve of your neck.
If you can stay in this variation for 5-10 breathing cycles, you are ready to perform the full version of Sarvangasana .
Useful tips
When learning a headstand, it is important to adhere to the following recommendations:
- Take the first steps only under the supervision of an instructor;
- After completing the asana, there should be no pain or discomfort in the cervical area.
- Before lifting your legs off the surface, place your arms at a 90-degree angle.
- When pushing off the surface, do not allow the upper limbs to diverge to the sides.
- For safety, it is better to learn the asana in the corner of the room.
- Don’t try to lean against the wall so as not to get used to it.
- Keep your feet together to maintain balance.
- If the asana is being performed in the middle of the hall and you feel a loss of balance, quickly regroup by unclasping your intertwined fingers.
- Breathe through your nose.
- Body weight is concentrated on the palms and elbows, not on the head.
Parshva Sarvangasana
Do this version of “Birches” only when the basic form has been mastered.
From Salamba Sarvangasana (i.e. the usual form), you turn your torso and legs to the right, place your left palm on the pelvis on the left side so that the tailbone rests on the wrist. Next, lower your body onto your left palm - the weight of the body moves to the left wrist and elbow. In this case, the palm of the right hand remains in its place, i.e. on the back.
Now move your legs away from your left palm at an angle, and stay in this position for 20 seconds, breathing normally. As you exhale, return to Sarvangasana and repeat the pose to the right side.
This is a rather complex version of Sarvangasana, but it has a beneficial effect on the liver, spleen, and pancreas.
There is Setu Bandha Sarvangasana, when from the final position you lower your legs in the direction opposite to your head until they are on the floor. This is also a difficult pose and must be performed very carefully. The body in it resembles a bridge, hence the name (“setu” is a bridge in Sanskrit).
You can also perform a headstand with your legs folded in the lotus position - you get Padma Sarvangasana. The pose itself is not very difficult, but you need to master Padmasana to perform it.
That's all the basic information on the birch tree pose or shoulder stand. Have a safe practice!
Basic rules for performing handstands
Try to place your hands as close to the top of your thighs as possible, and your feet to your shoulder joints. “The ability to create correct contact between your arms and legs largely determines whether you perform the asana correctly,” says Anna Volkova.
“In all handstands, lift the center of your palms from the floor, and, on the contrary, press your fingers ,” advises Anna Volkova. - Make sure that the body weight is evenly distributed across the plane of the palms, and not just on its outer or inner edges. This way you will engage the muscles of the forearms, shoulders and chest.”
To lift your feet off the floor using your palms, shift your center of gravity so that it is directly above the fulcrum.
Don't do handstands while pregnant. And also for injuries of the lumbar region, shoulders, wrists, high blood pressure.
Before you start doing handstands, be sure to warm up. And do your usual yoga asanas for 10-15 minutes.
Entering Sarvangasana
To enter the full pose, straighten your legs and extend them up towards the ceiling. Continue lengthening the front of your thighs as in the previous variation. Gently pull your stomach in to lengthen even more - this will reduce the pressure on your shoulders. Observe your breathing - although it may require more effort in an inverted position, breathe evenly and calmly.
Actively stretch your legs and move your palms closer and closer to your shoulder blades. This will help open the chest, shoulders and collarbones. As you continue to develop the pose, observe your breath and sensations in your neck, eyes, ears, and tongue. If you feel tension in one of these areas, return to the previous variation.
Hold in full Sarvangasana for 5-10 breaths, then move your feet to the wall. Bend your knees and walk your feet down the wall until they are about 30cm from your head. Lift your palms from your back and carefully lower your pelvis to the floor, supporting yourself with your arms.
Rest for a few seconds in a lying position to avoid a sudden increase in intracranial pressure. Observe whether new sensations have arisen in the body and whether the internal state has changed in the inverted position. (Yoga Journal)
Handstands: complex for advanced
To perform this complex you will need a yoga mat.
Attention! If you are just learning asanas, it is better to place rolled blankets around you in case of a fall. Make all movements as carefully as possible, stay focused.
Bakasana
Squat down with your feet together. Spread your knees out to the sides. Place your palms on the floor shoulder-width apart. As you exhale, bend your body forward, moving your torso between your thighs. Press your shins toward your shoulders and point your elbows back. Leaning on your hands, gently lift your heels off the floor. Keeping your pelvis lifted, shift your body weight forward and lift yourself up on your big toes. Fix your center of gravity above the point between your palms. Lift one foot off the floor, then the other. Balance on bent arms. Your body should be as compact as possible, pointing your heels and buttocks towards each other. Keep your inner and back thigh muscles and abdominal muscles toned. Round your back. As you exhale, rise higher, spreading your shoulder blades and straightening your arms. At the same time, make sure that your shins do not slide down. Push your pelvis down, positioning your body horizontally. Stay in the asana for 8-12 seconds, breathe evenly.
*instructor clothing provided by Fashion Verdict Sport
Parshva bakasana
Stand straight with your feet together. Squat down until your thighs are parallel to the floor. Place your left elbow behind your right thigh. As you exhale, twist to the right. Place your palms on the floor, shoulder-width apart, with your left shoulder pressed toward your right thigh. Lower your pelvis down so that it is just a few centimeters from your heels. The bulk of the weight should fall on the feet. Slowly lift your pelvis and move it to the right, maintaining contact between your left hand and right thigh. Slowly shift your body weight onto your hands. When you feel that your feet can be lifted off the floor, bring them closer to each other and lift your heels. Forcefully push the left side of your pelvis down and lift your feet off the floor. Fully straighten your right arm, leaving your left arm slightly bent. Raise your chest and head, look forward. Breathe calmly. Hold the pose for 8-12 seconds, then perform the asana in the other direction.
Variations
1) Assume the final position, exhale and lower one leg towards your head until it is parallel to the floor. The second leg remains vertical. Hold this position for a few seconds, then inhale and return your leg to the vertical position. Repeat with the other leg.
Sometimes the leg is lowered to the floor, both along the body and from the side. This option is called Eka Pada Sarvangasana.
2) At the final pose, inhale and bend your straight legs from your hips towards your head until they are parallel to the floor. Hold the position for a few seconds. Inhale and lift your legs to a vertical position.
3) At the final pose, inhale and bend your right knee. Place your right foot on your left knee. Exhale, bend your legs forward, holding this position, so that your right knee is on your forehead. The left leg is straight and parallel to the floor. Hold this position and hold your breath after inhaling. As you exhale, return to the final pose of Sarvangasana. Repeat with the other leg.
These variations can be done immediately after the final pose (that is, while still in it).
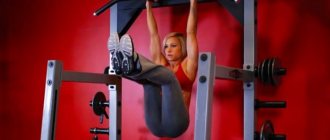
Elbowstand for the abs, back and shoulders
For some reason, “people” consider the movement to be an abdominal exercise. In fact, a large static load falls on the trapezius, deltoid and rhomboid muscles of the back. They take body weight.
A simple elbow stand for the press is also effective, but to a lesser extent. You can maintain balance only if you tighten your stomach and pull your legs up at the same time. This creates a load on the transverse abdominal muscles, and partially on the rectus muscle. But keeping your stomach pulled in in this pose is not the most difficult thing.
A more significant static load lies on the long back muscle and the tensor fasciae lata. These are rather small muscles; they normally work differently. Therefore, before moving on to elbow stands (or rather, on the head and forearms), it is worth carefully strengthening the long back muscle by bending over with a gymnastic stick, the boat exercise and hyperextensions.
It is important to develop the flexibility of the shoulder girdle and do an adequate warm-up before class.
Plank
The elbow stand is often called a plank. All professional athletes can perform it, as well as those who do yoga and other types of physical exercise. Elbowstand is considered one of the main exercises for developing and strengthening the abdominals, back and core.
It is intended not only for these groups, but also has a beneficial effect on the upper shoulder girdle, strengthening this area.
During the exercise, a person may feel strong tension in the abs, back, joints and shoulders. At the same time, the static position allows you to pump up these groups without extra effort.
You can learn to do it even after giving birth, three to four months later, when other exercises are still prohibited. During an elbow stand, the following muscle groups work:
- delta - anterior and upper;
- rear delta;
- core muscles;
- abdominal muscles;
- gastrocnemius;
- quadriceps;
- buttocks.
The main load is placed on the abdominal muscles and back muscles, but many other areas are also involved during the exercise. Additionally, the load can be increased by using weights or other special devices during the exercise.
If you apply the pose daily, each time slightly increasing the time interval, you can achieve strong abs within a month of starting classes.
How to learn to do an elbow stand
If gymnastics and yoga are not your specialty, then you need to be patient. A person with average training can master an elbow stand in 2-3 months. You need to practice 2-3 times a week so that the muscles have time to recover.
The preparation should include exercises to develop mobility of the shoulder joint:
- Perform 12-14 rotations forward and backward with a straight arm to warm up;
- Then take the gymnastic stick with a wide, comfortable grip and rotate it from chest level behind your head. There should be no pain in the shoulders. You need to do this 20-50 times;
- As a result, the straight arm should go behind the ear without pain or tension in the shoulder. If this does not happen, practice just the warm-up for 3-4 weeks before moving on to mastering the exercise.
First level
Stand with your feet on the floor. Get into dolphin pose and lower your forearms to the floor. Place your head between them, transfer part of your body weight to your head and forearms. Try to gradually step closer to your hands so that the weight moves to your head and forearms.
Second level
Wall-mounted stand. Stand facing the wall and do the first level exercise. Bring your legs up one at a time, lean on the wall, and stand in this position as long as you can. The task is to learn to control the abs so that the stomach does not fall out and breathing does not interfere with holding the pose. Take deep breaths and exhales, but do not hold the air.
As soon as you can stand with the wall for several minutes, try to move to the level without it and master the classical technique.
Benefits of Sarvangasana
Thanks to the pressure of the chin on the chest, the thyroid gland is stimulated, the circulatory, digestive, reproductive, nervous and endocrine systems are harmonized.
The brain receives a surge of fresh blood, the mind calms down, mental and emotional stress, fear, headaches, and other psychological concerns are eliminated. The thymus gland is activated, followed by the immune system, which has a positive effect on the parathyroid gland, which ensures normal development and restoration of bone tissue.
Thanks to abdominal breathing in the pose, oxygen exchange improves, stress is relieved, and the abdominal organs are massaged. The birch tree pose removes the normal force of gravity on the anal muscles, which helps in the treatment of hemorrhoids.
The muscles of the legs, abdomen, and reproductive organs are toned; Stagnant blood and fluid are drained from these areas and blood flow improves.
The flexibility of the cervical spine increases, and nerve conduction in the neck improves. The pose gives tone to organs such as eyes, ears, nose, and prevents diseases of these organs. In yoga therapy, shoulderstand is used to treat asthma, diabetes, thyroid diseases, colitis, impotence, dropsy, prolapse, menopausal disorders, menstrual disorders, leucorrhoea. Regular practice helps prevent coughs, colds and flu (I used to treat a cold with Sarvangasana overnight, in the early stages).
Technique for performing an elbow stand
Beginners often try to take a “jumping” position by simply rolling into a standing position against the wall and leaning on their feet. This is fraught with shoulder injuries, since before adjusting to the pose, the mobility of the joint should be increased. How to do an elbow stand correctly?
Ideally, the technique resembles a yogic exercise on the forearms with raised feet and extended toes:
- We take the “bar on the elbows” emphasis, the socks rest on the floor. The weight is evenly distributed between the four points of support, the stomach is tucked, the shoulders are away from the ears;
- The pelvis is moved upward into the “dolphin pose”; several minutes are spent stretching the chest towards the hips. This allows you to adequately open your shoulders and prepare the joint for the exercise;
- To begin with, you can clasp your fingers in front of you so that your forearm forms a triangle;
- Then the head is lowered between the hands, and the legs are stepped towards the forearms so that the weight moves to the head and hands;
- In the most stable position, the weight is transferred to the head and forearms, and the legs are simultaneously raised up.
Variation for beginners: lifting your legs one at a time, or lifting your legs while leaning on the wall.
What does an elbow stand give to an ordinary person? It is valuable because it allows you to prepare the shoulder joints for the load of power movements, and strengthens the long back muscle. This eliminates “office” type posture disorders (shoulders directed forward, back relaxed), and can even eliminate slight kyphosis.
Contraindications to doing handstands and forearms are exacerbation of hypertension and headaches. Yogis do not recommend girls to practice this movement in the first phase of the menstrual cycle. Otherwise, with a little effort, you will definitely learn!
When is Salamba Sarvangasana performed?
It is usually practiced immediately before Plow Pose (Halasana). This is followed by either Matsyasana, Ushtrasana or Supta Vajrasana - i.e. poses that have the opposite effect, in this case, arching the back in the other direction. These "reverse impact" poses are practiced with half the time spent performing shoulderstand and plow pose (i.e., half the time used for both of these poses).
When it comes to where to do a shoulderstand within a certain sequence of poses, there are different options. Beginner yogis are usually recommended to perform it at the end of an asana program. Experienced practitioners can do it at the beginning, after Surya Namaskar, for example. If you look at Yoga from the point of view of Ayurveda, then the famous expert in this field, David Frawley (Vamadeva Shastri) has a so-called “neutral” sequence of yoga poses, suitable for all doshas (Ayurvedic constitutional types: vata, pitta and kapha). So, in this sequence, Sarvangasana comes approximately in the middle of the practice, after a cycle of standing poses. Someday I will tell you more about the combination of Yoga and Ayurveda to achieve maximum healing and harmonizing effects (not that I am a great specialist - I’ll just share what I know and what I use myself).
The effect of the practice of Sarvangasana
Sarvangasana is one of the most beneficial of all asanas. If Shirshasana is the king, then Sarvangasana is the queen of all asanas. If Shirshasana develops masculine qualities - willpower, mental acuity and clarity of thinking, then Sarvangasana develops feminine qualities of patience and emotional stability. She is considered the mother of asanas. Just as a mother strives all her life for the happiness of her children, so this asana directs her efforts towards peace and health of the body. It would not be an exaggeration to call this pose “Trailokya Chintamani” - “an extraordinary pearl among the three worlds.”
Sarvangasana , as its name implies, has an effect on the entire system. Thanks to the inverted position, venous blood is transported without strain to the heart for purification, because gravity acts. Oxygen-enriched blood enters the chest area, bringing relief in cases of difficulty breathing, asthma, bronchitis, diseases of the throat and larynx, and palpitations. The pose is of great help in anemic conditions and in cases of reduced vitality. Thanks to the strong lock that forms the chin, the thyroid and parathyroid glands receive an abundant blood supply, thereby increasing their effectiveness in keeping the body and brain in good balance. Since the head is very stable due to the lock formed by the chin, the nerves are calmed, the brain is also calmed and headaches disappear. Common diseases such as colds and runny nose can be cured by the practice of this asana.
Sarvangasana has a calming effect on the nervous system and is therefore good to practice when you are stressed, upset, irritated, tired, or suffering from nervous exhaustion or insomnia. Sarvangasana also helps regulate the processes of digestion and excretion, ridding the body of toxins; it helps get rid of constipation, cure intestinal ulcers, colitis and hemorrhoids. Sarvangasana has a corrective effect on disorders of the urinary system, uterine displacement and menstrual disorders. It gives calm, strength and vitality to the one who does it, and is recommended as the best restorative remedy after a long illness.