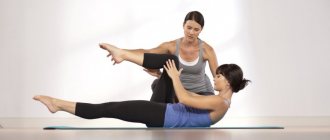
Why do you need joint exercises?
Joints are the main link of the musculoskeletal system; they serve for flexion and extension of the limbs and torso, especially in sports; their proper functioning affects the results and productivity of each workout. Focusing on the work of the muscles, they remember the joints only when they feel discomfort, pain, immobility of the joints and stiffness of movement.
Over time, intense loads can wear down the joints, causing joint tissue (cartilage) to become deformed and become inflamed. A sedentary lifestyle, on the contrary, leads to ossification and impaired mobility. All these factors affect the health of every person. They can be prevented with the help of joint gymnastics exercises.
Joint gymnastics as a direction in fitness
Joint gymnastics is considered one of the safest areas of fitness. The training involves the development of mobility of all joints, positively affecting the condition and functions of the musculoskeletal system.
Exercises from joint gymnastics are aimed at dynamic or static impact on all joints of the body, including the spine, ligaments and small muscles. Thus, by performing gymnastics regularly or at least once a week, joint mobility significantly increases, which prevents various joint deformities, stiffness and deterioration of blood supply.
In general, this direction is suitable for everyone, regardless of age and level of physical activity. Joint exercises are necessary for everyone, including a child who leads a sedentary lifestyle or is in a period of active growth, athletes of all sports, especially those prone to injury, and older people whose joints and ligaments become stiff and subject to degeneration due to age-related changes. risk of dislocations and fractures.
Also, in addition to its healing properties, joint gymnastics increases flexibility for aesthetic purposes, for example, improves the quality of yoga asanas, which is why joint gymnastics is more often practiced in yoga centers.
What principles need to be followed and how to prepare for the lesson?
If you decide to do joint exercises, do it regularly. This is one of the main principles for achieving a positive result. All movements during gymnastics should be painless.
To increase the effectiveness of joint gymnastics, you should adhere to 5 basic principles:
- movements are performed smoothly, without sudden movements;
- Before loading, be sure to do a warm-up or massage;
- joints develop from smaller to larger, from healthy to sick;
- during muscle contractions, exhale, and during relaxation, inhale;
- classes are held for at least 15 minutes a day, at least 3 times a week.
You are allowed to drink water during joint exercises. Do not start exercising earlier than 60 minutes after your last meal.
Key preparatory activities before joint gymnastics include:
- Rubbing the joints with a warming or anti-inflammatory ointment. You can use Voltaren emulgel gel or Diklak gel.
- Massage or self-massage of joints.
- Warm up.
To warm up, light movements are used, which are carried out along the physiological axis of movement of the joints. All active exercises with which you can increase blood circulation are suitable: cycling, swimming in water, active walking on steps, stretching, static contractions, lying in bed.
3 exercises from joint gymnastics to warm up before training:
- While standing, place your feet at a distance of 50–60 cm from each other, spread your arms to the sides. From this position, raise your arms above your head until they are completely brought together. Next, lower your arms not to the sides, but in front of you, bend them at the elbow joints and spread them as far apart as possible, placing your elbows behind your back. Repeat 15–20 times, perform 1–2 approaches.
- Place your hands on your waist and roll your shoulders forward. Bend forward. Then roll your shoulders back and tilt your torso back. Then do 1 tilt in different directions and 1 circular movement. Repeat the joint complex 10–15 times, perform 2 approaches.
- Standing, place your hands on your belt. Take turns raising your knee to your stomach and moving it to the side. Lower along the same trajectory as you raised, only you need to place your foot on the floor 20–30 centimeters further from its original position. Repeat 10-12 times, perform 2 sets on each leg.
Charging takes 10–12 minutes, no more.
Joint gymnastics for beginners: recommendations
Despite the fact that the direction is practically harmless, it is necessary to understand that joints are a fragile mechanism that is easily damaged and more difficult to restore, and sometimes the echoes of joint injury accompany a person throughout his life. Therefore, you need to treat your joints with care and never cause acute pain.
At first, perform the exercises at half strength, or better yet, under the supervision of an experienced trainer who will correctly dose the load. But don’t expect quick results - joints take a long time to develop, so sudden movements and large amplitudes are inappropriate .
A set of joint gymnastics exercises
Gymnastics for leg joints
Foot exercises
Exercise 1
While standing, rise onto your toes and roll smoothly onto your heels, perform the movement slowly, working through the full range of motion. Do 8-10 repetitions.
Exercise 2
Standing on one leg, hold the other one above the floor. Perform circular movements with your feet in one direction (5-10 circles), then in the opposite direction. Change your leg.
Exercise 3
The next movement is performed while sitting on the buttocks, with the legs straightened as much as possible at the knees. The movement is performed in 4 stages:
- pull your feet towards you as much as possible, hold for 4 seconds;
- leave the joints of your feet motionless, bend only your toes as much as possible (pause 4 seconds);
- Stretch the toe as much as possible (knuckles and toes), hold for 4 seconds.
- with a tense joint, lift only your toes “towards you”, pause.
- Repeat the movement cycle 5-10 times.
For knee joints
Exercise 1
While standing, lift and hold the thigh of one leg overhang, make circular movements with your shin, rotating your knee joints as much as possible. 5-10 laps in one direction and the other. Change your leg.
Exercise 2
While standing, sweep one leg back towards the buttocks, hold the foot with the same hand, pressing the heel as much as possible against the buttock. The knees are pressed together. Switch legs and hold the position for 15-30 seconds on each leg.
For the hip joint
Exercise 1
Rotate your pelvis, starting in a small circle, gradually increasing the range of motion. 5-10 laps in one direction, and in the opposite direction.
Exercise 2
Standing on one leg, lift one hip towards you. Hold your shin with your hands, press your thigh as close to your stomach as possible, and bring your knee toward your chest. Hold for 15-30 seconds, change sides.
Half lotus
- Sitting on the buttocks, one leg is extended straight in front of you, the second foot is pressed against the inner thigh of the straight leg, with the heel closer to the groin.
- The knee of the bent leg reaches as far as possible towards the floor; you can gently press with the force of your hand.
- Hold for 30 seconds, switch sides.
To make it more difficult, you can tilt your body forward along your straight leg.
Lotus
- Sitting on your buttocks, bring your feet together as close to your pelvis as possible.
- Use your palms or elbows to press down on the berm, pulling your knees toward the floor.
Hold for 15-30 seconds.
Gymnastics for hand joints
Exercises for hands
Exercise 1
Extend your arms to your sides. Perform rotation with your hands, fingers in a fist, in one direction 5-10 times, and in the other.
Exercise 2
- Raise your right hand forward, with your palm facing away from you, and with your left, press on the palm of your right hand (fingers pointing down) and pull your hand toward you as much as possible, hold for 10-20 seconds.
- Unfold the same hand and press on the back of it, pause for 10-20 seconds.
- Same for the left hand.
For elbow joints
Keep your arms hanging by your sides, hands in fists. Perform rotation only in the elbow joints inward - 5-10 circles, then in the opposite direction.
For shoulder joints
Exercise 1
Perform rotation of straight arms from the shoulder in a full circle in one direction (5-10 circles), then in the opposite direction.
Exercise 2
- Raise your right arm straight in front of you, clasp your right elbow with your left hand.
- Pull your straight right arm as close to you as possible, the movement comes from the shoulder joint, hold the tension for 10-30 seconds, then change sides.
Hadoo exercises
Khadu joint gymnastics allows you to recover from injuries and rejuvenate the body.
Joint gymnastic complex Khadu:
- Feet shoulder-width apart, slightly bent at the knee joints. Squeeze your shoulder blades and bend at the lower back. While inhaling deeply, straighten your legs and stretch upward as much as possible. Repeat 10–12 times.
- Spread your arms to the sides and arch your back so that your chest moves forward. Exhale deeply and bend your back, and straighten your arms and stretch them forward to the maximum distance. Repeat 10–15 times.
- Standing, feet shoulder-width apart, hands at your sides. Begin to slowly draw air into your lungs and rise onto your toes. At the same moment, raise your hands up. At the end point, try to stretch upward a little more. As you exhale, lower your torso down and place your straightened arms behind your back. Repeat 10-12 times.
- While standing, begin to bend to the sides using only your abdominal muscles. To do this, tense your stomach and do 8-10 bends in each direction. Perform 1-2 approaches.
- While standing, bend your legs slightly at the knee joints. Begin to make circular movements with your pelvis in this position for 45–60 seconds, while your torso should remain inactive.
- While sitting, place your hands on your knees. As you inhale, lift your chest as high as possible, and as you exhale, lower it down, arching your lower back. Do this 10–12 times, complete 2–3 approaches.
- Standing, feet shoulder-width apart, hands at your sides. Exhale, bring your shoulders forward, while inhaling, lift your chest, and move your shoulders back in a circular motion 10-15 times. Perform 2 approaches.
Look at pictures of Hadou's exercises.
Exercise 2more Exercise 5more
Useful video: learning Hadu movements
See how Hadou gymnastics for joints is clearly performed.
Gymnastics Hadu Hadu is a set of exercises for the back, joints and muscles of the whole body
Joint gymnastics in video format
The joints are the epicenter of our movements; their good condition gives health to the entire skeleton. What is a joint?
This is an articulation or connection of two or more bones that are attached to each other in a two-layer joint capsule that seals the joint cavities and secretes a lubricant - synovial fluid.
The joint cannot move on its own. It is driven by muscles. They cannot exist without each other and together they form the articular apparatus, therefore the motor activity that will be discussed in this article is more correctly called muscular-articular gymnastics.
A sedentary lifestyle (hypodynamia), a reduction in strength and range of movements due to computerization (hypokinesia) have become integral attributes of the life of a modern person. Arthritis, arthrosis and osteochondrosis at a young age will not surprise anyone these days. Those suffering from ailments of the musculoskeletal system do not attempt to get rid of this disease on their own without expensive and not always effective medical intervention and do not even imagine that this is possible.
5-20 minutes of daily exercise for the joints is enough to strengthen the body, restore good health and vigor. Simple dynamic movements, for example, with the head left and right, hands up and down, feet in a circle, and so on, seem simple on the surface, but in fact they provide the necessary load on the muscles and joints, allowing the entire body system to function properly. Our skeleton needs such micro-movements every day, and we stubbornly deprive it, thinking that we will remain healthy by walking 50 meters from home to the store and from the office to our own car...
Systematic and comprehensive implementation of joint gymnastics can lead a person to relative health in six months to a year, depending on the initial state of the individual’s skeletal system. It takes little time - from 20 to 45 minutes and is available to everyone: children, adults with poor health, elderly people, patients undergoing rehabilitation after serious illnesses.
What does joint gymnastics give?
Another advantage of muscular-articular gymnastics is that its various parts can be performed anywhere. If you are driving in a traffic jam, you can work your neck by moving your head in different planes and partially with your shoulders; sitting at your desk in the office, you can stretch your elbows, hands, arms along the entire length and chest, bend sideways and twist backwards.
The body itself often suggests the nature and range of movements. When, after sitting in one position for an hour, you raise your arms up and stretch, you relieve tension from the upper body; sinking into a chair and straightening your legs under the table, you relax your bottom. Sitting for a long time in the same position and monotony of movements are painful for the joints. They are trying to tell us about this by feeling numbness and numbness.
What does motor activity give to a joint? While moving, it “squeezes” the lubricant out of the cartilage and pressure absorbers and receives the necessary nutrition. The more the connecting bones press on each other, the more synovial fluid is released, and its composition changes, becoming more viscous.
Joint gymnastics
Viscosity instantly changes from changes in load and temperature of the environment: fast and light movements reduce it and, accordingly, the coefficient of friction, while a large load increases viscosity, evenly distributing pressure over the joint and increasing its shock absorption.
The immobilized joint dries out very quickly. So micro-movements, which people underestimate, fulfill an important mission by making joints mobile in everyday situations and preparing them for more serious loads.
It is worth mentioning the ligaments that hold the joints in a certain position. They are moderately elastic and give the movement the necessary amplitude; in the absence of mobility, they lose elasticity and do not hold the joint well, so people damage ligaments and break their arms and legs, seemingly out of the blue.
It is impossible to maintain healthy joints without optimal load, because movement is the basis of their health. It is better to devote some time to muscle-joint gymnastics and work on the musculoskeletal system in all directions of mobility. It will pay off in spades.
Athletes must include elements of joint gymnastics in their warm-up. This is an excellent warm-up, general strengthening of the body, its flexibility, training of will, self-confidence, good reaction and attention. The psyche also receives bonuses, because when the body works, the mind rests. A person feels a surge of strength and a lift in mood.
Complex of joint gymnastics
Muscular-joint gymnastics is also recommended for people who have suffered injuries and fractures. After completing the main treatment, the doctor selects a set of exercises to restore motor activity to the damaged organs. Rehabilitation in such cases is much easier and faster.
Pregnant or postpartum women, the elderly, people with thyroid diseases, hypertension, oncology, acute infectious diseases should consult a doctor before performing gymnastics to avoid undesirable consequences.
Some countries, understanding the importance of a healthy lifestyle, created their own national gymnastics: China, Germany, Sweden. The latter gave the world new gymnastic equipment, such as the Swedish wall. The author's methods of joint gymnastics by Dikul, Norbekov, Bubnovsky and others are popular. The cervical region, hip joints, knees, that is, specific areas, are well worked by specialized complexes. Usually in such complexes, trainers first give general strengthening exercises to warm up, and after them they spend more time actively working on problem areas of the skeleton.
The body is a single whole, so the failure of one element directly or indirectly affects the functioning of others. The principle is simple: if you suffer, for example, from cervicothoracic osteochondrosis, then it is this part of the body that you should work more actively in a muscle-articular gymnastics class.
Joint gymnastics
Joint gymnastics exercises
Everyone can choose muscle-joint gymnastics exercises to suit their individual needs by selecting the desired positions from the standard program. You can start the warm-up from the top: in a standing position, first turn your head to the sides, then up and down, in circular movements. These and subsequent gymnastics exercises should be performed at least 10–20 times;
- We stretch our shoulders, elbows, arms and hands in any order. Circular movements of the shoulders forward and backward together and alternately. We bend our arms at the elbow, raise them to shoulder level and rotate our arms. Then rotate with fully straightened arms back and forth together and alternately. You can swing your arms back and forth with straight arms, just like skiers do. Don’t forget about your hands: rotate them in a circle at the wrist joints, clench and unclench your fists 20 times, move your fingers as if you are scratching something. Pull each finger with your other hand;
- working out the chest and back. While remaining in a standing position, you can make slight turns of the body left and right, bends in the lumbar region back and forth, and circular rotations of the upper body. Hands on the belt, push the chest forward, elbows back, try to bring the shoulder blades together, then hide them back, bring the elbows forward, trying to lengthen the distance between the shoulder blades;
- you can get on all fours and perform the “Cat” exercise, which perfectly stretches the entire length of the spine. This position makes it possible to move on to warming up the hip joint. We perform back swings with each leg in turn, straight or bent at the knee. Then we try to move each leg to the side one by one and hold it slightly in weight with the muscles of the abs and thighs parallel to the floor. We pull the toe towards ourselves with force;
- remaining in the cat position, the knees under the hips are strictly in place, and with our palms, placing one in front of the other, we first walk to the left, then slowly to the right, slightly twisting the upper part of the body in these directions;
- You can stretch your knees both standing and sitting, swinging back and forth or making circular movements in the knee joint, supporting your hips from below with your hands. You can also lie on your back and perform swings, circular and wave-like movements, as when swimming;
- let's move on to the feet. While sitting, you can pull your knee towards you and, holding your foot with your hand, rotate it. Perform the movement on the other leg. Stretch your legs and wiggle your toes freely. Squeeze them as if you want to hold a small object with them, and release them. Pull the foot towards you strongly and then lower it towards the floor, extending the instep to the extreme position, as if you want to touch the floor with your toes. Make circular rotations with your feet around your ankle together and alternately.
Types of joints
Our joints can be divided into three types. Some of them are motionless, others are partially mobile, and others, mobile joints, are great workers who do not know rest.
Fixed, in other words, fixed joints are suture joints. They connect, for example, the bones of the skull.
Soft joints connect bones, leaving them with limited movement. These are the joints that connect the lower part of the spinal column to the pelvis.
Mobile joints are not the same. In the elbows, for example, trochlear joints work; they allow the hands to touch the shoulders. Their movement is similar to how a door moves on its hinges. The connection between the femur and the pelvis is provided by ball-and-socket joints. Their capabilities are much wider: their legs move forward and backward, right and left, and even describe something like a semicircle.
The bases of the thumbs have saddle joints, and the wrists have flat joints.
Yoga and joint gymnastics
India gave the world joint gymnastics called Sukshma Vyayama, which prepares for performing the basic physical exercises of yoga - asanas and pranayamas. An approximate translation of the phrase is 'soft warm-up, exercises'. Sukshma Vyayama has many variations. Our most common version of exercises is in the tradition of Dhirendra Brahmachari.
The difference between Indian joint gymnastics and others is that it works not only the physical body, but also the energy and psyche. It harmoniously alternates between relaxation and tension. Along with micro-movements of various parts of the body, such gymnastics trains a person’s attention and works with images and breathing.
The exercises of the complex can be either an excellent preparation for yogic asanas or practiced independently of them, providing a comprehensive healing effect on the body. They are very similar to the movements of the above muscular-articular gymnastics, however, practitioners note a stronger impact and effect of Sukshma Vyayama. If the first is similar to exercise therapy and gives good physical well-being, then the second plus gives energy, self-confidence, inner strength, mobility and endurance.
Yoga joint gymnastics
Yoga joint gymnastics can also be performed in parts. Concentration on breathing, when each movement has its own respiratory cycle and a special type of breathing (kapalabhati, bhastrika), is not difficult for most practitioners and enhances the kneading, warming aspect. Movements can begin from top to bottom, or from bottom to top, or from the limbs to the center, comprehensively working deep-lying muscles and hard-to-reach joints.
It is a little more difficult for practitioners of joint yogi gymnastics to master their attention: the crowded thoughts in the head do not allow concentration, but as you dive into the complex and strictly follow the instructions, the restless mind “slows down.” At this stage, using your imagination, you can start working with images.
So, while tilting the head, we close our eyes and mentally try to see the neck being stretched in the same place where it is. We begin to listen to the sensations in this part of the body, imagine how the ligaments soften, “allowing” the joints a greater range of motion, how the blood flow through the vessels and veins accelerates. Thus, draw pictures on your inner screen. This brings awareness to the exercises.
When practicing joint gymnastics, Sukshma Vyayama yogis often overlook the following points:
- increase the load gradually. If discomfort occurs, reduce it;
- choose a variable pace - from slow to fast, avoiding monotony and haste;
- analyze sensations;
- ensure correct posture and calm breathing (in cases where you are not working with it purposefully);
- do not change the sequence of the complex;
- Perform joint exercises systematically and on an empty stomach.
For experienced practitioners, there is a type of yogic joint gymnastics called Sthula Vyayama, which roughly translates to 'rough exercises'. Often the same exercise can be performed in sukshma and sthula variations. In the latter case, when the body is prepared, the exercises can be performed in a tense manner with special breathing (accentuated exhalation) and the inclusion of deep squats, bending, running in place, and jumping. Such movements develop muscles, strength, endurance and other similar qualities.
The leading symptoms of most pathologies of the musculoskeletal system are pain and stiffness. To eliminate them, pharmacological drugs of various groups are used in orthopedics, traumatology, and rheumatology. But their constant use does not leave its mark on the human body and can seriously disrupt the functioning of the liver, kidneys, and stomach. Therefore, after stopping the acute inflammatory process and eliminating severe pain, doctors always recommend therapeutic exercises and physical education to patients.
Gymnastics for joints is indicated for all people over 40-45 years of age, especially with a hereditary predisposition to the development of arthritis, arthrosis, and gout. Regular training will help avoid destruction of bone, cartilage tissue, ligaments and tendons. It's not too late to start exercising when the first signs of joint diseases appear. On the contrary, performing gymnastic exercises will prevent the spread of pathology to healthy joint structures.
Basic principles of therapeutic exercises
It is important to know! Doctors are shocked: “An effective and affordable remedy for joint pain exists. " Read more.
Joint diseases are degenerative and inflammatory. But their invariable result is the destruction of hyaline cartilage and pathological growth of bone tissue. There are no pharmacological drugs in the pharmacy assortment, the use of which could restore destroyed joint structures. Therefore, the main goal of therapy is to prevent the progression of arthritis and osteoarthritis by improving blood circulation. Namely, this is what is observed when doing certain exercises regularly. What happens during training:
- cartilage, bones, and soft tissues receive the amount of nutrients and biologically active substances necessary for their full functioning;
- the muscle corset is strengthened, providing support for the vertebrae and joints in an anatomically correct position;
- the condition of muscle fibers is normalized, hypertonicity of skeletal muscles is eliminated - a common cause of pain;
- products of the inflammatory process and tissue breakdown, waste, and toxins are evacuated from the joint cavities;
- slow inflammatory processes in soft tissues and ligamentous-tendon apparatus are stopped;
- the production of synovial fluid is stimulated, which not only serves as a shock absorber for the articular surfaces, but also ensures the delivery of nutrients to the tissues.
It should be noted the healing and general tonic effect of joint gymnastics. Eliminating morning swelling and stiffness of movement improves a person’s well-being and mobilizes him to fight the disease.
Classification
Balm comes in the following types:
For joints and the spinal column, you can use Tibetan balm.
- Cream for moving joints and spine. It is considered a classic medicine, thanks to which it is possible to get rid of a painful attack and stop the inflammatory process in tissues. After applying the product to the skin, accumulated salts are removed from the body, intra-articular fluid and cartilage tissue are restored. Balm for joints and the spinal column is divided into 3 types: classic;
- Tibetan;
- forte.
The right approach to doing exercises
A set of exercises is prepared by a physical therapy doctor. It takes into account the form and stage of the disease, the degree of destruction of hyaline cartilage, weight, and age of the patient. The first training sessions must be carried out under the supervision of a doctor, who will show you how to perform the movements correctly and how many approaches are needed. The basic rule of joint gymnastics is the absence of any serious loads on the damaged joint. When you feel tired, you should rest rather than increase the pace, trying to complete all the exercises faster. What becomes the purpose of the classes:
- strengthening the muscles located next to the sore joint;
- elimination of stiffness, restoration of the previous range of movements;
- increasing the resistance of the joint to the effects of external and internal negative factors;
- strengthening the muscles of the spinal column, the condition of which determines the optimal distribution of loads on all joints.
The original methods of Gitt and Bubnovsky are very popular. These doctors have developed ways to treat pathologies without using any medications. They suggest restoring joints through frequent, low-range movements. Dr. Gitt suggests paying attention to small children who, after running and playing for a long time, sit down and begin to “dangle” their legs. They instinctively choose the right way to improve the function of their knees. Such movements do not load the joint, but at the same time stimulate the production of synovial fluid.
Joint gymnastics
Exercise therapy doctors advise not to try to quickly improve the condition of the musculoskeletal system. Intense, frequently repeated movements will only lead to greater abrasion and wear of the cartilage tissue, despite the gradually forming muscle corset. Doctors also recommend increasing the load gradually, and if pain or other discomfort occurs, immediately stop the workout.
During classes you can use comfortable orthopedic devices. For example, expanders and massage balls with spikes are suitable for developing the wrist joint. And exercises on an orthopedic mat will help you quickly get rid of pain in the hip, ankle, and heel joint.
A little about breathing. Doctors Gitt and Bubnovsky pay a lot of attention to the correct breathing rhythm. It enhances the therapeutic effect of gymnastics on joints and helps avoid fatigue. The inhalation should be deep, and the exhalation should be sharp and strong. Movements that require muscle tension should be performed while inhaling, and relaxing ones while exhaling.
Dr. Bubnovsky about breathing:
Brachial
Shoulder pain and limited range of motion are the leading symptoms of osteoarthritis and any form of arthritis. To eliminate them, you need to perform the following exercises 1-2 times a day:
- in a standing position, swing your straightened arms forward/backward, and then from side to side;
- sit on a stool, raise your shoulders 3-4 cm, and then make rotational movements with them;
- in a sitting position, move your shoulders forward and back, first alternately, and then simultaneously;
- stand up, make circular rotations with your arms;
- in a sitting position, try to touch the opposite shoulder with your palm, placing your hand behind your back.
At the beginning of training, the number of approaches does not exceed 3, including 5-10 movements. As the muscle corset strengthens and pain subsides, each exercise can be performed 50-70 times.
Even “advanced” joint problems can be cured at home! Just remember to apply this once a day.
Ankle
Joint gymnastics for the ankle is carried out while sitting on the floor and stretching out your legs. The most therapeutically effective movements are:
- bring your legs together and spread them, lifting them above the surface by 10-15 cm. To maintain stability, you can rest your hands on the floor;
- Place your palms on the floor behind your back, lift your legs one at a time, and then together;
- pull the toe towards the body without lifting the heels from the surface, and then move them as far as possible in the opposite direction;
- bend one leg at the knee, make rotational movements with the other. Do the same with the other limb;
- lean forward, trying to touch the toes of the opposite foot with your hand, then do everything with the other hand and leg.
Exercises for the leg joints should be repeated 20-30 times. During training, you need to listen to the sensations that arise. If during the execution of any movement the pain subsides, the muscles tense pleasantly, then it can be repeated much more often.
Knee
People who are overweight or who frequently lift heavy objects suffer from knee pain. To eliminate discomfort and prevent further destruction of joint structures, it is necessary to perform the following exercises 25-30 times daily:
- lie on your back, straighten and raise your legs, imitate riding a bicycle;
- in a lying position, slowly bend your legs, pulling your knees to your chest, first alternately, and then together;
- roll over on your side, bend the leg at the top at the knee, lift it 20 cm. Straighten your leg, swing forward. Perform the complex using the other limb;
- lie on your back, bend your legs, and place a thick cushion or small ball under them. Move your limbs towards the body, trying to squeeze the object;
- lying on your back, bend your legs, spread your knees as far as possible, and then bring them together.
Such exercises are recommended during the rehabilitation period after endoprosthetics. Frequent monotonous movements with small amplitude promote tissue restoration and increase range of motion in the operated joint.
Hip
Exercise therapy doctors recommend that older patients do exercises for the hip joints every day, performing each movement 20-30 times. It is this joint that is most often damaged due to increased loads on it while walking. It is possible to avoid coxarthrosis with the help of the following exercises:
- lie on your back, straighten your legs. Slowly bend them at the knees and alternately pull them towards the chest, directing the right knee to the left shoulder and vice versa;
- roll over onto your right side, raise your left leg 15-20 cm. Do the same with the other limb;
- sit on a low stool with your feet shoulder-width apart. Bring your knees together and apart, first alternately, then simultaneously;
- stand up, stretch your arms forward. Swing your straight leg first back and forth, then from side to side. You can help yourself by leaning on the back of a chair or a wall;
- in a standing position, make rotational movements first with one, then with the other leg.
Walking in the fresh air over short distances goes well with therapeutic exercises for arthrosis of the hip joint.
Elbow
Elbow exercises can also be performed to reduce the severity of pain in the wrist and shoulder joints, as well as with lateral or medial epicondylitis. Performing the following movements 20-30 times daily brings good results:
- sit down, place your palms on your knees with the inside up, raise your hands, touching each one first to the right, then to the left shoulder;
- in a lying position with bent knees, lift your body, trying to touch the opposite knee with your elbow;
- sit on a low stool, bend your arms, simultaneously spread your elbows to the side, trying to ensure that the main load falls on your forearms;
- in a sitting position, extend your arms in front of you, bend them at the elbows alternately, then together;
- stand up, bend your arms in front of you, spread your elbows as wide as possible, and then bring them together.
Such exercises for joints are recommended for people who often perform monotonous hand movements due to their line of work. Gymnastics helps avoid muscle strain by strengthening them.
Bubnovsky
Most exercises according to the Bubnovsky method are performed using additional devices and weights. The complex of joint gymnastics according to Bubnovsky is indicated for people with arthrosis and those undergoing rehabilitation after endoprosthetics.
Dr. Bubnovsky’s complex of adaptive joint gymnastics:
- Make a circular motion with your hands. At the highest point of their rise, inhale and exhale. Repeat 3-4 times. At the end of the exhalation, actively contract the abdominal muscles.
- Sitting on the floor, stretch your arms forward, legs straight. Without changing your position, begin to move forward and backward using the contraction of your gluteal muscles and the strength of your heels. Perform the exercise for 1–2 minutes.
- Sitting on the floor, raise your buttocks, bend your legs at the knee joints, and rest your hands on your back. Rotate your knees sideways for 45–60 seconds without lifting the outside of your feet off the floor.
- Without changing your position, place your feet slightly wider than your shoulders. Bend your knees alternately to the sides.
- While sitting, straighten your legs at the knee joints. Work the ankle joint: contract the muscles of the lower leg, pulling and relaxing the toe. The optimal number of repetitions is 20–30 curls.
- In a sitting position on the floor, place your hands behind your back on the floor, bend your leg at the knee joint and begin to pull it towards your stomach. Do 15–20 repetitions with each leg.
- Lying on the floor, rest your feet and shoulder blades on the floor. Raise your pelvis up 10–15 times, perform 2 approaches.
- Lying on your stomach, take turns raising your straight legs to a height of 10–20 cm 15 times, perform 2 approaches.
- In a kneeling position, place your hands on the floor and begin to bend and straighten your elbow joints, gradually transferring your body weight to them. Perform 10–12 times, do 3 approaches.
- Take a small towel and sit on the floor with your legs stretched out. Wrap the towel around your feet and grab the 2 free ends with your hands. Begin to pull your torso toward your feet by pulling the ends of the towel. You need to do 3 sets of 15–20 rows.
In addition to the usual complex of joint gymnastics, Dr. Bubnovsky has developed additional ground exercises.
7 ground exercises according to Bubnovsky:
- Lying on your back, put your hands behind your head and fold them into a “lock”, cross your legs. In this position, raise your torso and touch your knee with one elbow. After 10-15 times, switch your legs and continue doing the exercise.
- Lying on your back, raise both legs and begin doing the scissor exercise for 30 seconds. Perform 2 approaches. As you work, gradually raise your legs up.
- Do the same joint exercise, only on your stomach.
- While lying on your side, move the leg that is on top as much as possible back and as much as possible forward at a high pace. After 20 reps, change sides and do 2-3 sets.
- In a knee-elbow position, lift your leg, bent at the knee joint, as high as possible, and then try to touch your buttocks with your toe. Repeat 15 times on each leg.
- Perform 10–12 abductions of the leg to the side.
- While lying on your stomach, bend your legs at the knee joints one by one. Perform foot turns for 30 seconds.
These exercises can be performed as a warm-up before weight training.
A little testing
Each person can independently assess the condition of their joints. To do this, you should use a test developed by orthopedists. You need to perform a few simple exercises and remember the sensations that arise:
- touch your chin to your chest and then throw your head back;
- tilt your head to each shoulder in turn, trying to touch them with your ears;
- put your hands behind your back and clasp them in a “lock”;
- squat 3-4 times without lifting your feet from the floor surface;
- lean forward without bending your legs, touch your feet with straightened palms;
- bend back to see an object lying on the floor;
- lean as much as possible in one direction and then in the other.
If performing the exercises did not cause any difficulties, then everything is fine with the joints. But this does not mean that you do not need to train yet. Quite the opposite: regular exercise will help keep your joints healthy and your ligaments strong and elastic for a long time. This is especially true for older people, in whose bodies collagen production decreases and bone formation processes slow down.
You should contact an orthopedist if you hear characteristic clicking or crunching noises during testing. Warning factors include painful sensations and (or) inability to fully perform the exercises. This may indicate existing problems with the joints and the need to eliminate them with the help of therapeutic exercises.
Execution Rules
Physical therapy exercises give tangible results. The correct execution technique depends on the following rules:
- For classes to be effective, gymnastics are performed daily or at least 3 times a week. Number of repetitions – 10-15 times. Muscles and joints are worked out, warmed up, enriched with oxygen and nutrients.
- The exercises are performed smoothly, without jerking. If you cannot exercise at full capacity during the training process, do not overpower yourself. Gradually, the range of movements will increase, and it will become easier to practice.
- If a person has problems with the spine, twisting and rotational exercises are performed with caution.
- If there are acute joint pathologies, training should be postponed.
Articular gymnastics is often forgotten until we are faced with diseases of cartilage, tendons, and ligaments. Regular exercise for 10-15 minutes per session is a preventive measure, so you should not neglect them.
Warm-up for joint exercises
Elements of this type of physical activity are part of physical therapy or an independent complex. Those who wish can do it at home or in the gym, but training activities in the fresh air are considered effective. This way the blood is better enriched with oxygen and delivers nutrients to the joint. It regains elasticity, strength, and flexibility. The advantage of the technique is the absence of strong tension during training. The effect depends on the number of repetitions and systematic training.
Complexes of exercises are designed for all muscle groups, ligaments, and joints. They begin with a warm-up lasting 5-15 minutes. This is enough to warm up the cartilage and tendons.
- Feet. Exercises are performed standing or sitting. Feet together, soles pressed to the floor. Just move your toes for a minute, then move on to smoothly rolling your foot from heel to toe, and then back. To complete the warm-up, rotate the talocaleonavicular joint in one direction and then the other.
- Knees. The exercise is performed standing or sitting. Bend your legs at the knees, alternately move them to the sides, then back. You can check whether your execution is correct in the following way: tension will appear in the thigh muscles.
- Back, spine. To warm up the intervertebral joints, bends, bends, and rotations of the body are performed. Do the exercises smoothly and carefully. The warm-up complex includes the “cat” exercise, bending back and forth, left and right, rotating the torso and hips clockwise and counterclockwise. If the patient has problems with the spine, then the program will have to be abandoned. The doctor will advise on acceptable types of further exercise.
- Neck, shoulders. The exercise is performed standing or sitting. The arms are spread to the sides and they perform alternating rotations. From this position, the head is tilted forward, backward, to the sides, and the neck is rotated clockwise/counterclockwise.
- Elbows. The exercise is performed standing. Place your arms along your body, clench your fingers into fists. Alternately, bending your elbows, raise your hands to your forearms, and make rotational movements with your elbows in one direction and the other.
Joint gymnastics for beginners
The complex of joint gymnastics for beginners is designed for patients with problems in bone joints. This group includes athletes who have been injured. People who have not previously paid enough attention to sports can also begin classes in this program. Its goal is to thoroughly warm up the tendons, cartilage, and muscles, preparing for the main load. Therefore, the training begins with warm-up exercises, gradually moving on to complex ones. Otherwise, a person in the process of sports work risks receiving additional injuries.
Complex of joint gymnastics
- Stand on the mat, place your feet at the level of the width of your pelvis, lower your arms. Inhale, raise your arms, stretch forward. Exhale, lower one arm, and stretch the other up for 10 seconds. Reach for your lowered hand, bend over. Hold your body for 5-10 seconds, straighten up. Change hands. Bend over and hold for 5-10 seconds. Repeat 10-15 times in both directions. The exercise stretches the oblique abdominal muscles and vertebral joints.
- Feet together, hands on the waist. Inhale, lower your head. Touch your chin to your chest. Hold for 5-10 seconds. Exhale, raise your head, stretch your chin forward. Hold for 5-10 seconds. Number of repetitions – 5-10 times. Perform movements smoothly. If you feel dizzy, consult your doctor.
- Tilt your head to the right. Inhale, place your right hand on your left ear, pull it towards your shoulder. Hold for 5-10 seconds. Exhale, straighten your head, return your hand to your belt. Do it in the other direction. Number of repetitions – 5-10 times. If dizziness does not go away, consult a doctor for advice.
- Clasp your hands. Put it forward with the lock away from you and lift it up – inhale. Push the shoulder blades down to the center of the back, bend in the thoracic region - exhale. Lower your head down without lowering your arms – inhale. Tilt the body to the left - exhale. Straighten your back - inhale. Tilt to the right - exhale. Give up. Repeat all movements 5-10 times.
- Clasp your hands behind your back. Lower your shoulders down, directing your shoulder blades to the center of your back, trying to touch them. Leave your arms in this position, place your feet shoulder-width apart. Bend down. Stretch your arms forward and up. Straighten up. Without unclenching your arms, pull forward, your back is round. Repeat the exercise 5-15 times.
- Feet hip-width apart, arms to the sides at shoulder level. Raise your palms, reach forward with their bases, trying to push apart the invisible barrier. Turn your hands over with your fingers down and stretch in the same way.
- Raise your right hand, throw it behind your head, place your palm between your shoulder blades. Take a breath. With your other hand, press on your elbow, and while exhaling, bend to the left. If you can’t reach your shoulder blades, don’t be upset. Start as far as your tendons allow. Gradually, with regular exercise, the amplitude can be increased. Perform the same movements in the other direction, the number of repetitions is 5-10 in each direction.
- The exercise is similar to the previous one. Raise your right hand up, throw it behind your head, and place it between your shoulder blades. Turn the second one behind your back from below, placing your palm at the level of your shoulder blades. Clasp your hands while inhaling, stretch, exhale. Do everything in the other direction. The number of repetitions is 5-10 times. It will not be possible to perform the exercise correctly right away. A systematic approach will increase the range of motion in a month.
- Stand with your legs wide apart and turn your feet 45 degrees. While inhaling, perform a deep squat, forming a right angle with your thigh and shin. Exhale, straighten your knees. Repeat 5-15 times. The exercise warms up the knee joints.
- Starting position – deep squat. The back is straight. As you inhale, shift your body weight to one leg, lift the other, and pull your knee up. As you exhale, return to the starting position. Repeat for the second leg. The pace of execution is moderate.
- Place your feet wide parallel to each other. Take a breath, lean forward. Place your fingertips on the floor, bend your body, bending your knees. As you exhale, straighten your legs without straightening your back. Repeat the exercise 10 times at a moderate pace.
- From the previous position, bend lower, placing your elbows on the floor. Legs straight. Hold for 10 seconds. Move your hands further behind your legs, deepening the tilt. Hold for 10 seconds. Gradually the static is increased to a minute.
- Place your legs wide, parallel to each other. Lean forward and touch the floor with your hands. Squat down on one leg and lunge to the side. The feet do not come off the floor. Stay in the lower position for 10 seconds and lunge onto the other leg. Number of repetitions – 5-15 times in each direction, depending on physical fitness.
- From the previous position, lower yourself down and pull the toe towards you. Stretch your leg muscles well. Do the same movements in the other direction.
- The exercise works the hip joint. Starting position – standing, feet together, hands on the belt or to the sides. Raise one leg high, bending your knee. Perform 10 external rotations of the hip joints. Repeat for the second leg.
- Perform the previous exercise by internally rotating the knee.
- Turn around, one leg in front, the other behind. Feet pressed to the mat, knees straight. Inhale - bend down without lifting your soles off the floor, keeping your back straight. Exhale - straighten up. Repeat 10 times. Turn around in the other direction and repeat the exercise.
- In the same position, lean forward. Place your hands on your leg and pull the toe towards you, warming up the Achilles. Then repeat everything in the other direction.
- The starting position of the exercise is the same. Lean forward towards your leg and lunge, lowering the knee of your other leg to the floor. Stretch your pelvis forward, stay in this position for 5-10 seconds. Return to starting position. Turn around and repeat the exercise.
- From a vertical position, lower your body forward, placing your palms near your feet on the floor. Straighten your knees, try to place your stomach on your thighs. Hold for 10 seconds, inhale, and raise your back round. When bending and lifting, try to stretch the intervertebral joints. Repeat the exercise 5-15 times.
This is the main complex for beginners. If a person gets into the rhythm, the load is increased: more repetitions of each exercise are done, the amplitude of movements is increased. It is not recommended to train with force, so as not to tear ligaments or damage muscles during exercise.
Joint gymnastics for the elderly
Physical therapy classes for older people are less intense. The warm-up program is similar to the previous one, only the number of repetitions changes. While doing the exercises, listen to your own feelings. If you experience discomfort during exercise or fatigue, slow down the pace.
The training begins with a warm-up. Its duration for older people is longer to work out each joint. Exercises from the main program are gradually added, focusing on a person’s subjective feelings. If it is difficult to maintain balance when performing exercises, the help of improvised objects is allowed. By exercising 2-3 times a week, people forget about problems with joints and ligaments.
Olga Yanchuk’s joint gymnastics classes are available to everyone. When implementing the developed program, it is important to listen to subjective sensations. In the first days, you need to train under the supervision of a coach or instructor. He monitors the correct execution of exercises and suggests the pace for classes. Later, exercise therapy is carried out at home in a comfortable environment for the person.