Performance
Leg raise while lying on your side
- Initial position. Lie on your side, extend your lower arm and both legs so that they form a straight line with your body. The head rests on the lower hand. The upper arm bent at the elbow rests the palm on the mat in front of the chest. Fingers point towards the head.
- Exhalation. Lift both legs as one, and then try to lift them even higher by lateral flexing your spine.
- Inhale. Lower your legs until they almost touch the mat. Repeat the side leg raise 10 times and then return to the starting position. Turn over to the other side.
Laying the patient on his side.
⇐ PreviousPage 5 of 13Next ⇒Equipment: pillows, bolsters, foot rests
| No. | Sequencing | Rationale |
| 1. | Explain to the patient the essence and course of upcoming actions | Ensuring patient awareness |
| 2. | Inquire about the condition, obtain consent to move | Ensuring patient rights |
| 3. | Lower the head of the bed, remove the pillow from under the patient's head | Providing preparation for relocation |
| 4. | Move the patient in the supine position closer to the edge of the bed | Providing preparation for relocation |
| 5. | Bend the patient’s left (provided he turns onto the right side) leg at the knee joint, bringing the left foot into the right popliteal cavity | Ensuring correct body biomechanics |
| 6. | Place one hand on the patient's thigh, the other on the shoulder, turn the patient on his side towards you | Technique for turning the patient on his side |
| 7. | Place a pillow under the patient's head and shoulders | Reducing cervical lateral bending and neck muscle tension |
| 8. | Place the patient's arms in a slightly bent position, with the arm on top resting at shoulder level (with a pillow underneath) and the arm on the bottom resting on a pillow next to the head. | Providing: - protection of the shoulder joints - facilitation of chest movements - improvement of pulmonary ventilation |
| 9. | Place a bent pillow under the patient's back | Ensuring that the patient is kept in the lateral position |
| 10. | Place a pillow under the leg on top, slightly bent at the knee joint (from the groin area to the foot) | Prevention of bedsores, prevention of joint bending |
| 11. | Provide support at a 90 degree angle for the leg below | Ensuring the dorsal bend of the foot, preventing its sagging |
| 12. | Inquire about the patient’s condition and the comfort of the position | Ensuring comfort |
| 13. | Wash and dry your hands | Ensuring infection safety |
PLACEMENT OF THE PATIENT IN THE BED IN VARIOUS POSITIONS
Place the patient in the Sims position (intermediate between the prone and side-lying positions).
Equipment: pillows, bolsters, foot rests.
| No. | Sequencing | Rationale |
| 1. | Explain to the patient the essence and course of upcoming actions | Ensuring patient awareness |
| 2. | Inquire about the condition, obtain consent to move | Ensuring patient rights |
| 3. | Move the head of the bed to a horizontal position, remove the pillow | Providing preparation for relocation |
| 4. | From the “lying on his back” position, transfer the patient to the “side lying” position and partially “lying on his stomach” | Ensuring patient movement |
| 5. | Place a pillow under the patient's head with the head turned to the side | Preventing excessive neck flexion |
| 6. | Place a pillow under the arm on top, bent at the elbow and shoulder joints at an angle of 90 degrees | Maintaining correct body biomechanics |
| 7. | Place the patient's lower arm along the body on the bed without bending it | Maintaining correct body biomechanics |
| 8. | Place a pillow under the bent leg on top so that the lower part of the shin is located on the lower third of the thigh | Prevention of: - inward rotation of the hip - bending of the limb Prevention of bedsores |
| 9. | Ensure that your bottom foot rests at a 90 degree angle. | Ensuring proper dorsiflexion of the feet and preventing foot sagging |
| 10. | Inquire about the patient’s condition and the comfort of the position | Ensuring comfort |
| 11. | Wash and dry your hands | Ensuring infection safety |
PLACEMENT OF THE PATIENT IN THE BED IN VARIOUS POSITIONS
Laying the patient on his back (patient in passive position)
Equipment: pillows, bolsters, foot rests.
| No. | Sequencing | Rationale |
| 1. | Explain to the patient the essence and course of the upcoming movements | Ensuring patient awareness |
| 2. | Inquire about the condition, obtain consent to move | Ensuring patient rights |
| 3. | Place the head of the bed in a horizontal position | Required condition |
| 4. | Place a rolled towel or small pillow under your lower back | Supporting the lumbar spine |
| 5. | Place a pillow under the patient's upper shoulders, neck, and head | Preventing flexion and contracture in the cervical vertebrae |
| 6. | Place the rollers along the outer thighs, starting at the trochanter of the femur | Preventing hip external rotation |
| 7. | Place a small pillow or cushion in the area of the lower third of the leg | Reducing pressure on heels, preventing bedsores |
| 8. | Ensure your feet rest at a 90 degree angle | Promoting dorsiflexion and preventing foot sagging |
| 9. | Turn the patient's arms palms down and place them along the body, place pillows under them | Reducing excessive rotation of the shoulders, preventing bending of the elbow joint |
| 10. | Place hand rollers in the patient's hands | Decreased finger extension and abduction of the 1st finger |
| 11. | Inquire about the patient’s condition and the comfort of the position | Ensuring comfort |
| 12. | Wash and dry your hands | Ensuring infection safety |
⇐ Previous5Next ⇒
Recommendations for execution technique
- In the 2nd phase, the legs should form a single unit when lifting. To do this, the adductor muscles of the lower leg press it against the upper leg, and the abductor muscles of the upper leg lift the upper leg. The knee extensor muscles straighten both legs at the knees, and the plantar flexion muscles of the foot pull down the toes.
- At the beginning of the exercise, the legs are lifted at the hip joints, and the torso remains motionless. The lumbar area does not come into contact with the mat. Then, as you rise further, the muscles that perform lateral flexion of the spine come into action. In this case, the side of the pelvis that is on the upper surface of the body is pulled closer to the chest. In this phase, a lateral tilt of the pelvis occurs, and the lumbar region lowers and presses against the mat.
- During the entire leg lift, lying on your side, your legs should be exactly one above the other. Do not allow them to deviate forward or backward from the longitudinal axis of the body.
- Mental image. To maintain the correct line and quality of movement, imagine a bow with a taut string. When you lift your legs, your body bends like the shaft of a bow.
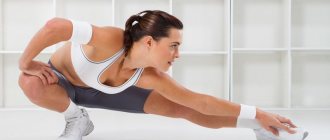
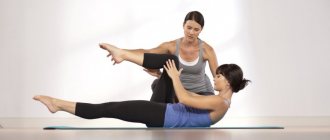
Frog Pose (Mandukasana)
There are also exercises in yoga that are great for stretching into splits. Mandukasana, otherwise called frog pose, will also help with this.
Exercises in the gym - tips for choosing the best set of exercises. Recommendations for beginners and tips on how to practice correctly (85 photos)A set of exercises for gaining weight - basic exercises and recommendations for selecting weights for exercises
We perform squats with dumbbells - a description of the technique of performing the exercise. Subtleties and secrets of squats for girls (125 photos)
In order to perform it correctly, follow these steps:
- First you need to get on all fours.
- Next, you should very smoothly begin to spread your knees to the sides. In this case, a strong stretch should be felt in the area of the inner thighs, but there should be no pain. Once you feel a little pain, it is highly recommended to stop.
- Then, while in this position, you need to place your feet on the floor so that your heels point in the direction of each other.
- Your forearms should be on the floor and parallel to each other.
- Make sure there is no arch in your lower back. The abdominal muscles are tense.
- The pelvis should be aimed at the feet.
Notes
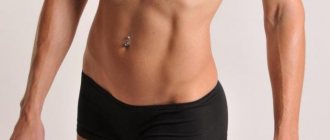
Lifting the legs while lying on your side allows you to increase the tone of the abductor and adductor muscles of the thigh to a certain extent; its main task is to strengthen the muscles that perform lateral flexion of the spine and develop skills in stabilizing the power center.
Lateral flexion of the spine
. Ideally, the spine should be flexed strictly to the side. This movement requires precise coordination and simultaneous contraction of muscles located in the front (primarily the obliques and iliopsoas), on the sides (quadratus lumborum) and in the back of the body (erector spinae, semispinalis and parts of the deep muscles). spinal muscles). The main work is performed by the oblique abdominal muscles, and the back muscles only keep the torso from bending forward. However, often the back muscles tense too much, which causes excessive arching in the lower back. In such cases, you can slightly move your legs forward and pull in your stomach so that your body has the shape of a banana when viewed from above. This allows for optimal use of the obliques.
What else can help treat iliotibial band syndrome?
Although Frederickson's results were impressive, his study had some limitations.
First, there was no control group, so it is unclear whether the improvement occurred as a result of the exercise or as a result of taking a break from running.
Additionally, his protocol does not include exercises to strengthen the external rotator muscles of the hip.
Does it make sense to stretch the PBT?
Do not do that!
PBT is not very fond of stretching exercises for the following two reasons...
First of all, this is not a stretchy fabric. In terms of rigidity, PBT is more similar to a car tire than a rubber band.
Second, exercises that are supposed to stretch the TJ don't actually stretch it much, since it attaches to the femur in several places.
Instead, focus your efforts on stretching the muscles that attach to the PBT, namely the gluteus maximus and the tensor fascia lata.
The Frederickson Protocol already contains the best stretching exercises for PBT.
Deep massage for iliotibial band syndrome
Using a foam roller to loosen the soft tissue around the PBT is a great idea, just be careful not to knead the painful area itself.
Remember that the pain of PBT syndrome is caused by irritation of the very sensitive area between the protuberance of the femur and the PBT, so don't irritate the area further!
Some people find that a certain type of running shoe irritates their PBT, but there is no scientific evidence that any type of shoe or orthotic can cause or treat PBT.
All the evidence so far points to the root cause being in the hips, not the feet, so your #1 priority should be strengthening your hip abductors and external rotators.
Abduction (raising) of the straight leg while lying on its side
Abduction (raising) of the straight leg while lying on its side
- Isolated/single-joint
- Traction
- Open circuit
- With your own body weight
- Beginner and intermediate levels of physical fitness
This exercise, perhaps more than any other, was popularized in the 1980s by the best-selling book The Jane Fonda Workout. The Oscar-winning film actress was a pioneer in the popularization of aerobics and home workout videotapes.
Features of symptoms depending on the type of pathology
Let's look at diseases that can affect the hip joints and be accompanied by pain at night. Let us pay attention to the characteristics of each disease, the reasons contributing to its development, and the specific differences in the pain syndrome.
| Name of the disease | Causes and predisposing factors | Features of pain and other symptoms | Intensity | Prevalence | Primary/Secondary |
| Rheumatoid arthritis | Articular: Immunological damage to articular connective tissue. Extra-articular: 1. Genetic predisposition. 2. Hypothermia. 3. Stress. 4. Physical overexertion. 5. Recent illnesses (flu, sore throat, otitis media, etc.). | The disease begins in small joints (usually both hands, symmetrically) and is accompanied by pain, stiffness at night and in the early morning hours. Further, as the disease progresses, large joints are also involved in the pathological process; in particular, pain in the hip joint may appear. The greatest intensity of pain is observed in the second half of the night or in the morning. There is an increase in pain with active movements in the hip joint. They are accompanied by the appearance of effusion, and the skin over them becomes swollen and hot to the touch. The range of motion in the affected joints decreases, and over time they become deformed to the point of complete immobility. The pain syndrome decreases in the supine position, without making active movements in the affected joint. | Medium or high | 0,5 – 1,5 % | Secondary |
| Coxarthrosis | Articular: 1. Increased load on articular cartilage. 2. Changes in the structure of articular cartilage. 3. Trauma. 4. Impaired blood supply to cartilage. Extra-articular: 1. Anomalies of skeletal development. 2. Metabolic disorders, excess weight. 3. Genetic predisposition. | The pain syndrome is initially moderate in nature, subsequently its intensity and strength increase. The first stage of the disease is characterized by initial pain, pain associated with the onset of active movements in the affected joint; at rest, it significantly decreases or disappears completely; at stages 2-3, it can be observed both at rest and at night. When moving, crepitus and crunching occur, there is limited mobility, and a decrease in range of motion. Characteristic deformation of the hip joint. The patient limps when moving, the pain intensifies when changing body position, starting to walk, and over time even with the slightest movements. The pain radiates to the knee and groin. The muscles surrounding the joint are tense, and an antalgic position of the limb is characteristic (adduction, flexion and rotation, outward rotation). | Medium or high | 10 – 15 % | Primary |
| Ankylosing spondylitis (Rhisomelic form) | Articular: 1. Immunological damage to articular connective tissue. 2. Formation of syndesmosis. Extra-articular: Hereditary predisposition. | The disease occurs with the appearance of pain in the lumbosacral region (involvement of the spine and iliosacral joint in the process); the hip joint may be involved in the pathological process. When the hip joints are affected, the patient is bothered by a dull, constant pain that can radiate to the groin, knee or sacrum. The pain syndrome is maximum at night and in the early morning hours. Over time, the mobility of the joint is limited and the range of its movements decreases due to deformation. The disease occurs in the form of exacerbations and remissions. Complete immobility occurs 15-20 years from the onset of the disease. | Average | 0,8 – 1 % | Secondary |
| Infectious arthritis | The presence of a focus of infection in the body (borreliosis, tuberculosis, less often pyogenic infection). | The disease begins gradually in the case of tuberculosis or borreliosis, acutely in the case of pyogenic infection. The pain syndrome is usually unilateral, localized in the joint area, and may radiate to the groin and knee. Additional symptoms include dysfunction of the joint, its deformation and defiguration (change in shape), limited mobility, and redness of the skin around the joint. There are symptoms of general intoxication, increased temperature (from subfebrile to hectic - from 38 to 40). | High | 2-10:100000 | Secondary |
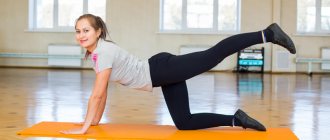
Exercise technique
Slowly lift your right leg outward and outward through the full range of motion. Pause, slowly lower your leg, then repeat the exercise. Roll over to the other side and repeat the exercise for your left leg.
Stabilizing muscles
- Torso: Abdominal muscle group, erector spinae, quadratus lumborum.
INITIAL POSITION
- Lying on your right side, your head rests on your right hand.
- Maintain a horizontal body position and do not bend your lower leg.
Tips on proper exercise technique
:
- Do not allow your pelvis to move forward or backward while performing the exercise; engage your abdominal muscles to stabilize your spine and pelvis.
- Do not externally rotate your hip when lifting your leg.
- Work slowly and do not use inertia.
- Avoid excessive hip abduction.
| Motion Analysis | Joint |
| Joints | Hip |
| Directions of joint movements | Up - abduction (abduction) Down - adduction (adduction) |
| Mobilizing muscles | Gluteus medius and minimus muscles Tensor fascia lata |
Triangle Pose (Utthita Trikonasana)
Among the many yoga asanas, there are also those that are suitable for stretching the neck. For example, Utthita Trikonasana helps stretch the neck and back, and also strengthens the leg muscles and helps open the hip joints. Performance:
You need to stand up straight, spread your legs wide, then turn your left leg 90 degrees to the left, and turn your right leg slightly inward.
The face also looks up, the gaze should be directed to the fingers of the right hand.
Next, you need to stand in this position for some time, after which you need to repeat the same on the other side, starting with the right leg.
Fowler's position
This is a certain position in the patient’s bed, which is characterized as a half-sitting position. This position is formed by placing the patient on the surface of the bed with the top raised at an angle of 45 to 60 degrees.
The patient's body is also secured with bolsters, according to correct biomechanics, and a perpendicular support is given to the feet. In this position, the patient, who is in clear consciousness, will be comfortable communicating with people, eating and performing other procedures.
Forced
The forced position of the patient in bed is observed when the patient, experiencing severe pain, takes a position that, as it seems to him, at least a little, eases the discomfort. The position of the patient’s body is a very important characteristic, which in certain cases can indicate the location of pain and the disease itself.
There are many poses that in one way or another accompany certain diseases. For example, with acute pancreatitis, the patient lies on the bed with his legs pressed to his chest, in the so-called “fetal position.” With peritonitis, the patient tries to take a position of complete immobility, since any movement causes severe pain.
With a disease such as tetanus, the patient arches during convulsions, resting his head and legs on the edges of the bed.
Methodology
Before stretching, you should warm up your muscles with a light warm-up in the form of running, squats, jumping rope, swinging your arms and legs. The duration of the warm-up is determined individually, according to the age and physical characteristics of the child, but no more than 15-20 minutes.
Each stretching exercise is carried out in 4 stages:
- initial position,
- stretching,
- exit from the stretch,
- interval pause.
During execution, the pulse should be smooth, well-filled, and breathing should be calm. The movement begins with inhalation. Exhale slowly while stretching. The main indicator of positive dynamics is the absence of pain during and after classes.
But what about the hoop – is it effective?
Many people believe that hoop training is the best exercise for losing weight on your sides. Let's see if this is really true? It is believed that due to the gentle massage of the abdomen and hips, the exercise machine allows you to completely remove the sides at home. Modern hula hoops are made of special materials and have additional attachments that enhance their massage effect.
The hoop is not as simple as it seems at first glance!
For the effect to appear, you need to spin the hoop for at least 20 minutes daily.
However, gynecologists warn women against using a hoop. And the massage effect that the hoop gives is not so soft. If your abdominal muscles are already in good tone, then twist to your health, do exercises for the sides and everything will be fine.
If your abdominal muscles are still weak, rhythmic impacts of the hoop surface against the walls of the abdominal cavity can cause health problems - ranging from bruises to microtrauma of internal organs.
It is no coincidence that hoop training has contraindications:
- any stage of pregnancy;
- gynecological diseases;
- inflammatory processes in the body;
- diseases of the gastrointestinal tract.
Even if you are in excellent shape, you should not train longer than the allowed time.
Prone position
This position is recommended for the patient if he already has a risk of developing bedsores.
To achieve this position, the patient is carefully placed on a horizontal surface without pillows. The head is turned to the side and a narrow small cushion is placed under it to avoid unnecessary stress on the vertebrae. Below the level of the diaphragm, a pillow is placed under the abdomen to relieve pressure on the spine. The arms must be raised and bent so that the hands are at the level of the head. The legs are also secured with bolsters, and pads are placed under the lower part.