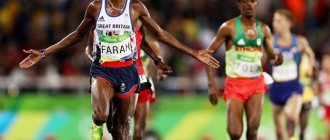
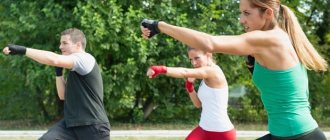
Hello dear readers of our site! Let's talk today about what exercises there are for long-distance running. By starting your day with a run, you will receive the following bonuses:
- Self-esteem will improve.
- Muscles are strengthened.
- The aging process is delayed.
- Your mood improves.
- Potency increases in men.
From the list it is clear that cross-country exercise is very useful for physical and emotional well-being.
Preparation
Before going to the stadium, you need to choose comfortable shoes and sportswear. If the surface is soft, take sneakers in which you will be comfortable and will not cause discomfort if you stay in them for a long time. If the surface is hard, you need to choose very soft shoes, otherwise your muscles will quickly become clogged and your knee joints will begin to ache. Clothing should be comfortable and loose, in which you will be comfortable for a long period of time.
Before class, you should not eat heavily. Also avoid heavy foods (digestibility categories 3-4). This will make training difficult, and you won't last long. Plus, you may experience nausea and gag reflexes. If you are very hungry, eat an apple or a small sandwich.
Where to begin? If you have never done this before, it is better to start gradually. We went for a run, got tired, walked, recovered and sped up again. Ten minutes on the first day will be enough. See how you feel, add 5 minutes every 2-3 days. After 3 months, you will be able to move calmly for 40 to 60 minutes at a good pace, which is about 8 km.
Periodization of training
Combine different types of training based on periodization—changing your training focus to get you into peak condition before a specific race.
In summary, a 6-12 week marathon training cycle can begin with a baseline of running volume, progressing to speed training, then progressing to threshold training, and finally returning to speed training.
You can periodize your training plan, including half marathon, 10 km, 5 km in your marathon training and at the same time continue to run long runs on weekends.
Lane Anderson, coach of Olympian Diane Nukuri-Johnson (2:30 marathon), Fr.
Breath
Oxygen is very necessary for our body; without it, not a single cell can live long. When you breathe, carbon dioxide is removed from the body and oxygen is delivered. The higher the speed and the longer the distance, the more the body needs this exchange and a person switches from breathing through the nose to breathing through the mouth. People often argue about what to breathe, chest or stomach? Experts recommend using the stomach (diaphragm), this type of breathing allows you to use your lungs as much as possible and fill them completely with air.
Technical base
Scientists carried out research and came to the conclusion that gait, like running, is individual for each person, but there are general principles of correct running, and we’ll talk about them now.
The axis of the human body should be level, tilted 5-7 degrees forward, relative to the surface. As the speed increases, the angle of inclination also changes upward. You should not throw your head back or lower it too far forward, this makes balance difficult, keep it straight. Your shoulders should be relaxed, otherwise, in a stiff state, they will compress your lungs, and you will not be able to breathe freely. The pelvis must be level; excessive protrusion forward or backward will lead to imbalance of the body and this will significantly affect efficiency.
The gaze should be directed in the direction of movement. The feet are straight, parallel to each other. If the toe is pointed to the side, you will overload the muscles and ligaments, which will not benefit you.
Hands play an important role in running; they create balance and set the rhythm in movements. The faster you start moving your arms, the faster your legs start working and your pace increases.
At first, it will be difficult to keep this in mind and control all the necessary rules, but over time, by gradually adjusting your work, you will put everything on the shelf and will do it automatically.
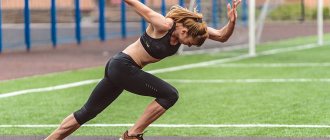
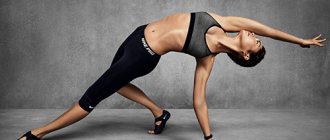
There are special exercises for long-distance running that help you master the basic movements correctly.
Impact of speed training
Even if your VO2 max is no longer improving, it's worth working on your vVO2 max.
vVO2 max is the pace at which you run when you first reach VO2 max. This is not your fastest pace, but it reaches your aerobic threshold.
In other words, this is approximately 80% of the maximum pace for a distance of 1000 m.
It is believed that speed training forces the body to use other energy systems that are not used in slower training (such as long running). This way you become more economical at a fast pace and (in theory) should become more economical burning fat at a slower marathon pace.
University of Lille physiologist Véronique Billat says another benefit of speed training is the “restoration of elastic energy” - the elasticity you get from stretched muscles with each successive step.
High hip raise
Stand straight, bending your knee, lift your left leg, while moving your left arm back in a straightened position. The right one is bent at the elbow joint and is at chest level. Afterwards, the legs change their position along with the arms to a mirror one. The thigh should be raised as high as possible. The axis of the body should be vertical or tilted slightly forward. When landing, your foot will be on your toe, this will help you avoid injury and engage the calf muscle.
Walking on straight legs
While standing with the body in a vertical position, we extend the straight leg forward. In this case, the other leg is behind in a straightened position. The arms are bent at the elbow and at chest level. While performing the exercise, alternately change the position of the arms and legs. When landing, try to bring your toe under you, so your position will be more stable.
EXERCISES TO TEACH RUNNING TECHNIQUES
Page 1 of 2Next ⇒
Lead-up exercises
EXERCISES TO TEACH RUNNING TECHNIQUES
Considering running from the point of view of the economy and efficiency of movements of individual parts of the body and studying the technique of the best runners in the world, you can notice that many of them have differences in holding their heads, moving their arms and even their legs. However, in general, all movements of a runner are subject to the general principles of biomechanics, and all are characterized by the running technique described above. It is important to learn the correct, most effective and economical movements, for which beginning runners perform the following exercises:
1. Running a segment of 60–80 m in a straight line. The feet are placed on the line and parallel to it.
2. The same as in exercise 1, but with the feet placed in front.
3. The same as in the previous exercises, but pay attention to the vigorous lifting of the hip (knee) forward and upward.
4. Movements with straight legs with a wide amplitude in support on barriers with increasing frequency and reducing the amplitude to a minimum (45°).
5. Circular movements of the legs with different amplitudes in a stand on the shoulder blades.
6. Standing on one leg and holding the support with your hand (near the wall), swing your leg freely with a repeated emphasis on an active swing back with a quick transition to moving forward, exert the greatest effort when quickly braking the leg from behind and starting to move forward to the knee of the supporting leg, then the leg should fly forward and upward by inertia, changing the position of the legs after 10–15 swing movements, also using weights: cuffs, shoes.
7. The same exercise, but the emphasis is on the active swing of the straight leg forward with a quick transition to moving backward, the greatest effort when changing the direction of movement within 45° (holding firmly on the support with your hand and standing on the toe of the supporting leg), then the leg continues freely by inertia moving backwards.
8. Running with high hips. First performed on the spot, then with slight advancement. Make sure that your shoulders do not lean back or tense, for which you can hold your hands on your belt. The thigh rises to the horizontal, and the supporting leg is fully straightened at this time. 8. Running through objects (balls, gymnastic benches, etc.). By changing the distance between objects and their height, you can change the height of the hip rise, the length and frequency of the step, and, consequently, the rhythm and speed of running.
9. Run a segment of 60–80 m with an emphasis on finishing the back push well. To improve the push-off technique, slow running with accentuated push-off due to full straightening of the ankle joint is used.
10. Jumping from foot to foot. When pushing off, the pushing leg is completely straightened in all joints, and the fly leg, bent at the knee joint, is energetically sent forward by the knee slightly upward, the torso is tilted forward, the arms, bent at the elbow joints, are vigorously moving back and forth.
11. Running in jerks with an accentuated push-off, at the moment of which the thigh, lower leg and foot form an almost straight line.
12. Multi-jumps on one leg with pulling the pushing leg forward and up, as when running, and lowering onto it.
13. Running with throwing (overwhelming) the shin back until the heels touch the buttocks. Make sure that your torso and shoulders do not lean forward.
14. Running with a high hip lift and throwing the shin back (“wheel”). Make sure that the supporting leg is fully straightened at the moment the hip moves forward and upward, and that the pelvis moves forward sufficiently.
15. I.p. – main stand. Shift the weight of your body onto your toes without lifting your heels. Run a distance of 15–20 m, maintaining the torso tilt obtained in this way. 7
16. I. p. - main stance. Movement with arms bent at the elbows, as if running. It is performed slowly at first, then with acceleration. Make sure that your elbows move back energetically to failure and that there is no tension in the neck and shoulders. The exercise can be performed with a jump rope or a towel on your shoulders.
17. In the wide lunge position, elastic rocking, the same with a gradual increase in the lunge and amplitude of movements.
18. In the mid-lunge position, push both legs in a low jump, quickly change the position of the legs, gradually add amplitude and frequency of movements, also with dumbbells in hands.
19. Walking with wide lunges up to 15–20 steps with an elastic step and quick straightening of the legs forward and up, gradually adding the pace of steps followed by a light run, then shaking the legs.
20. Running a segment of 60–80 m at the entrance to the turn. Make sure to smoothly enter the turn, tilt your body forward and left, and move the elbow of your right hand to the right when moving it back.
21. The same, but running around the turn.
22. Running a segment of 60–80 m when exiting a turn. Make sure there is a smooth transition from running around a turn to running in a straight line. Pay attention to the tilt of the body forward and to the left.
23. Running from a high start over a distance of 40–50 m. Pay attention to leaving the start on a slope and running fast, which is achieved by actively raising and lowering the hip, as well as powerful push-off.
24. Run from a low start over a distance of 30–40 m. Pay attention to a powerful and quick push-off while maintaining the starting tilt of the body.
25. Running downhill on an inclined path (4–5°).
26. Accelerated running along a straight track with an entrance to a turn (120–150 m).
27. Running at an average pace of 200–400 m. 8
28. Running a segment of 50–60 m with an approach to the finish line. Various options are used: chest, turning the right and left shoulders. The number of segments run and their length depend on the runner’s level of preparedness, as well as on specialization in short, medium or long distance running.
EXERCISES FOR TEACHING WALKING TECHNIQUES
Exercises to develop joint mobility
1. I. p. – main stance. Bend the torso forward with straightened legs.
2. I. p. - sitting on the floor. Bend towards straightened legs, toes towards you.
3. I. p. - standing feet together, toes on a balance beam (mat, gymnastic bench). Raising and lowering the heels (rocking). Make sure that your legs are straight at the knee joint (sitting on the floor, take your toes towards you). Rock on your toes gently.
4. I. p. – main stance. During each step, bend the torso forward towards a straight leg with the toe of the foot significantly raised, while simultaneously touching the ground with your fingers or palms. When performing the exercise, pay special attention to placing the swing leg straight on the heel with some rotation of the pelvis.
5. I. p. – main stance. Normal walking uphill on straight legs with pressure on the knee joint of the supporting leg for each step. Pay special attention to the position of the walker at the moment of pressure with hands on the knee joint of the leg in front (there should be a two-support position and legs straight).
Exercises for mastering leg movements in general
1. I. p. – main stance. Normal walking (slowly) with the straightened leg placed on the ground from the heel and maintained in this straightened position until the vertical moment passes. When performing the exercise, the arms are bent at the elbow joints, the torso is straight.
2. The same exercise, but with a gradual increase in the tempo of movement. Perform for 150–200 m.
3 I. p. – main stance. Race walking in a circle of small diameter (5–6 m) and “snake” (5–6 steps to the left, 5–6 steps to the right). Not quick to do. When performing the exercise, monitor the position of the legs: a) the legs should be straight, b) place the swing leg from the heel; c) hand work should be rhythmic.
4. I. p. – main stance. Mincing race walking (step length 60–70 cm) alternating with walking with wide steps (115–125 cm). Perform the exercise along the stadium path: 50 meters of mincing walking, 50 meters of long strides. Make sure to place your leg straight from the heel, with your torso slightly tilted forward.
5. I. p. – main stance. Race walking on short grass with the sole touching it. The same, but along the stadium track. Perform at a slow pace. Pay special attention to the relaxed movement of the swing leg, touching the grass or ground with the heel.
6. Walking with long steps in a straight line with wide swings of straight arms forward and back, the same exercise with placing the feet inward from the straight line (left to the right, and right to the left) - weaving walking.
Climbing exercise
Climbing exercises develop strength, agility, courage, increase the practitioner’s self-confidence, and improve coordination abilities.
Climbing is performed in mixed hanging and hanging on one arms, and in the latter case you need to be careful, since the load falling mainly on the muscles of the arms and shoulder girdle increases greatly. Taking this into account, during classes it is necessary to alternate exercises in climbing on one hands with exercises in climbing in a mixed hang.
When climbing in a mixed hang, the load on the arm muscles of the shoulder girdle is significantly reduced, but the participation of the leg and torso muscles in the work increases and breathing conditions are significantly improved.
Climbing in mixed hang and support
Climbing exercises on a gymnastic wall:
a) climbing up, down, moving to the sides with alternating interception with hands and stepping with feet;
b) the same, but with simultaneous interception with hands;
c) moving by jumping up, down and to the sides (when performing this exercise, careful belay is required)"
d) climbing with your back to the wall. Rope climbing.
There are three ways to climb in a mixed hanging position on a vertical rope: climbing in a hanging position with bent arms* and climbing in three and two steps.
Lasagne in three steps. Starting position: hanging on straight arms. The first technique is to bend your legs forward and grab the rope with your feet (lifting one leg and the heel of the other leg). You can secure the rope with a loop. In this case, it should pass outside the thigh and shin of one leg and be pressed with the inside of the foot (the method of gripping the rope depends on its rigidity and thickness. A thin and soft rope can be grabbed with a loop).
The second technique is to straighten your legs without weakening your grip (pushing off) and bend your arms.
The third technique is to alternately grab your arms up and take the starting position, without releasing the grip of the rope with your legs (Fig. 69). This method is used in classes with women’s groups and groups of middle school-aged children, since the load falls not only on the muscles of the arms and shoulder girdle, but also on the muscles of the legs. When learning this method of climbing, it is advisable to thoroughly master the techniques of climbing on a vertical ladder. To facilitate the learning of rope climbing techniques, the following exercises can be recommended:
1. Hanging on a rope with straight arms and swinging while hanging (hanging after a push with your legs or a slight run-up).
2. Learning a leg grip while sitting on a bench.
3. Grasping the rope with your feet in a hanging position with straight arms.
4. From hanging, sitting on the floor with your legs apart, pulling yourself up and resting your heels on the floor, hanging while lying on your bent arms.
After mastering these exercises, performing three-step climbing will not be difficult.
Lasagna in two steps. There are two options for rope climbing in two steps.
First option. Starting position: hanging on a straight arm, the other hand holds the rope at chin level. The first technique is to bend your legs forward and grab the rope, as if climbing in three steps. The second technique is to straighten your legs (pushing off), pull yourself up with one hand, and grab the rope at the top with the other (Fig. 70).
Second option. Starting position: hanging on straight arms. The first technique is to pull yourself up on your hands, bend your knees and grab the rope with them. The second technique is to straighten your legs (pushing off), grab the rope with your hands, that is, go into a hanging position with straight arms.
This method of climbing is less difficult to coordinate, but it increases the load on the arms and shoulder girdle. Those with sufficient physical strength can master this method of climbing with minimal preparation. In addition to these two main methods, you can use rope climbing with your feet on the wall, climbing on two ropes - with your hands one at a time, with your feet in another, or one hand on one, the other on the other, and your legs grab one or two ropes at once.
Climbing in a simple hang
Exercises are performed on a gymnastic wall facing it, on an inclined ladder, on a rope or pole with alternating or simultaneous hand grabs.
Climbing with stops
When climbing with stops, the practitioner assumes a position in which he can free one or both hands at a certain height. Stops are possible on a pole, ladder, rope.
The most characteristic stops on a vertical rope are the so-called “tyings”. Climbing is combined with carrying a friend or climbing.
On ladders and ropes, you can climb with a partner sitting on your back (Fig. 75) or shoulders (Fig. 76).
When climbing a rope, the partner must sit on his shoulders, hooking his toes behind the back of the person sitting, and help the latter (who climbs in three steps) by pulling himself up on his hands (Fig. 77).
Tying while standing (Fig. 71). Starting position: hanging on straight arms, rope on the right. With a circular movement of your leg (from the side of the rope) from front to back, wrap the rope around your right leg and, catching it from below with the lift of your left leg, connect your legs together and press the rope tightly to your right foot. Then move the rope under your left hand and raise your arms to the sides. The same can be done in the other direction.
Tying a loop on the thigh (Fig. 72). Starting position: hanging on straight arms, rope between legs. Raising your legs forward and holding the rope between them, hang on one hand, and with the other hand take the rope from below and connect it to the rope at chin level. Free one hand.
The same tying can be done by bringing the rope under both legs (Fig. 73).
Tying with a figure eight (Fig. 74). The starting position and beginning of tying are the same as when tying with a loop on the thigh, but the raised lower end of the rope, wrapping around the thigh, is passed down between the legs. Then, changing the position of your hands, lift the rope again (but on the other side) and lower it again between your legs. The result is loops on both hips. One hand can be lowered.
Group climbing
Group climbing is the most challenging type of climbing and requires good physical fitness and reliable equipment. It is carried out on a gymnastic ladder, installed in a vertical and inclined position, on a rope and a pole.
Climbing
Climbing is performed while hanging (for example, from rope to rope, from ladder to ladder), point-blank, and from hanging to point-blank range and back. So, on an inclined or horizontal ladder, climbs are performed from the upper side to the lower side and back: feet forward, head forward, flips to the point of support, lifting by force, lowering forward from the point of support, etc.
This same group of exercises includes climbing a fence with a height of 1.5 to 3 m and climbing over it. These exercises are usually carried out in natural terrain.
For preparatory exercises for climbing over a fence in the gym, you can use parallel bars, a beam, or high jumping apparatus.
Teaching Methodology
When teaching climbing, various methods are used:
1) holistic method - when teaching light exercises (climbing in mixed supports and hangs on a gymnastic bench and wall);
2) the method of dismemberment, when climbing, for example, on a rope. Separately, they are taught to first grab the rope with their feet in the position
sitting on a gymnastic bench, then hanging on a rope and then climbing in general;
3) the method of introductory exercises, when they teach climbing techniques in easier and then more difficult conditions (for example, climbing a rope with feet supporting a gymnastic wall or a rope with knots for supporting feet, and then climbing under normal conditions);
4) method of algorithmic type prescriptions (for a description, see Chapter XI, page 193).
Considering the large load on the respiratory system when climbing in a simple hang, it is necessary to proceed to these exercises very carefully, especially when working with children: make wider use of a variety of exercises in climbing in a mixed hang and support, during which it is much easier to regulate the physiological load.
These exercises are very emotional. They are recommended to be carried out in the form of games and competitions, which significantly increases interest in them.
As a rule, climbing exercises are carried out in the main part of the gymnastics lesson.
Insurance here is necessary in the same way as when performing exercises on other gymnastic equipment, especially when climbing exercises are performed at high altitudes.
It is advisable to carry out climbing exercises more often in natural terrain.
Lead-up exercises
EXERCISES TO TEACH RUNNING TECHNIQUES
Considering running from the point of view of the economy and efficiency of movements of individual parts of the body and studying the technique of the best runners in the world, you can notice that many of them have differences in holding their heads, moving their arms and even their legs. However, in general, all movements of a runner are subject to the general principles of biomechanics, and all are characterized by the running technique described above. It is important to learn the correct, most effective and economical movements, for which beginning runners perform the following exercises:
1. Running a segment of 60–80 m in a straight line. The feet are placed on the line and parallel to it.
2. The same as in exercise 1, but with the feet placed in front.
3. The same as in the previous exercises, but pay attention to the vigorous lifting of the hip (knee) forward and upward.
4. Movements with straight legs with a wide amplitude in support on barriers with increasing frequency and reducing the amplitude to a minimum (45°).
5. Circular movements of the legs with different amplitudes in a stand on the shoulder blades.
6. Standing on one leg and holding the support with your hand (near the wall), swing your leg freely with a repeated emphasis on an active swing back with a quick transition to moving forward, exert the greatest effort when quickly braking the leg from behind and starting to move forward to the knee of the supporting leg, then the leg should fly forward and upward by inertia, changing the position of the legs after 10–15 swing movements, also using weights: cuffs, shoes.
7. The same exercise, but the emphasis is on the active swing of the straight leg forward with a quick transition to moving backward, the greatest effort when changing the direction of movement within 45° (holding firmly on the support with your hand and standing on the toe of the supporting leg), then the leg continues freely by inertia moving backwards.
8. Running with high hips. First performed on the spot, then with slight advancement. Make sure that your shoulders do not lean back or tense, for which you can hold your hands on your belt. The thigh rises to the horizontal, and the supporting leg is fully straightened at this time. 8. Running through objects (balls, gymnastic benches, etc.). By changing the distance between objects and their height, you can change the height of the hip rise, the length and frequency of the step, and, consequently, the rhythm and speed of running.
9. Run a segment of 60–80 m with an emphasis on finishing the back push well. To improve the push-off technique, slow running with accentuated push-off due to full straightening of the ankle joint is used.
10. Jumping from foot to foot. When pushing off, the pushing leg is completely straightened in all joints, and the fly leg, bent at the knee joint, is energetically sent forward by the knee slightly upward, the torso is tilted forward, the arms, bent at the elbow joints, are vigorously moving back and forth.
11. Running in jerks with an accentuated push-off, at the moment of which the thigh, lower leg and foot form an almost straight line.
12. Multi-jumps on one leg with pulling the pushing leg forward and up, as when running, and lowering onto it.
13. Running with throwing (overwhelming) the shin back until the heels touch the buttocks. Make sure that your torso and shoulders do not lean forward.
14. Running with a high hip lift and throwing the shin back (“wheel”). Make sure that the supporting leg is fully straightened at the moment the hip moves forward and upward, and that the pelvis moves forward sufficiently.
15. I.p. – main stand. Shift the weight of your body onto your toes without lifting your heels. Run a distance of 15–20 m, maintaining the torso tilt obtained in this way. 7
16. I. p. - main stance. Movement with arms bent at the elbows, as if running. It is performed slowly at first, then with acceleration. Make sure that your elbows move back energetically to failure and that there is no tension in the neck and shoulders. The exercise can be performed with a jump rope or a towel on your shoulders.
17. In the wide lunge position, elastic rocking, the same with a gradual increase in the lunge and amplitude of movements.
18. In the mid-lunge position, push both legs in a low jump, quickly change the position of the legs, gradually add amplitude and frequency of movements, also with dumbbells in hands.
19. Walking with wide lunges up to 15–20 steps with an elastic step and quick straightening of the legs forward and up, gradually adding the pace of steps followed by a light run, then shaking the legs.
20. Running a segment of 60–80 m at the entrance to the turn. Make sure to smoothly enter the turn, tilt your body forward and left, and move the elbow of your right hand to the right when moving it back.
21. The same, but running around the turn.
22. Running a segment of 60–80 m when exiting a turn. Make sure there is a smooth transition from running around a turn to running in a straight line. Pay attention to the tilt of the body forward and to the left.
23. Running from a high start over a distance of 40–50 m. Pay attention to leaving the start on a slope and running fast, which is achieved by actively raising and lowering the hip, as well as powerful push-off.
24. Run from a low start over a distance of 30–40 m. Pay attention to a powerful and quick push-off while maintaining the starting tilt of the body.
25. Running downhill on an inclined path (4–5°).
26. Accelerated running along a straight track with an entrance to a turn (120–150 m).
27. Running at an average pace of 200–400 m. 8
28. Running a segment of 50–60 m with an approach to the finish line. Various options are used: chest, turning the right and left shoulders. The number of segments run and their length depend on the runner’s level of preparedness, as well as on specialization in short, medium or long distance running.
1Next ⇒
Recommended pages:
Jumping on one leg
Take a slight acceleration, push up with one foot as high as possible and lock it in a straight position. The knee of the other leg is bent and pointed up and slightly to the side. Hands work alternately up and down.
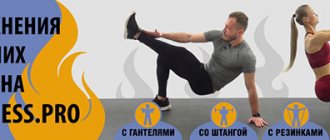
For long-distance running, large muscle mass is not needed, so strength exercises are best done with your body weight. Such exercises help increase the volume and strength of muscle fibers, while at the same time strengthening bones and ligaments. I offer 3 effective exercises for consideration.
Frog
Prepare yourself a flat area in advance, without any objects. Place your feet shoulder-width apart, sit down, swing your arms and jump from a standing position. When landing, it is important to put your hands forward for balance, bend your knees and prepare for the next jump. In this case, the gastrocnemius and quadriceps muscles are actively involved. For an untrained person, it is better not to do many approaches at once, this can lead to severe soreness the next day, and you will fall out of the training process for several days.
Jumping on a support
We will need a static support 20-40 cm high. Push off the floor with both feet and land on the support and back. The exercise can be performed with both legs at the same time, or in turn. It is performed for a while; to begin with, you can do three rounds of 40-60 seconds and a minute of rest. By doing this activity, you develop your calf and calf muscles well. The ankle is strengthened and the correct movements for running are honed.
Exercises using elastic bands or bands are very useful for runners. Such exercises help strengthen muscles and tendons, thereby preventing injuries and improving the technical part of performing movements.
Tabata - sprints
Tabata is a favorite system of Premier League sports specialists, who are known to include Tabata-style sessions up to four times a week in their training programs for elite footballers during pre-season training camps. It was originally developed to improve the fitness level of speed skaters on the Chinese Olympic team. However, its principles can be applied to almost any sport. To increase your running speed, try this:
- 20 seconds – running with maximum effort;
- 10 seconds - rest;
- Make eight such circles.
This workout takes about four minutes total time, but don't let its short duration fool you. She's "killer". Do it correctly and you'll be completely exhausted by the last lap, but don't give up and your fitness level will quickly improve.
If you are new to Tabata, you may want to run as hard as you can on a track or other flat surface. Once your fitness improves, move on to the mountains or sand dunes.
Taking your legs back
Place the rubber band on the static support and place the other end on your ankle. Turn your face to the support, grab it with your hands, slightly tilting your body forward, keeping your back straight, move your leg back to its maximum length and return it back. Do 3-4 sets, 15 reps.
Friends, we have reviewed with you an effective set of exercises for long-distance running. I hope you liked my recommendations and using them in your classes, you will get excellent results.
How children train
Children train only in the presence of a coach or his assistant. This rule is used by all coaches who train in the discipline of athletics. We do not create video lessons for one reason; there is no need for this, since everything is done only under the supervision of the coaching staff. It is in person that the child is assessed how determined he is to achieve results, how motivated he is, what interests him more and what interests him less. Parents can always obtain information about the developing abilities and interests of the child.
Remember the faces of these children. They will become champions...