Layout of the future projectile
Before you start work, you need to plan everything carefully so that you know what material is needed and how much to buy. Also at this stage, it is important to choose what type of rack itself will be, what kind of bench it will be for a bench press with your own hands. Drawings are also an integral part of the layout. In order for the projectile to turn out to be correct, everything must be done clearly according to the diagrams.
A bench press bench, made with your own hands, must have all the qualities it needs, namely practicality, compactness and reliability. The latter is one of the most important qualities, since working with considerable masses can simply break the projectile, so you need to make it powerful. Large pieces of iron welded together are exactly what you need. Yes, the equipment will take up some space in the apartment, but it needs to be sacrificed for the sake of training. What to do if there is not enough space in the apartment? It is necessary to make the structure compact. This can only be achieved with a collapsible projectile. When all the parts are disassembled, there will definitely be no problems with assembly and storage.
Power bench for home selection criteria
To choose the right bench and not overpay, you must decide what you will train. If you only bench press, then the simplest monoblock will be the best choice. But for other exercises, a folding block design is better suited. It will allow you to add the necessary modules and turn a regular simulator into an analogue of a multifunctional station.
To make a successful choice, pay attention to the following criteria:
- Size. Select a place in the house and select a simulator taking into account the permissible dimensions.
- Price. Too expensive models are most often produced for halls, so they are not worth considering, but you should not choose the cheapest ones either. Stick to average options.
- Manufacturer. It is better to order a budget line from a well-known manufacturer than other models from unknown brands.
- The structure must be completely metal with the exception of soft upholstery.
Quality and reliability
As I already mentioned, this is not the case when you need to save money. The combination of quality and cost is the main criterion when choosing. Appearance plays a role in the gym. For your home, a bench should be functional and durable, not pretty.
What determines reliability and quality? First of all this:
- Material. The frame and main parts must be steel.
- Textile. Choose a seat with vinyl upholstery, it is the most reliable and durable.
- Rollers. If they are installed, the material should be moderately soft. Regular foam wears out quickly.
- Wide legs. The wider the legs at the bottom, the better the training fixation.
It is also highly preferable to choose models with reinforced fastenings.
Functionality
A standard bench is not a functional exercise machine because it is intended for highly specialized exercises. However, both at home and in the gym, athletes can perform a variety of movements from dumbbell pullovers to Bulgarian lunges. Therefore, try to choose those models in which the back is at least adjustable. This bench will allow you to perform presses at different angles and will replace three exercise machines at once.
I consider designs with additional rollers to be a good option for the home. They are good for training your abs, lower back, and even allow you to do some leg exercises. Add modules with bars only when the equipment is produced by a well-known brand. Otherwise, the fasteners in such structures will quickly become loose and the lounger will dangle.
Monoblock or transformation
If the size of your home gym allows you to place several exercise machines, then I always recommend using monoblocks. This is the most reliable and time-tested type. If space is limited, then you should pay attention to transformers. But it is important to remember that they are often designed to work with light weights. That is, if you are training for health and do not exceed the work with your own body weight, multi-component designs are suitable. If you plan to develop strength indicators and bench press more than your own weight, it is better to choose a reliable monoblock.
Additional blocks
Block exercise machines belong to the home category, so they are rarely installed in gyms. However, in conditions of limited space they have a big advantage: you can additionally purchase the necessary blocks and expand your training capabilities. A great advantage of block models is that each module is removable.
Comfort
In most cases, comfort is determined by two criteria - upholstery material and fasteners. Therefore, I advise you to pay special attention to these details. Most models are available with vinyl fabric. It is reliable and pleasant to the skin. In the case of clamps, try to give preference to those located at an angle. Horizontal clamps on the stand are less convenient. The difference is especially noticeable when you train at home without a partner. Throwing the bar onto the brackets at an angle is much easier (and anatomically correct) than placing it on horizontal clamps.
Simplicity and ease of operation
If you value ease of use highly, then you should probably only look at all-in-one PCs. This machine is extremely simple and does not require intervention after installation in the house or hall. An alternative would be a frame with a removable bench. This choice helps save space. After training, you simply move the bench to the side, and the machine will become less cumbersome.
Price
It all depends on the manufacturer, budget, preferences and other criteria. There is a certain standard for houses and halls, which I will write about.
Models with an average price-quality ratio for the home start from 15 thousand rubles and above. This is if you don’t take into account the barbell and plates, which are already quite expensive. The optimal price range is from 20 to 25 thousand. In case of purchasing additional modules – up to 35 thousand. For halls, this price tag increases by no less than 2, or even 3 times. Prices for professional equipment start from 100 thousand and reach 200–300 thousand rubles.
TOP 5 most popular models
I want to immediately clarify that these are not the most advanced models (most of which have a very high price tag), but those that are most often chosen for fitness clubs and at home. That is, this is the top 5 in terms of practicality and price/quality ratio.
- AEROFIT IF IFOFB is a simple and reliable monoblock with low cost.
- The “Uncle Vova” bench is an inexpensive but high-quality equipment from a domestic manufacturer. There are models with adjustable backrest.
- BODY SOLID ProClub SFB349G is a professional model with a very low price for exercise equipment in this class.
- The ELEIKO bench is the best choice for weightlifting, PA and crossfit.
- Inter Atletika has a good selection of benches for every taste and the lowest prices.
Expert opinion
I would like to note that if you take Inter Atletika home or to the gym, I recommend refraining from purchasing the cheapest line. She has collected a lot of complaints, so saving in this case does not make sense.
What materials will you need?
Even the amount spent on various materials will still be less than the cost of a ready-made, factory-made bench press bench. You will have to do a lot with your own hands. But it's definitely worth it.
First of all, before starting work, you should prepare the materials from which you will make your own bench press. Drawings and calculations will tell you how much and what needs to be purchased. What materials will be needed to make this projectile?
It is best to make a bench press with your own hands from a profile pipe. This is a type of rolled metal that is sold in construction stores and markets. It comes in square and rectangular. It is best, of course, to take a square one, as it is more practical. We only need one type of this metal profile, from which the entire structure of the bench and stand will be made. The dimensions of this profile should be forty by forty millimeters. The thickness of the walls (cross section) is two millimeters.
You will also need two rectangular steel plates. It is desirable that their thickness be at least half a centimeter. The rod holders will be made from them. They should be bent at each end to form a hook. You also need bolts with nuts and rubber pads. Due to the fact that the entire structure is made of metal, it is too noisy and can scratch the floor. In order to avoid this, they are glued to the entire base of the bench. This way it becomes more stable, and therefore better.
The lounger itself will be made using boards, foam rubber and leatherette. Such a bed will be very durable, soft and practical, and most importantly - durable.
Buy or make it yourself
I often welcome home-made exercise equipment, especially where you can save money without losing quality. For example, making a jumping stand, a step platform and other exercise equipment. But with the athletic bench things are completely different. You must understand that this is not just a structure for holding a barbell - it is a machine that ensures the safety of the press. Nothing should be loose in it, and the maximum permissible load on the fasteners should be many times greater than the actual weight of the athlete.
Just imagine what the consequences could be if a leg or a lounger breaks under an athlete and a frame with a barbell falls on him. And if at the same time you squeeze out an impressive weight? That’s why I always insist that a sports bench is not a piece of equipment you need to skimp on.
If you have limited finances, especially if you are equipping a home gym, it is better to choose budget models. They feature cheaper materials but still provide a robust design. Moreover, making a good simulator on your own will require a lot of effort and expense: metal profiles, clamps, welding, etc. In this case, the choice is obvious: it is better not to take risks, but to use ready-made factory models.
Do-it-yourself bench press bench: drawings
What needs to be done from the very beginning? Before you get to work, you need to clearly imagine what the bench will look like. You will also have to make two racks with your own hands so that you can place the barbell on them during training. The structure will stand on three vertical supports. It should be one meter in length and eight hundred millimeters in height.
Basic bench exercises
Let's look at what you can do at home on a bench and why you needed to buy a machine or create a structure yourself.
Bench press
I’m not the only one who considers this exercise to be the main movement for the bench press, so it’s not surprising that it always comes first. If you have an adjustable backrest, you can additionally do bench presses at an angle.
Dumbbell flyes and presses
Even without a barbell, but with a bench, you can almost fully train the pectoral muscles. Dumbbell presses and flyes are great for this.
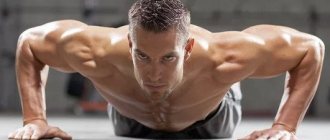
Push ups
If you have a regular bench (even one without a frame), you can easily develop your pectoral muscles by doing push-ups from the surface of the bench. This option switches the load to the upper part of the pectorals, which most often lags behind.
Exercises for the abs
You can do most of your abdominal exercises on a bench, although if you do so, I recommend adding a bolster module. With their help, the body is securely fastened during body or leg raises, lateral twists and other exercises.
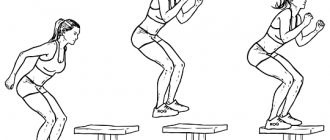
Bulgarian lunges
If in the gym there are many exercise machines for working on the legs, then working the lower body at home is much more difficult. The best options for this are squats (air or weighted) and lunges. Particularly popular are Bulgarian lunges, which require a bench.
How to make a bench press
Since the design is specially designed for beginners in the construction business, it will be a little rough, but light. The first step is to start by cutting the timber to length. After this, you can start welding.
Two perpendicular beams need to be welded to the two posts that will hold the bar. To the other vertical post there is a perpendicular block (everything can be seen in the drawing).
On two large vertical posts it is worth making marks at the level of three hundred and forty centimeters. It is at this point that a transverse horizontal beam is welded to two pieces of the profile. A straight beam parallel to the floor is added to the horizontal exactly in the middle. This will be the base for the bench. All that was left to do at the end was to attach a third vertical post, as well as two rod holders (these are the metal plates that needed to be bent). Welding work has been completed.
Concrete
The process of casting pancakes from concrete is a little more complicated, but using this method you can make sports equipment with a classic round shape.
Materials:
- water;
- sand;
- cement;
- metal mesh for reinforcement;
- form for pancakes - for example, cut plastic bottles with a capacity of 5 liters.
Manufacturing:
- Cut circles for reinforcement from metal mesh with holes for the bar slightly smaller than the diameter of the mold.
- Mix the solution, observing the proportions for a certain brand of cement.
- Pour the solution into the mold, drowning the metal mesh into it.
- Insert a bar or a piece of pipe of suitable diameter into the solution, which is secured in a stationary state.
- Wait until the solution dries completely and hardens.
Using this method, you can cast several plates of different diameters and weights for smooth adjustment of the load during training.
How to make a sun lounger
You can’t practice on an iron bar. Therefore, you need to make a special lounger. It is made from rectangular plywood, foam rubber and leatherette. First you should take care of the fastening.
To do this, in three places in a long beam parallel to the floor, it is worth making three holes for bolts every thirty centimeters. The same must be done with plywood. Using bolts we secure the board. Then, after applying a layer of glue, we glue the foam rubber. After the glue has dried, you can use a construction stapler to cover it with leatherette.
Advantages
DIY barbells:
fashionable fitness centers with thousands of exercise machines are a waste of money, because in order to develop beautiful muscles, you only need basic equipment:
- Barbell
- Dumbbells
- Multiple racks
But if you look at it, a barbell is enough to pump up the entire muscle corset, look:
♦ Barbell squats – legs
♦ Barbell deadlift – back
♦ Military shoulder press
♦ Biceps curl
♦ French triceps press
You see, all basic elements are performed using one projectile. Many people go to the gym thinking that only there they can become big, but this is not true.
Practical barbell at home, 5 variations
Preface:
In the article, I will not name the exact dimensions, since everyone at home has different materials and diameters of structures, therefore, I will give general information and attach pictures, and then you can easily figure it out for yourself.
Method 1
. A rod made from paint cans
As for me, this version of a barbell at home is very easy to make yourself, and in the end something beautiful comes out, especially if you paint it.
Materials:
- Steel pipe 2-3 meters (diameter is chosen based on the principle of comfortable grip)
- 2 pieces of steel pipe 30 cm each
- 2 3 liter paint cans
- Cement
Barbell manufacturing technique:
♦ Take 2 paint cans and cut off the bottom
♦ Then, we fasten 2 blanks in a jar using aluminum wire, in the same way as shown in the picture (our task is to make supports in order to pour concrete in the future, and the tube remains empty in the center)
♦ After the blanks have been laid out, place the jars standing on a flat surface
♦ Pour cement inside, place a brick on top, and wait for it to dry completely
♦ We insert the main bar into the holes, that’s all – the barbell is ready with your own hands!
As a result, we get a barbell that we made at home, spending only a few hundred rubles on cement. The plates can be removed and new ones added in just a few seconds, allowing for rapid progress in muscle mass.
The most important advantage of the design is that the cans will prevent the cement from crumbling.
Forward!
Method 2
. DIY bottle bar
The advantage of this method is its simplicity; it requires a minimum of materials, and you can make a barbell from bottles in an ordinary apartment.
Materials:
- 8 bottles of 2 l
- Main neck
- Sand
- Scotch
The projectile will be difficult to disassemble, so it is better to immediately decide on the weight or make several rods.
Manufacturing process:
♦ We take bottles that are equal not only in volume, but also in the same shape
♦ We go to the sandbox, where we fill the bottles and compact the sand in them well
♦ We tie 2 bottles with tape, then we tape them tightly to the bar, when 2 are already holding well, add 3 and 4
♦ 2nd side the same.
Use tape responsibly
, and it is advisable to weigh 4 bottles before attaching them and form equal sides by weight, so that there is no imbalance during classes.
Method 3
. Barbell with bricks
I also had such a bar at one time, its main advantage is the low weight of the bricks, which means you can control the weight and add little by little if necessary.
Materials:
- 10 bricks
- Vulture
- Stone drill
- Grinder and stone circle
Manufacturing process
♦ First step, drill a hole in each brick, slightly larger in diameter than the main neck
♦ Step 2, use a grinder to cut the corners and form circles from the bricks
♦ Adjust the bricks to the same weight, or hang them and sign them
♦ Put on homemade pancakes and play sports (good luck)
It’s very easy to make weight plates for a barbell with bricks; if you use the projectile carefully, the barbell will last a long time. And thanks to the fact that the load can be increased gradually by throwing a few pancakes, progress will not be long in coming.
Method 4
. Barbell made of cement circles
The technology for making such a barbell at home is quite simple, all you need is:
- Cement
- Metal molds
- Vulture
Before making a barbell, I’ll first tell you about cement molds:
♦ We take a metal sheet and cut a strip from it, 10 cm wide, and the length is up to you
♦ Then, we wrap the pole with a strip of tin, and bend the ends in different directions and fasten them
♦ When the shape has taken on a rounded shape, we make a bottom for it with a welded tube in the middle
♦ Pour cement into the mold and wait for it to dry. To better understand the process, look carefully at the picture
Method 5
. Rustic wooden rod at home
If you are from a village, like me, and don’t know what you can make a barbell from, then the next method is for you.
Materials:
- Solid wooden circle made from cut wood
- Several kilos of old nails
- Wood drill
- Wood file
- And other metal objects that can be hammered in
♦ We go to cut down old trees, or to a place where they process forests
♦ We cut out or ask for a solid wooden circle 10 cm thick, you choose the diameter yourself, which circle will be convenient for you to lift
♦ Make a hole in the middle for the neck
♦ Then, we hammer into our wooden circles everything that can be hammered into wood (staples, nails, other garage debris, like an idea - buy slate nails)
Using available materials, we fill the tree with metal to increase the weight, hang weights so that the barbell is balanced - you can begin to conquer the heights of sports.
All these methods are primitive, the equipment does not turn out beautiful, but we don’t need this - muscles grow from weight, and not from the object that we hold in our hands during exercise.
I hope that I have fully answered the question “how to make a barbell with your own hands”, and provided the necessary options to make your dream come true
.
Subscribe to the blog, leave a comment and constantly receive new, useful information.
A method for making a barbell at home
Before you start creating a barbell, you need to determine how much it should weigh.
. To do this, you will need to carry out basic mathematical calculations. A regular liter plastic bottle holds about two kilograms of dry sand, which means now you can independently calculate how much the bar we created will weigh. More specifically, 3 kilograms and 750 grams of sand are placed in a two-kilogram jar, which means the home barbell will weigh thirty kilograms or more, depending on the strength of our handle.
The most important thing in our business is to make sure that the homemade barbell has the same weight on the improvised bar
. To do this, the first bottle after filling must be weighed so that all subsequent bottles do not turn out to be lighter or heavier. Uneven weight distribution can affect the muscles and lead to injury, which is highly undesirable.
Having filled all the bottles, let's move on to the main part of creating the bar: four bottles of sand should be placed side by side and tightly wrapped with tape. You shouldn’t skimp on the material; it’s better to cover the bottles with extra so that the bar will last longer. The axial rigidity of our structure will be provided by aluminum wire, which we prepared in advance. The same must be repeated with the remaining four bottles. And at the end we take the stem and thread it between the bottles. Thanks to their narrowing, it fits perfectly.
To prevent the rod from breaking at the most inopportune moment, you need to check whether the handle sits tightly between the bottles. If it does not fit tightly enough, you need to either cut it down or increase the volume, depending on the thickness of the cutting. Be sure to lift the barbell and check that the load is evenly distributed. If you are not new to the sport, then the weight of the barbell may seem too small to you. In this case, its weight can be increased by replacing the wooden handle with scrap iron. This barbell will weigh much heavier than the original version and will be perfect for your activities.
Cement pancakes
Here you need more time and patience, you need to find a large container where the cement will be poured, then pour it there and insert the bar at one end. It is advisable to use paint cans. True, the weight of such a barbell is difficult to predict, so this option is suitable only for those who are confident in their abilities and can lift a lot of weight.
When the cement is poured into the container and the bar is inserted into it, you need to create a support for the bar and wait for the cement to completely harden. The optimal waiting time is four days. Everything that was written above were the best ideas on how to make a barbell, and these options are also easy to implement.
An important element are the racks for the barbell. They are needed to make it more convenient to use. How to make a barbell and a barbell rack with your own hands will be described below point by point.
Material options for a homemade barbell
There are two simplest options for fretboard materials: iron or wood. It’s easy to decide on a wooden base for the bar, since you can use, for example, an old wooden rake. The advantage of this option is that the tree will not add extra weight to the bar if it is not necessary.
To turn a rake into a suitable form for a projectile, you need to remove its handle in any suitable way, the main thing is that only one stick remains from it, which will be used as a basis for pancakes. We’ll look at what else you can use to make a barbell and weight plates below.
Another option for the bar could be, for example, a metal rod if you are planning classes with a weight of more than 50 kilograms.
The length of the rod should be 2 meters, and the cross-sectional diameter should be 35 millimeters; these are the optimal requirements for comfortable playing sports. You can also use a metal pipe with a diameter of 4 centimeters, but it is not suitable for the heavy weight of the pancakes.