The handstand is an excellent exercise, the benefits of which are often underestimated for one simple reason: most people believe that they simply cannot do it.
However, this is not true at all - just because you didn't do gymnastics when you were younger and aren't a yoga master now, doesn't mean you can't start doing handstands now.
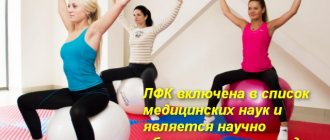
Handstands help you have fun and release your inner child, but they are also very beneficial for your health, especially if you start doing them every day.
Whether you do them near the wall or in the middle of the room is not so important, because in any case they:
Handstand: technique of performing against a wall, benefits and harms of the exercise
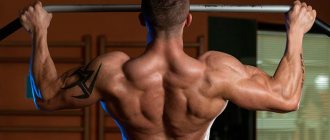
The handstand is one of the most difficult elements of gymnastics. It requires considerable physical preparation and balance, forcing the muscles to work both statically and dynamically. However, learning the handstand will provide incredibly powerful development of the entire upper body, with an emphasis on the muscles of the shoulder girdle.
The benefits and harms of handstands
A handstand against a wall or in a free position (without support) is a gymnastic element. The exercise gained maximum popularity in CrossFit, where headstand and handstands are used in many complexes.
Key benefits and reasons to do handstands:
- One of the most impressive tricks that demonstrates a high level of physical fitness.
- Develops almost all the muscles of the upper body.
- Creates flexible and strong shoulders, core muscles, and back.
- At the same time, it combines dynamic and static loads, giving maximum preparation when performing the element.
- Strengthens the muscles that fix the spine and is an excellent prevention of intervertebral hernias and protrusions (only with a competent approach and not during periods of exacerbation of disc problems).
- Develops a sense of equilibrium and balance.
The exercise has almost no disadvantages, with the exception of some features:
- Technically, the handstand is a very complex movement. Therefore, mastering it requires a high level of training.
- The exercise can be traumatic for the shoulders and back (if the technique is not mastered sufficiently).
Multi-stage training can also a drawback To learn how to stand on your hands, you need to perform a number of exercises to strengthen some muscles, as well as gradually complicate the technique, from the easiest level to the moment when you can do a handstand in the classic version.
What muscles work during a handstand?
Before learning how to do a handstand, you need to understand which muscles work during the execution of the element. This will tighten weak and limiting muscle groups and strengthen the main working areas with additional exercises.
Dynamics involves:
In static mode the following work:
- Spinal extensors.
- Gluteal.
- Core muscles.
- Forearms.
In general, to stand on your hands you need to engage almost all the muscles of the body, which is why this movement is one of the most difficult gymnastic elements.
How to learn to stand on your hands
There are two ways to learn how to do a handstand:
- progress from the simplest technique to the most complex option;
- or strengthen muscles with the help of auxiliary (leading) exercises.
Gradual progression
The first path is longer and more uniform. To do this, handstand techniques are used with increasing complexity:
- Partial stand on a pedestal (hands on the floor).
- Full or partial headstand near a wall (with arms supported).
- Crow position (holding the body in a horizontal position with the help of hands).
- Raising the body from the crow position (attempting to get into a handstand without fully extending).
After this, the muscles will be ready to do a handstand without any simplification.
Lead-up exercises
The option with lead-in exercises involves performing a number of movements:
also important to remember that all exercises must be performed exclusively in a strength style. To quickly learn how to stand on your hands, strength, flexibility and coordination are important, not muscle size (in this case, it will only interfere due to the increase in body weight). Therefore, all exercises should be performed in five sets of 5-6 exercises with submaximal load.
Handstand technique
There are two main techniques:
- With a fully straightened body - a “straight” pose. Recommended for athletes weighing less than 80 kg, as the simplest and safest option.
- With a back bend or “banana” - holding a position with a bend in the lower back. Athletes with a body weight above 80 kg are recommended to start mastering the technique with this technique, as this option will reduce the load on the lumbar region. This technique prevails in CrossFit.
Despite the difference in the position of the body, there are no differences in the technology of the racks. Therefore, if you have learned to stand on your hands correctly in one position, the second option will also be available (the only difference is the load and balancing).
Technique:
- Bend at the waist and place both hands on the floor so that your palms are directly under your shoulders. Spread your fingers to the side, this will provide additional stability. When performing against a wall, your hands should be 20-23 cm behind.
- Swing your leg sharply to gain momentum. After this, make a powerful push with your other leg and fix your legs in the air.
- Hold the position for as long as possible, then return to the starting position in the same order.
- In the exercise, it is important to control the force of inertia when throwing your legs. With a strong push, there is a high risk that the legs will not be able to be fixed at the top point.
- When holding a position with a bent back, the correct position in the lower back is assumed after throwing the legs (immediately before fixation).
Recommendations
The exercise is a highly specialized movement. It is usually mastered in gymnastics, crossfit or calisthenics. The movement can provide powerful development of the entire upper body (with an emphasis on the shoulder girdle), but requires a long time to master all the technical features.
To learn how to stand on your hands without a wall as quickly as possible, you need to consider the following recommendations:
- It is more difficult for athletes with massive legs to master all the elements, so it will take more time.
- It is highly not recommended to start mastering the exercise without support. The wall option is not only safer, but also more effective for beginners.
- If you lose your balance at a support, keep your balance using your head, not your toes.
- The most difficult part of the exercise is considered to be maintaining balance, therefore, without powerful core and back muscles, correct execution is unlikely to be possible.
- If you feel that you cannot correctly perform all phases of the movement due to certain muscle groups, it is recommended to additionally perform exercises with weights to strengthen them.
- Keep your shoulders in a natural position. Lowering, lifting or rotating slightly can cause serious injury.
: how to learn to stand on your hands
And also read how to learn to do handstand push-ups →
It is important to know
- Athletes with massive legs should learn handstands. You will have to spend more time and effort on this.
- You can’t start learning right away without support. A safe and effective way is to use a wall as support.
- If you feel yourself losing your balance, try to maintain your body position using your head, not your toes.
- Perform regular exercises to strengthen your back and core muscles.
- Keep your shoulders in a natural position.
- Raising and lowering the body must be done smoothly, without jerking, otherwise serious injury may occur.
Handstands are an exercise that anyone can do. To achieve results, you will need patience and endurance.
Handstand - learning the correct technique
Handstand is a fairly complex exercise that will require you not only to be generally physically fit, but also to have well-developed coordination of movements. This exercise is used in CrossFit, bodybuilding, gymnastics and can be included in advanced bodyweight training programs.
Why stand on your hands?
In addition to the fact that the handstand itself looks very impressive and allows you to demonstrate the athlete’s physical fitness, it is a very useful exercise in terms of training.
Muscles working during the exercise.
An argument for learning how to perform this exercise can be any of the following points:
- A handstand gives a powerful workout to the muscles. The main emphasis is on the shoulder girdle, arm muscles and core.
- Coordination of movements and a sense of balance are trained, and the overall level of control over your own body increases. The benefits of such training are obvious not only in the gym, but also in everyday life.
- The inverted pose helps improve blood circulation. Blood rushes to the brain, increasing the supply of oxygen to its cells.
Contraindications
It is not recommended to perform handstands if you have the following conditions:
- Injuries to the shoulder, elbow or wrist joints.
- Problems with the spine.
- Intracranial pressure, headache, head injuries.
- Diseases of the cardiovascular system
- A period of exacerbation of inflammatory diseases, menstruation or late pregnancy.
Exercise technique
Before moving on to mastering an unsupported handstand, you should learn how to perform the exercise against a wall.
It is better to start training against the wall.
An important stage of training is overcoming the psychological fear of falling when going into a stand.
Therefore, even athletes with good physical fitness are recommended to initially do the exercise with support on the wall or use the help of a partner who can provide backup in case of loss of balance.
You can place a gymnastics mat in front of you so that if you fall forward on your back, it will soften the blow. But in any case, hands should only be placed on a hard surface.
Standing technique.
Handstand against a wall:
- Stand facing a wall two steps away. Bring one leg forward. The leg you are currently standing on will be in a straight line with your body throughout the entire movement.
- With a quick movement, springily step onto your forward leg and sharply bend with your straight body, rotating at the hip. At the same time, the second leg rises straight back, making a swinging movement. Hands should be on the floor 10–15 cm from the wall. The head should be lowered.
- With your other leg, push elastically off the floor. The force of the push and the inertia of the swing will allow you to throw your pelvis and legs up and go into a handstand. Try to stand as straight as possible, without sagging your shoulders or arching your lower back. The body needs to be pulled into a string. Direct your gaze in front of you.
- When lowering from the stance, lower one leg first, then the other.
If you want to learn how to stand on your hands without support in the future, it is not recommended to practice handstands near a wall for a long time.
This is due to the fact that when leaning against a wall, the weight of the body is not distributed quite evenly and a deflection involuntarily forms in the lower back, which ideally should not exist.
Therefore, as soon as you have mastered the technique of getting into a stand against the wall, begin to gradually lift your legs off it, and then completely stand on your hands without touching the wall with your feet.
A handstand without support is technically somewhat more difficult. Exiting into it is performed in the same way as when performing the exercise against the wall. The difficulty lies in keeping the body upright.
Important technical details.
Therefore, having skipped the moment of entering the stance, we will focus specifically on maintaining balance. How to learn to stand on your hands without support:
- To maintain balance, your body must be strictly perpendicular to the ground.
- The shoulders are fully open, that is, the arms and body should not form an angle. Remember about the straight line.
- The fingers are open and pointing forward. The center of the load falls not on the hands, as it seems at first glance, but on the fingers and at the junction of the fingers with the palm.
- Your back should be kept straight. At first glance, it seems that arching in the lower back helps to balance, but this is not so. If there is a deflection, the head involuntarily moves forward, and an additional load is applied to the lumbar region, which should not be there.
- Legs extended upward.
- The head is between the hands, the gaze is directed straight, and not to the ground.
Arms, body and legs form a straight line.
It’s difficult to assess your position subjectively, so ask someone to take a photo or film you. This will make it easier to correct errors.
Change in balance when bending the lower back.
Exit from the rack
If, when you take a stand, you feel that you are losing your balance, first try to fix the position by using the force of your fingers or changing the position of your legs. Try not to do steps on your hands until the handstand itself is perfect. If you perfect the technique of the exercise, you will not need additional training in walking on your hands - everything will work out by itself.
Exit with a turn in the direction of the fall.
You can exit the handstand backwards (the same way you stood up, only in reverse), to the side or forward (to the side where your back is pointing).
- In the first case, you simply lower one leg back, followed by the other.
- If you are pulled to the side or forward (there is a danger of falling on your back), try to turn in the direction of falling sideways and place first one foot on the ground, then the other.
- The most difficult technically is the exit from the stance forward into a somersault. Do not attempt this element without prior practice or if you are generally unfamiliar with proper tumbling technique. Under no circumstances should you fall on your head or neck. The chin is pressed to the chest, and the shoulders first touch the ground, and then the roll goes along the rounded spine. The inertia of the somersault should be enough to get to your feet. To learn how to do such an exit, you should practice on a gymnastics mat, having previously practiced standard forward somersaults.
Exit to somersault.
Complicated exercise options
If you have already mastered the classic stance, there are many options to complicate and diversify this exercise.
On the uneven bars
First of all, you can try to learn how to perform it on parallel bars or on special supports that are placed on the floor. In this case, getting into a stand becomes more difficult due to a decrease in inertia; you rise to a greater extent due to the effort of the core muscles. However, the hands on the uneven bars are in a more natural position, which makes it somewhat easier to maintain balance.
Use of special stops.
Pirouette or turn
The “pirouette” exercise is a turn on the uneven bars without leaving the stance.
To learn how to do it, first practice holding yourself steady on your hands and not arching your back, shifting your weight in the direction of the turn.
When this starts to work out calmly, move your hands from one support to another. Once the turn is complete, level off and stabilize your position. Only then leave the stand.
Turn or pirouette.
To the horizon
Try changing the position of your body relative to the ground, until you reach the horizon. This position or exercise is called a planche. The body tilts by changing the angle of the shoulder joint and shifting the weight forward. Elbows should be pressed tightly to your sides. Aerobatics is to push yourself back into a standing position from a horizontal position.
Transition to horizontal position.
On one hand
Another complication option is a one-arm stand. To learn how to do it, first get into a standard stance, and then try to lift one hand off the ground. In this case, the weight is redistributed, and maintaining balance becomes much more difficult. And the load on the working arm and shoulder doubles.
Based on all of the above, we can say that success in performing a handstand is 40% general physical preparation and 60% well-developed technique for performing movements. Learning this exercise will not require much difficulty if you overcome the psychological fear of falling. Go ahead, have a little patience and everything will work out!
Was the article useful to you?
Please rate!
Handstand - learning the correct technique
You inspired us! The authors rejoice! We are very glad that you liked the article!
on social networks:
I'm very sorry that the article was not useful to you.
We ask for your advice!
Preparing to perform the “Golden Chinese Rooster” exercise
Check the condition of your body: if you have colds, feel unwell, late pregnancy or serious injuries, you should not take risks. The best time to do this exercise is in the morning. Do not start immediately after waking up, when it is still dark in your eyes and coordination of movements has not been worked out, but after a shower and a light breakfast. It is very important that the environment helps you relax internally and tune in to receive the right energy. The surface on which you stand also plays a significant role: carpet, fleecy bedspreads and other soft materials “dampen” energy and weaken the connection between the body and the floor/ground. As for marble, tiled or concrete surfaces, they are often dangerous for beginners, since there is a risk of landing unsuccessfully. It is best to choose a room with wooden flooring, non-slip parquet or compacted soil in the fresh air. A thin fitness mat is also rated.
Handstand: benefits and harms, how to learn how to do it, video training
The benefits and harms of handstands are not known to all people. Many people think that they won’t do the exercise due to excess weight or inability to concentrate. Standing is often referred to as the work of gymnasts and circus performers.
What are the benefits of handstands?
The pose included in the list of exercises for yoga is the position perpendicular to the surface. The lesson trains muscles, concentration, the desire to hold on, to withstand. Precision of movements during the vertical rise and fall of the torso is one of the useful exercises that an athlete can master.
The entire body is subject to stress, but this does not cause harm. Special properties of exercises bring benefits:
- strengthen the muscles of the forearms, shoulders, arms, back - they will begin to take on formed shapes,
- help improve your sense of balance,
- tone,
- improve mood, suppress stress,
- tighten the buttocks, make the contour clear,
- improve the condition of bones and joints,
- increase blood circulation.
Important! The upside down position, with constant training, will open up new ways for a person to do push-ups and walk on his hands.
The benefits of walking on your hands and other upside-down exercises will become noticeable after a few months. The human body will acquire perfect contours, and the mood will be positive.
For whom is handstand especially beneficial?
The beneficial properties of such a stand are preventive and health-improving in nature. During exercise, the cardiac system is unloaded, hair roots are strengthened, as blood flows to them more strongly.
Handstands against a wall are beneficial for boys and girls. The wall will be an excellent assistant in the first steps of mastering the technique.
The exercises are useful for those who are interested in various sports. For people who do:
- martial arts,
- yoga,
- dancing,
- acrobatics,
- gymnastics,
- workout.
The stand will add variety and bonuses to other sports activities without causing harm.
How to learn to stand on your hands at home
To learn how to do a stand, a person needs to overcome fear. The inverted position causes fear in people and the risk of injury. This exercise will cause strained muscles and tendons in people who have not practiced this sport before.
Therefore, it is best to start doing this type of sports training with a partner. If he is not nearby, it is better to train against the wall. She will act as a safety net that will prevent you from falling.
Advice! If a person takes a handstand without having previously engaged in any sport, it is advisable that he be supported by two people (a wall, a partner-teacher).
Steps to take when trying to stand upside down:
- Take a rug and lay it against the wall, which will serve as a support.
- Bend forward, rest your hands on the mat at a distance of 10 cm from each other.
- Palms are shoulder-width apart, fingers pointing to the sides.
- Push off with one leg, straighten your body.
- Extend your legs along the wall.
- The body, hips, and toes are maximally extended, perpendicular to the surface.
- Maintain the position against the wall for several seconds. If a person can stand like this for longer, there is no point in finishing the workout.
- Push off with one leg, take the starting position.
Advice! Before training, you need to stretch your hands, forearms, and shoulders so as not to stretch the tendons.
Handstand without support
The following type is easy to perform for gymnasts and acrobats. If a person has overcome the psychological barrier and learned how to do a handstand against a wall, it will not be difficult for him to do the exercise.
If a novice gymnast is unsure that he can perform a stand-up without support, it is better to resort to the help of a partner. He must support the person while he learns to catch himself if he falls.
After completing the exercises, a beginner will not be afraid to make a stand perpendicular to the surface without support or support:
- push off, spin, get down on your feet,
- if you fall, bend over and make a bridge.
The lesson will allow you to behave confidently while taking a pose upside down. It will strengthen your muscles and allow you to feel a sense of power over your own body. Will sharpen coordination of movements, improve orientation in space without support.
Steps to take a position perpendicular to the surface without support:
- Repeat all the steps of the wall stand until point No. 5.
- Take one leg off and stand. Change to another, stand again.
- Take both legs off the wall and try to stand.
- Move 2 steps away from the wall and repeat all steps.
- After the above steps, train in free space.
Important! You need to calculate the force of pushing your foot off the ground, otherwise a fall is inevitable.
Advanced handstand variations
Walking on your hands and other types of handstands will benefit your body. A person will strengthen bones, build muscles, and develop an athletic body build.
Bar stand
A useful workout after the rack would be the position upside down on the uneven bars. This is a more dangerous type of activity. A person can be injured by falling from the uneven bars.
It is necessary to start doing the exercise when the beginner is completely confident in his abilities. The first 2 or 3 weeks you need to train with a partner.
It's better to start with floor bars. Gradually increase the distance between them and the ground.
A beginner must prepare his body well before training. The emphasis is on the triceps and anterior muscle groups. It won't hurt to learn how to do push-ups while standing perpendicular to the surface.
Planche
Planche or “horizon” is recommended to be done on uneven bars. The highest goal of this exercise is to move the body from the most horizontal position to a vertical one.
Legs are brought together. Do not touch the ground in a horizontal position.
Steps to perform the planche exercise:
- Bend over, rest your hands on the bars.
- Push off the ground.
- Stay in a vertical position perpendicular to the surface.
- Tilt the body, changing the angle of the shoulder joint.
- Shift your weight forward.
- When doing this, press your elbows tightly to your sides.
- If the beginner feels strong enough, you can move your body back to a vertical position.
One hand stand
A more complicated method is to position yourself upside down on one arm. The weight falls on her, making it difficult to stand upside down.
It is recommended to take the position if the person is physically trained enough. For a beginner, doing this will be problematic.
Exercise steps:
- Bend over and place your hands on the floor.
- Push off with one leg.
- Catch an even vertical “rod” after lifting the lower part of the body up.
- Shift your weight to one side and lift your other hand off the floor.
- Go to the starting position.
Walking on your hands
Walking upside down is the simplest exercise you can do while standing upside down. The performance looks impressive in public. Easy to do.
Exercise steps:
- Bend over, rest your hands on the floor, palms shoulder-width apart.
- Push off with one leg.
- Lift your lower body up.
- Shift your weight to one side, put your other hand forward.
- Shift your weight to your extended hand, placing your first hand forward.
- Repeat the movements.
Damage to handstands
Handstands are beneficial for some people, but harmful for others if they have certain medical conditions. Exercise will cause harm:
- eyes, increasing eye pressure,
- increasing blood pressure,
- congestion appears in the ears,
- possible damage to the capillaries on the face,
- redness appears that does not disappear for a long time.
It is recommended to talk with a trainer and visit a doctor before classes. When qualified specialists allow classes, you can begin training.
Contraindications for performing handstands
Exercise is not beneficial for everyone. For people with diseases or conditions listed, exercise may cause irreparable harm:
- high blood pressure,
- glaucoma,
- menstruation,
- spinal deformities,
- heart diseases.
In such cases, it is recommended to check with a doctor before starting training.
Conclusion
The benefits and harms of handstands are solely the merit of the person who decided to start doing this type of gymnastic exercise. With the right approach, after consultation with a doctor, at the first positive results, the benefits of training upside down will be invaluable to the body.
Did you find this article useful? Not really
Exercise #2: Raising your legs
As part of the next exercise, the child will have to raise his legs. However, before moving on to this task, the teenager needs to learn how to shift the center of gravity. Therefore, pay special attention to studying exercise #1.
How to do the exercise?
To perform the exercise with your child, follow these steps:
- Tell your child to place his feet shoulder-width apart.
- In this exercise, he will also have to transfer the center of gravity from one leg to the other.
- When the child shifts the center of gravity to his right leg, he should raise his left. And squeeze her. So that the knee is in front of him. At an angle of 90 degrees. When the child lifts his left leg, he should fix it. And stay in this position for at least thirty seconds.
Practice this exercise with your child regularly. It is ideal for teaching a teenager how to balance.
If over time the child learns to perform this exercise well and can easily balance on one leg, complicate the task. Place a pillow underneath it. It will be more difficult for a teenager to balance.
If over time the child learns to balance with a pillow, then complicate the task even more. Buy him dumbbells. And offer to squat with them.
Such an exercise will not only teach the child to balance, but will also give him the opportunity to pump up his muscles.
Benefits of exercise
As mentioned above, the exercise is useful, first of all, for its complexity - push-ups in a handstand force all muscles to work, and they teach you to control the position of your body in space and maximally uses the core muscles - only thanks to them you can do this movement. Without good communication between the upper and lower limb girdles, you will never be able to perform an upside down handstand push-up.
Accordingly, push-ups while standing on your hands will be useful for representatives of absolutely all sports where the combined manifestation of maximum strength of the “arms” and “legs” is necessary: weightlifting, wrestling, gymnastics.