Many young people want to play sports, but such an unpleasant factor as insufficient money constantly haunts them. It would probably be cool to swing at home, but there is also a problem here - there is no equipment. I dedicate this article, on the topic: how to make a barbell at home, to young athletes with great desire, but empty pockets.
Important : in the next article, we will make a gym with our own hands, absolutely free.
Advantages
DIY barbells:
fashionable fitness centers with thousands of exercise machines are a waste of money, because in order to develop beautiful muscles, you only need basic equipment:
- Barbell
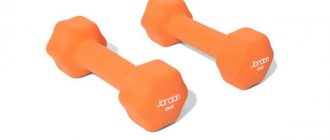
- Dumbbells
- Multiple racks
But if you look at it, a barbell is enough to pump up the entire muscle corset, look:
♦ Barbell squats – legs
♦ Military shoulder press
♦ Biceps curl
♦ French triceps press
You see, all basic elements are performed using one projectile. Many people go to the gym thinking that only there they can become big, but this is not true.
I advise you to read the article to the end, choose one of 5 ways “how to make a barbell at home” and start a new, sports life tomorrow.
Practical barbell at home, 5 variations
Preface: in the article, I will not name the exact dimensions, since everyone at home has different materials and diameters of structures, therefore, I will give general information and attach pictures, and then you can easily figure it out for yourself.
Method 1 . A rod made from paint cans
As for me, this version of a barbell at home is very easy to make yourself, and in the end something beautiful comes out, especially if you paint it.
Materials:
- Steel pipe 2-3 meters (diameter is chosen based on the principle of comfortable grip)
- 2 pieces of steel pipe 30 cm each
- 2 3 liter paint cans
- Cement
Barbell manufacturing technique:
♦ Take 2 paint cans and cut off the bottom
♦ Next, 2 pieces of pipe 30 cm each (it is important that they are slightly larger in diameter than the main neck)
♦ Then, we fasten 2 blanks in a jar using aluminum wire, in the same way as shown in the picture (our task is to make supports in order to pour concrete in the future, and the tube remains empty in the center)
♦ After the blanks have been laid out, place the jars standing on a flat surface
♦ Pour cement inside, place a brick on top, and wait for it to dry completely
♦ We insert the main bar into the holes, that’s all – the barbell is ready with your own hands!
As a result, we get a barbell that we made at home, spending only a few hundred rubles on cement. The plates can be removed and new ones added in just a few seconds, allowing for rapid progress in muscle mass.
The most important advantage of the design is that the cans will prevent the cement from crumbling.
Forward!
Method 2 . DIY bottle bar
The advantage of this method is its simplicity; it requires a minimum of materials, and you can make a barbell from bottles in an ordinary apartment.
Materials:
- 8 bottles of 2 l
- Main neck
- Sand
- Scotch
The projectile will be difficult to disassemble, so it is better to immediately decide on the weight or make several rods.
Manufacturing process:
♦ We take bottles that are equal not only in volume, but also in the same shape
♦ We go to the sandbox, where we fill the bottles and compact the sand in them well
♦ Next we start winding the pancakes
♦ We tie 2 bottles with tape, then we tape them tightly to the bar, when 2 are already holding well, add 3 and 4
♦ 2nd side the same.
Be responsible when fastening with tape , and it is advisable to weigh 4 bottles before fastening and form equal sides by weight, so that there is no imbalance during classes.
Method 3 . Barbell with bricks
I also had such a bar at one time, its main advantage is the low weight of the bricks, which means you can control the weight and add little by little if necessary.
Materials:
- 10 bricks
- Vulture
- Stone drill
- Grinder and stone circle
Manufacturing process
♦ First step, drill a hole in each brick, slightly larger in diameter than the main neck
♦ Step 2, use a grinder to cut the corners and form circles from the bricks
♦ Adjust the bricks to the same weight, or hang them and sign them
♦ Put on homemade pancakes and play sports (good luck)
It’s very easy to make weight plates for a barbell with bricks; if you use the projectile carefully, the barbell will last a long time. And thanks to the fact that the load can be increased gradually by throwing a few pancakes, progress will not be long in coming.
Method 4 . Barbell made of cement circles
The technology for making such a barbell at home is quite simple, all you need is:
Before making a barbell, I’ll first tell you about cement molds:
♦ We take a metal sheet and cut a strip from it, 10 cm wide, and the length is up to you
♦ Then, we wrap the pole with a strip of tin, and bend the ends in different directions and fasten them
♦ When the shape has taken on a rounded shape, we make a bottom for it with a welded tube in the middle
♦ Pour cement into the mold and wait for it to dry. To better understand the process, look carefully at the picture
Then everything is simple, we make several of these discs and start playing sports.
Method 5 . Rustic wooden rod at home
If you are from a village, like me, and don’t know what you can make a barbell from, then the next method is for you.
Materials:
- Solid wooden circle made from cut wood
- Several kilos of old nails
- Wood drill
- Wood file
- And other metal objects that can be hammered in
Next, a simple manufacturing process
♦ We go to cut down old trees, or to a place where they process forests
♦ We cut out or ask for a solid wooden circle 10 cm thick, you choose the diameter yourself, which circle will be convenient for you to lift
♦ Make a hole in the middle for the neck
♦ Then, we hammer into our wooden circles everything that can be hammered into wood (staples, nails, other garage debris, like an idea - buy slate nails)
Using available materials, we fill the tree with metal to increase the weight, hang weights so that the barbell is balanced - you can begin to conquer the heights of sports.
All these methods are primitive, the equipment does not turn out beautiful, but we don’t need this - muscles grow from weight, and not from the object that we hold in our hands during exercise.
I hope that I have fully covered the question “how to make a barbell with your own hands” and have provided the necessary options to make your dream come true .
Do-it-yourself concrete weights
3D hello everyone!
Today we’ll talk about how to make a weight from concrete and calculate the future weight of the weight, taking into account the metal reinforcement that we will throw into the concrete.
If you want to try your hand at kettlebell lifting like I did, you can make your first test kettlebell out of concrete. It's quick and inexpensive, and if you don't drop it, it will last you a lifetime). It took me 1.5 hours to make the weights (I worked using a stopwatch). Unlike a metal weight, if this sport does not suit you, you will not need to waste time selling unnecessary equipment. It wouldn’t be a shame to leave a concrete weight in the yard or give it to friends.
So, in order to make a weight from concrete, we need a minimum of materials: a piece of ¾” water pipe, 60 cm long for the handle, 8 kg of cement, 10 kg of sand and water. This is if you, like me, decide to use a mold from a 5 liter plastic bottle. Also, to increase the weight of the weight, you will need to throw unnecessary scrap metal into the concrete, otherwise the weight will turn out to be light, 5 liters of concrete (density 2000 kg/m3) weighs 10 kg.
1. Bend the handle using a lever, holding it in a vice. I filled the pipe with sand and sealed it on both sides so that the handle had fewer sharp corners and bends.
2. Using a grinder, we make longitudinal cuts at the ends of the handle and bend it 90 degrees for better connection with the concrete.
3.Cut out an oval hole in the side of the plastic bottle and place metal fittings (large bolts and scrap metal) into it and place a handle.
4. Pour concrete solution inside the bottle.
5.After the concrete hardened, a week later I cut off the neck and painted it with a can of paint. I only had red paint, so it was better for me not to exercise in front of bulls with weights :)
To calculate the expected weight of the kettlebell, I had to create a formula:
M=2000*L-Ma*0.2564+Ma+Mr
where M is the expected weight of the weight, in kg
Ma - weight of used reinforcement, in kg
L - volume of the bottle, in m3 (in our case 5L = 0.005 m3)
Mr is the weight of the handle, in kg.
Do-it-yourself dumbbells from plastic bottles
Ordinary plastic bottles allow you to make dumbbells in a short time with minimal money, which you can use right away. The main thing is to secure the structural elements well so that it does not collapse during training.
To assemble one plastic projectile you will need: 2 bottles, adhesive tape or insulating tape, filler.
Step-by-step instructions for making dumbbells from plastic bottles:
- Cut out the middle part of the bottles. The separated elements (upper and lower) are fastened with adhesive insulating tape.
- Filler is poured into the container. If the projectile is made of light weight, cement and sand are used. Dumbbells with greater mass require the addition of metal inclusions, which can be balls from bearings, nails, or various metals. The choice depends entirely on the availability of a particular material.
- When the necks of the bottles are filled, insert a pipe or stick made of metal or wood. Wrap the joints with electrical tape or tape. Thanks to this manipulation, you will get a non-slip, soft and quite comfortable handle.
Before starting classes, you should carefully check all connections so that the filler does not “leak through.”
Homemade concrete dumbbells
The best, of course, are metal dumbbells and barbells. But when making them, you need to be as careful as possible so that the width of the disks and the quality of the locks correspond to your calculations. It is better not to use discs that are too wide - it is better to increase their diameter, or make 2-4 very heavy discs and the rest smaller.
Take the time to clean and polish every part of your new dumbbell or barbell to make it look presentable—paint the weights like sporting goods manufacturers do. In the end, it will still cost you less than purchased equipment, and the pleasure of exercising with such equipment and the effort expended on it will motivate you to train regularly, which will certainly benefit you.
There are photographs on the Internet of craftsmen hanging about 100 kg on their dumbbells, demonstrating the quality of workmanship. Don’t even think about wasting your energy on such antics, it’s better to make a barbell and hang 200-300 kg on it for a deadlift - that’s impressive.
Depending on your capabilities, you can buy handles and a neck in a store, and make the pancakes yourself or order them from a workshop. Then the high-quality shape and comfort of the branded handle will help you hold your grip better, and the rest will cost much less.
December 24, 2020.
You don’t have to buy dumbbells at all, because you can make them yourself
Do not skimp on adhesive tape and tape - poor fixation of the dumbbell elements can lead to its destruction
You can assemble dumbbells quickly and very cheaply by using plastic bottles. Due to the simplicity of the design, you can practice with such projectiles immediately after production. For one dumbbell we need: 2 plastic bottles; filler; insulating tape/adhesive tape.
Manufacturing
- The middle part of the bottles needs to be cut out, and then the top and bottom parts must be reattached with adhesive tape.
- Then you need to fill the resulting containers with filler. Sand and cement are excellent fillers, but if you need more weight, then feel free to add nails, scrap metal, balls from bearings, in general, let your imagination run wild.
- After filling, you need to insert a wooden or metal shelf or pipe into both necks. Cover the areas with tape or duct tape. You will get a very comfortable, soft and non-slip handle.
Rod made of plastic bottles
Regular plastic bottles are suitable not only for collecting dumbbells, but also barbells. This projectile weighs much more, so the amount of starting material increases.
To assemble the bar you will need: at least 8 plastic bottles, a bar, filler material, electrical tape or tape.
Instructions for making a plastic rod:
- Bottles are filled in the same way as dumbbells.
- Select the material for the fingerboard. It is better to take fittings or pipes that fit comfortably in your hand.
- At each end of the bar, ready-made weights from filled plastic bottles are placed and wrapped with adhesive tape. There are four weights on each side.
- Check the quality of fastening. The neck should not move or form any play. If the connection is weak, add more electrical tape.
- The weight of the bar can be increased by placing additional weights in the form of bars between bottle weights and so on.
- Each additional load must be wrapped with a new layer of electrical tape. The load can be increased up to 100 kg.
It is quite difficult to navigate the choice of material. The approximate weight of a dumbbell or barbell can be calculated based on the data presented:
Weight of a two-liter plastic bottle with various fillers:
- water - 1.997;
- compacted sand - 3.360;
- wet sand - 3.840;
- crushed stone (peasant) - 2,600;
- lead - 22,800.
Weight is given in kilograms.
We collect shells from concrete
The cement base allows you to get heavier dumbbells and barbells than using plastic bottles. The pancakes are not only more impressive in weight, but also look much more solid. They are cast from cement mortar in a special mold, inside of which there is a neck. The disadvantage of this design is that the load of the projectile cannot be adjusted or adjusted to suit someone else.
To start working with a different weight, you will need to make a new barbell or dumbbells. Weighting agents, in fact, are individual, and also quite fragile and “free-flowing”. The last drawback is eliminated by introducing PVA glue into the solution. And if the classes are not conducted according to the principle of powerlifting, when the apparatus is thrown onto the floor, then it will last quite a long time.
To make concrete dumbbells (bars) you will need: a metal pipe of the required length, bolts or screws, cement mortar, PVA, and a mold for casting the weight.
Step-by-step instructions for making cement projectiles:
- At the ends of the pipe, holes are made in four directions using a drill. Screws are screwed into the holes made so that they are fixed as securely as possible at the ends and form a peculiar cross shape. They become the framework that holds the cement.
- The pancake pan is made from a flat mayonnaise or paint bucket. You can use another container. The main thing is that the weight be selected so that it is necessary for training and suits the body of the student. Glue is added to the solution for hardness or oil paint is introduced.
- Place a pipe in the poured mixture and wait about four days until it completely sets. Repeat the manipulations described in the previous paragraphs for the second side. Make a support. The structure is tied up or suspended for another four days.
- When the cement has completely set, over the next week the projectile is soaked at least twice in water so that it gains even greater strength.
Shells poured into a two-liter mold can weigh about 5 kg. The exact weight is determined by the composition of the mixture involved.
To do the Farmer's Walk, you don't need to make any apparatus. It is enough to take two ordinary cans and hang them on a stick. You can use tires filled with sand or any other filler. It is difficult to perform other exercises with a similar design. They require the use of full dumbbells.
Assembling dumbbells using improvised means
In order to create heavier projectiles than from plastic bottles, you will need cement and a mold to pour it. The disadvantage is that it will not be possible to change the weight of the finished structure.
Materials for making the rod:
- Thick stick, 3-3.5 cm in diameter. Length must be at least 125 cm.
- Two empty five-liter plastic bottles for making a mold
Manufacturing process:
- You should start by pouring the pancakes. To do this, you need to cut out the part for the ebb. Measure 35 cm from the bottom of the bottle and cut at this point.
- Mix the solution. Mix water with cement powder. It is better to make a thick solution so that the element does not begin to crumble in the future.
- Place polyethylene moistened with water at the bottom of the resulting form. This is necessary in order to easily remove the frozen element.
- Screw screws to the neck along the diameter, on both sides, in those places where the pancakes will be put on.
- Place the reinforcement in the center.
- Wait until the concrete hardens.
- Let it sit for 2-3 days. Water periodically.
- Fill the second form with concrete, turn the resulting structure over, and insert the second end of the neck into the middle. In order for the bar to stand up straight, place the entire structure, for example, on a table leg and tie it with a rope.
- After hardening, remove from the mold and also let the finished sports equipment stand. Don't forget to water the concrete parts.
In a few days the rod will be ready for use.
The same principle can be used to make dumbbells. For the form, use smaller containers.
The cement base allows you to get heavier dumbbells and barbells than using plastic bottles. The pancakes are not only more impressive in weight, but also look much more solid. They are cast from cement mortar in a special mold, inside of which there is a neck. The disadvantage of this design is that the load of the projectile cannot be adjusted or adjusted to suit someone else.
To start working with a different weight, you will need to make a new barbell or dumbbells. Weighting agents, in fact, are individual, and also quite fragile and “free-flowing”. The last drawback is eliminated by introducing PVA glue into the solution. And if the classes are not conducted according to the principle of powerlifting, when the apparatus is thrown onto the floor, then it will last quite a long time.
To make concrete dumbbells (bars) you will need: a metal pipe of the required length, bolts or screws, cement mortar, PVA, and a mold for casting the weight.
Step-by-step instructions for making cement projectiles:
- At the ends of the pipe, holes are made in four directions using a drill. Screws are screwed into the holes made so that they are fixed as securely as possible at the ends and form a peculiar cross shape. They become the framework that holds the cement.
- The pancake pan is made from a flat mayonnaise or paint bucket. You can use another container. The main thing is that the weight be selected so that it is necessary for training and suits the body of the student. Glue is added to the solution for hardness or oil paint is introduced.
- Place a pipe in the poured mixture and wait about four days until it completely sets. Repeat the manipulations described in the previous paragraphs for the second side. Make a support. The structure is tied up or suspended for another four days.
- When the cement has completely set, over the next week the projectile is soaked at least twice in water so that it gains even greater strength.
Shells poured into a two-liter mold can weigh about 5 kg. The exact weight is determined by the composition of the mixture involved.
To do the Farmer's Walk, you don't need to make any apparatus. It is enough to take two ordinary cans and hang them on a stick. You can use tires filled with sand or any other filler. It is difficult to perform other exercises with a similar design. They require the use of full dumbbells.
If you want, you do it, if you don’t want, you look for a reason!
For many who want to play sports, the question of visiting the gym is closed due to lack of time, and their own sports equipment for exercising at home is not so cheap.
Despite the ease of manufacture, the sporting goods industry is simply not interested in selling pieces of metal for cheap.
Moreover, it is not a fact that every dumbbell and even a barbell will suit you in terms of the diameter and shape of the handle, material and other characteristics.
A completely adequate response to such a pricing policy was the manufacture of personal sports equipment by hand by many craftsmen. For this, different materials, methods and designs are used.
Now we will look at the most common of them, so that you can choose and make your own dumbbells or barbell yourself.
You can assemble dumbbells quickly and very cheaply by using plastic bottles. Due to the simplicity of the design, you can exercise with such dumbbells immediately after they are manufactured.
Read more: How to make a girl’s legs thin and slender
For one dumbbell we need: 2 plastic bottles; filler; insulating tape/adhesive tape.
- The middle part of the bottles needs to be cut out, and then the top and bottom parts must be reattached with adhesive tape.
- Then you need to fill the resulting containers with filler. Sand and cement are excellent fillers, but if you need more weight, then feel free to add nails, scrap metal, balls from bearings, in general, let your imagination run wild.
- After filling, the bottles need to be secured neck to neck, sparing no adhesive tape or tape. You will get a very comfortable, soft and non-slip handle. If you have a very wide palm, find some kind of base for the handle (reinforcement, pipe) and close the bottles around it, and wind more tape in the middle to compensate for the difference in the thickness of the neck and the neck of the bottle. Thus, a homemade bar will also increase the weight of the dumbbell.
Barbell
The bar itself implies a lot of weight, so you need a lot more bottles. This barbell can also be used immediately after it is ready.
For the bar you will need: plastic bottles, at least 8 pieces; filler; fingerboard; tape/duct tape.
- As a neck we use a pipe and fittings that are comfortable for the hand.
- We fill the bottles in the same way as in dumbbells.
- Place the finished weight around both ends of the bar and wrap it with tape. We get four bottles on each side, between which the bar passes. Tape the weight securely to the bar so that it does not move or cause play.
- For a more impressive weight, we take another load and place it in the spaces between the existing bottles, like logs. We recommend wrapping each new layer with new tape - this way you can increase the weight of the bar to 100 kg.
Cement dumbbells
Cement-based dumbbells are much heavier than bottle dumbbells. Large and heavy, solid plates for dumbbells and barbells are obtained from a solution that has hardened into a certain shape with a bar inside. The main disadvantage of such equipment is the inability to optimize for a constant increase in loads or for another person.
That is, if you need a dumbbell with a different weight, you will have to make a new one. Another disadvantage of cement is its fragility and friability. To strengthen the mixture, glue (PVA) is added to the solution, and if you do not like, like a powerlifter, throwing the barbell to the floor with a victorious cry, then it is unlikely that it will quickly become unusable.
So, we will need: metal pipes of suitable length; drill, screws or bolts; cement mortar, PVA glue; cargo form.
- To begin, take a pipe and use a drill to drill holes for screws at its ends in four directions. Screw in the screws so that they are held as tightly as possible at the ends and stick out in the shape of a cross. This is necessary to hold the cement.
- Next, take a form (a flat bucket of paint, mayonnaise or whatever. It is only important that the size suits your weight), and mix the solution with glue or oil paint for hardness.
- Insert the pipe into the solution and wait four days until it dries completely.
- Then you need to do the same on the other side. Support, tie or hang the structure for another four days.
- After complete drying, you need to soak the dumbbell in water a couple of times over the next week to make the cement stronger.
Depending on the size of the loads and the length of the bar, both dumbbells and barbells are thus obtained.
Of course, for an exercise like the “farmer’s walk,” two canisters hung on a stick are also suitable; you can also weigh down a metal bar with car wheels, tires filled with sand, and much more. But only these cement dumbbells will allow you to fully engage in sports.
On the other hand, they will be useful only in the first stages. If your passion for sports goes further, then you will understand that it is time to make dumbbells from metal.
Metal dumbbells
Metal pancakes are analogues of factory ones, but they will only cost you less. Metal sports equipment has many advantages. You can change the weight on them, which makes training more effective and saves you from a bunch of assorted cement dumbbells and barbells. And if you make a bar for dumbbells and a barbell from the same pipe, you can use the same weights, which will save you time, money and space in the room.
In order to make metal dumbbells, you need much more: a metalworking workshop; metal rod - future neck; thin-walled pipe with a diameter slightly larger than the neck; Sheet steel; locking locks.
The creation of dumbbells should only take place in the workshop.
- First we make the neck. A crowbar about 3 cm in diameter works well as a base. We saw off a neck 35-40 cm long from it. Then we take a thin-walled pipe and cut 15 cm from it. It needs to be put on the neck to protect the place for the hand, in other words, it will be a handle. After making the dumbbell itself, it can be wrapped with electrical tape or covered with relief.
- We cut out disks (future pancakes) from sheet steel using an autogenous machine. Do not doubt their weight - with a sheet thickness of 1 cm, a disk with a diameter of 18 cm will weigh 2 kilograms. Hang 10 cm on each side of your dumbbell - and you will gain 40 kg! If desired, vary the size of the discs to randomly change the weight from the lightest to the heaviest when training different muscle groups. It would be a good idea to cut a whole set based on the prototype of factory dumbbells so that the total weight of one dumbbell could reach 25-30 kg - it is unlikely that you will need more.
- We produce locking locks. We find a pipe with a diameter slightly larger than our neck and cut off rings 3 cm wide from it. We need them to move freely along the neck, but not slide off by themselves. In each ring you need to drill a fairly wide hole (about 1-1.2 cm) for screws. After screwing in the screw, the ring will press against the bar and hold the plates. Just remember to press it close to the disks so that there is no play.
- Let's start assembling the dumbbell: there should already be a tube in the middle from step 1, then we hang the disks and secure them with locking locks.
DIY metal dumbbells
When sports activities become regular, the need arises to purchase more professional equipment or make them from metal. They are practically no different from the factory ones. The difference is that homemade dumbbells are much cheaper. From one pipe you can simultaneously make both a bar and plates. It is best to make stacked dumbbells from metal.
To make projectiles, you need to prepare in advance: a thin-walled pipe with a diameter slightly larger than that of the bar, for which it is better to take a metal rod, locking locks and sheet steel. Work on the manufacture of dumbbells should be carried out in a locksmith workshop.
Step-by-step instruction:
- Approximately 35-40 cm of the neck is sawed off from scrap metal with a diameter of about 3 cm. To make the projectile comfortable to hold in your hands, about 15 cm is cut from the thin-walled pipe. The resulting piece is put on the bar. Further, if desired, it can be covered with relief or wrapped with electrical tape.
- Pancakes are cut using an autogenous machine from sheet steel. The weight of one disk with a diameter of 18 cm and a thickness of 1 cm is 2 kg. This makes it easy to calculate the required number of pancakes to get a mass of 10, 20, 30, 40 kg. The dimensions of the discs also make it quite easy to change the weight of the weights from small to maximum. Cutting a whole set of pancakes allows you to constantly work with different weights.
- The next step is the locking locks. The diameter of the pipe is larger than that of the neck. Rings with a width of 3 cm are cut from the product. They should move freely along the bar, but not slip off. One hole with a diameter of at least 1-1.20 cm is drilled into the rings. They are necessary for screwing in screws, which allows the rings to hold the plates and press against the bar. The main thing is to take care of the high-quality pressing of the screw so that there are no backlashes.
- At the last stage, they begin to assemble the dumbbells. Weights are hung on the bar with a piece of pipe in the middle and secured with locking locks.
General tips and tricks for assembling dumbbells at home
The best without any doubt are metal shells, but they are much more difficult to manufacture than other designs. It is necessary not only to make the disks, but to choose the correct width of the pancakes, and to make the locking locks in a quality manner according to the calculations. It is recommended to increase not the width, but the diameter of the disks. You can make several heavy and several small pancakes.
To make the dumbbells look presentable, the parts are sanded and painted. This will only slightly complicate the creation process and increase the cost of the shells, but they will look no worse than factory ones and have a much lower price. Exercises with such equipment will bring more pleasure, and, consequently, motivation and the effect of training will increase.
You should not waste time and effort on creating dumbbells weighing up to 100 kg. There are plenty of instructions for assembling such structures on the Internet, but it is better to immediately make a barbell with a capacity of 200-300 kilos in order to perform deadlifts. Dumbbells are not suitable for such loads. And if you lift iron, then with a serious apparatus, that is, a barbell.
If such an opportunity exists, you can purchase a bar with a handle in a store, and either make the pancakes yourself or order them from a workshop. A high-quality handle contributes to comfortable training, and homemade pancakes significantly reduce the overall cost of the projectile.
Do-it-yourself barbell - how to make a homemade bar, locks and plates at home
Men or guys want to look good, but this requires spending time and money. Spending time to improve your physical fitness is completely normal, and you can avoid spending money on it if you make sports equipment with your own hands.
Barbell for sports
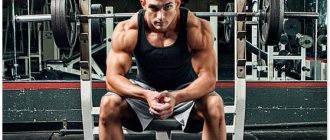
A sports barbell is one of the most important items that is useful for a variety of exercises.
The barbell is also the main object that makes it possible to exercise with heavy weight, and this, in turn, will give results from sports activities.
And this result will be much better than from other sports equipment, although other sports items are also very important.
If a person wants to exercise at home, but does not have the equipment for this, then you can make a barbell at home with your own hands and start exercising with barbell exercises.
Making a rod
If the decision to make a barbell has been made, you need to decide on the material that will be the basis for the barbell - this is the most important point. The base for the bar must be strong; you can use metal or wood.
A metal bar will add extra weight; if this is not desired, a wooden bar base can be used. It is important that the diameter of the bar is at least 4 centimeters, otherwise it will be difficult to grasp the barbell.
Material options for a homemade barbell
There are two simplest options for fretboard materials: iron or wood. It’s easy to decide on a wooden base for the bar, since you can use, for example, an old wooden rake. The advantage of this option is that the tree will not add extra weight to the bar if it is not necessary.
To turn a rake into a suitable form for a projectile, you need to remove its handle in any suitable way, the main thing is that only one stick remains from it, which will be used as a basis for pancakes. We’ll look at what else you can use to make a barbell and weight plates below.
Another option for the bar could be, for example, a metal rod if you are planning classes with a weight of more than 50 kilograms.
The length of the rod should be 2 meters, and the cross-sectional diameter should be 35 millimeters; these are the optimal requirements for comfortable playing sports. You can also use a metal pipe with a diameter of 4 centimeters, but it is not suitable for the heavy weight of the pancakes.
Making weight plates
Making pancakes for the bar is not difficult, since even ordinary plastic bottles are suitable for pancakes. These bottles need to be filled with something heavy, it can be cement, sand and stones, and even plain water. What the bottles will be filled with depends only on how much weight is needed, large or not.
You can use 1.5 liter bottles, as well as 2 liter bottles, it all depends on the desired weight. To make such pancakes, just fill them with the desired contents, and then put them on the ends of the bar and securely attach them with tape.
Cement pancakes
Here you need more time and patience, you need to find a large container where the cement will be poured, then pour it there and insert the bar at one end. It is advisable to use paint cans. True, the weight of such a barbell is difficult to predict, so this option is suitable only for those who are confident in their abilities and can lift a lot of weight.
When the cement is poured into the container and the bar is inserted into it, you need to create a support for the bar and wait for the cement to completely harden. The optimal waiting time is four days. Everything that was written above were the best ideas on how to make a barbell, and these options are also easy to implement.
An important element are the racks for the barbell. They are needed to make it more convenient to use. How to make a barbell and a barbell rack with your own hands will be described below point by point.
Materials for making rods and stands
- Wooden or iron base for the fingerboard.
- Plastic bottles for making pancakes.
- Any bottle filler.
- Cement if you need a lot of weight.
To specifically see a homemade barbell, you need to go to any website and look at photos of homemade barbells, this will help you better understand the process of working on the design.
Bar racks
Racks are needed to make it easier to use the barbell, easier to pick it up and put it in place. You can use drawings and dimensions for the bar to understand how much space the entire structure, including the bar racks, can take up.
Conclusion
You can find many options for materials for the bar and barbell, as well as many options for how to make plates, but there are the simplest ways to do it.
To understand how to do this, just read the instructions on how to make a barbell with your own hands and start working on the design.
It is important to decide on the desires and goals that are set, since this will determine your approach to work. And what materials may be useful.
Photo of a barbell with your own hands
Types of dumbbells
For many who want to play sports, the question of visiting the gym is closed due to lack of time, and their own sports equipment for exercising at home is not so cheap. Despite the ease of manufacture, the sporting goods industry is simply not interested in selling pieces of metal for cheap.
Before you make them yourself at home, let’s figure out what they are and what their varieties are. All dumbbells are divided into cast and collapsible. The first ones have a constant mass; it can only be changed by destroying the dumbbell. Most often they are used in gyms, since there should always be access to equipment of the required weight and no one wants to waste time assembling and disassembling it.
The second ones consist of a bar and plates or other types of weights. They can often be found in home gyms, since this option is cheaper - buying two dumbbells weighing 20 kg with the possibility of reducing the weight is much cheaper than purchasing 2, 4, 6...20 kg separately.
Dumbbells are also made from different materials - concrete, cast iron, steel coated with rubber, etc. The material and coating create ease of use and affect the durability of the product.
There are also differences in the form of the pancakes that are hung on the bar. It can be round, hexagonal and other designs. Available with self-regulating weight. Every day new options appear that can be called high-tech, but the price of such equipment is not commensurate with their benefits - there is no point in overpaying.
Warnings
- Test homemade barbells carefully before using them for intense training. You should make sure that the tape is held tightly and nothing will harm you by falling out or falling off.
- When using a homemade barbell, as described or otherwise, make sure you have proper insurance to ensure your safety. This is especially important in the bench press, where muscle failure can lead to laryngeal fragmentation and more serious consequences.
- Be careful with homemade weights; If your wrist hurts after (or during) training, it’s better to buy a normal kettlebell.
- Always consult a physician or professional trainer before beginning any exercise routine.
The bench press can be used to develop the pectoral muscles as well as other accessory muscles. This is one of the most common and effective exercises.
The article offers a drawing and a guide that will help you do everything you need to do this exercise at home. This option is relatively cheap and simple, but at the same time very reliable. In addition, it will look high quality.
In addition to how to make a barbell at home, this article will also describe how to make a bench press. After all, in order to perform this important exercise, both are necessary. To begin with, it is advisable to read at least the introduction of the article “”, as this will help you learn the main nuances and difficulties of home-made sports equipment, incl. and where you can get the material.
It should be understood that the specifics in the question of how to make a barbell with your own hands or how to make a rack for a barbell are not very important. The main thing is to understand the essence, dimensions, proportions and approximate appearance. The Internet is full of drawings for making a bench press bench and the barbell itself in the same form as it is sold in the store. But if you need to exercise yourself, or just make a small home gym, then there is no need for such a complex and expensive option. Here is a durable, effective and easy-to-manufacture option. This is what you should get (Fig. 1):
Rice. 1. DIY barbell and bench press
Of course, it is not the most basic, because you can also find how to make a barbell from wheels, bottles, or one where instead of pancakes there is a poured concrete mold. But if you want to exercise seriously, then it is better to make a barbell at home and a bench for the bench press so that it is normal, and not such that you will not even be in the mood to exercise over time.
In order to make a barbell at home and make a bench press bench, the main thing you need is:
- standard steel pipes (preferably square);
- tools that most people have at home (a grinder or a hacksaw, an electric drill or even a hand drill, a screwdriver, screws);
- knowledge of the basics of metal cutting;
- knowledge of basic welding or a familiar welder.
As for knowing the basics of welding, you can do without it if you fasten everything with screws or cheat something and simplify it (I’ll give an example of how later).
Now let’s take a more specific look at how to make a barbell at home and a bench for it for bench press. Let's start with the bench.
In the notation (Fig. 2), the upper number means the serial number of the part in the table, and the lower number means the number of exactly the same parts.
Rice. 2. Homemade bench for bench press.
Materials needed to make a bench press:
1. Square pipe
50x50x4. That is, the sides are 50 mm and the metal thickness is 4 mm. We need approximately 8.2 m, this is already with a small margin (8 cm). If everything is done carefully and exactly according to the drawing, then it should be enough almost right next to each other. The price of such a pipe is about 5-6 USD. per meter That is, you will have to spend approximately 45 USD on it. You can replace it with wooden blocks if you do not plan to train with very heavy weights. This will help save money, but increases the risk of injury if the tree fails. It is worth choosing strong wood species.
2. Wooden sheet
or just a board measuring approximately 1.3 x 0.3 m. It is necessary to lie on while performing the exercise. You can upholster it with dermantine or leatherette, placing a layer of foam rubber or some fabric folded several times underneath. But it shouldn't be too soft.
3. Holders
, as in drawing (10), which can be made from a strip of steel. Or simply arches in the form of stags in the form of the letter “U” or “Y”, which will be easier. These stags can be made from reinforcing rod. The main thing is that the bar lies securely in them. You need 2 of them.
4. Lids
or, so to speak, plugs - small metal plates measuring 50x50 mm (thickness is not important). You can do without them, they are only for aesthetics. But there is (11) on the diagram. If you decide to use them, you will need 6 pieces.
5. Fastenings
, as shown in the figure (Fig. 2), welded from rectangular and triangular plates.
This is practically the only place where welding is necessary if you do them as in the picture. But you can do without this. Instead, you need to take 3 metal or wooden plates measuring approximately 90x40 mm. Or you can have other sizes, the main thing is that the pipes to which the board is attached protrude a couple of centimeters on both sides. We fasten these plates with screws to this pipe, drill holes in them and screw the board on top. What is meant is shown in the figure below (Fig. 3). Rice.
3. Simplification of attaching the board to the bench frame. 6. Screws, nuts and spring washers (grovers) 12 pcs. each to keep the homemade bench press bench in the pile.
All these parts are shown in the figure above (Fig. 2).
Now it’s time to make a homemade barbell.
Rice. 4. DIY barbell.
Materials needed to make a barbell at home:
1. Round pipe
with a diameter of 32 mm, with a metal thickness of at least 6 mm, a length of 1.6 - 1.8 m. A standard steel bar is 2.2 m long and weighs 20 kg. Unfortunately, using available materials, that is, a round pipe, it will not be possible to achieve the same weight and strength as his. The maximum that can be found is a metal thickness of 8 mm. But even with this thickness, the weight and strength will not reach those of a standard bar. With a steel thickness of 6 mm (the most common pipes), the weight will be about 7 kg if its length is 1.8 m. Why you should not take a pipe length for the bar more than 1.8 m to make a barbell at home, I think it’s clear . After all, as already mentioned, its strength is less and its weight is the same as a standard bar will not withstand. It is better to take a pipe, of course, with as thick a metal as possible, but this will not add much weight, although a homemade rod will be stronger. Look at the price and the ability to get it. Round steel (“pipe without a hole”) is an expensive option, although more effective and reliable, because the main disadvantage of the pipe is that it will not withstand a lot of weight, unlike it. But, for example, a crowbar found in the yard is unlikely to be suitable due to its insufficient length. To make a homemade rod, you will need to cut a 20 cm thread on the edges of the pipe on each side.
2. So-called separators
, that is, 2 obstacles for the pancakes so that they do not cross the territory allocated for them. These delimiters can be implemented in different ways. The most reliable way, of course, is to weld pieces of steel onto the pipe in the right places. But you can do without welding, for example, make small holes and carefully wind wire or electrical tape in the right places. If appearance is not very important, then simply drill 2 through holes in the pipe and insert screws there, screw nuts on them, and the pancakes will not jump over such an obstacle. The distance from the edge of the neck (pipe) to the separator should be 20 cm.
3. Pancakes
. The picture shows pancakes that have a total mass of 51 kg. But, when doing a barbell at home, it will be difficult to guess with the weight. And also the weight of 51 kg of pancakes + 7 kg of the bar will be too small for a homemade barbell. If not now, then soon. But it is important not to overdo it so that the pipe can withstand it. Also, the pancakes are the most expensive part needed. The recommended steel thickness for them is 3 cm. You can buy such a sheet, but not cheaply, or you can look for suitable pancakes or their substitutes in the yard or scrap metal collection points. The main thing is symmetry in weight. That is, so that a load of 25 kg does not hang on one end of a homemade barbell, and 30 on the other.
4. Nuts
for fixing pancakes. Two nuts suitable for the selected pipe. If the pipe is 32 mm, then the nut is 32 mm, respectively. The second option is to drill several through holes with a small distance between them, and insert screws into them - into those holes that are as close as possible to the inserted pancakes. The third option (the most aesthetic and simplest) would be to buy 2 special spring clamps for the neck. They are not very expensive, but it will be very practical.
Everything is shown put together in the picture above (Figure 4).
If you decide to play sports, but there is no money for equipment, this is not a reason to be upset. Some sports equipment can be made independently from scrap materials.
How else to make a barbell yourself at home
For a home sports corner, you can make almost all the equipment if you have some skills and knowledge. For example, making a barbell at home is not that difficult.
The main part of the barbell is the bar. It needs to be strong enough to withstand the hefty weights you'll have to lift. A reliable bar will allow you to properly distribute the load and allow you to exercise without fear for your health.
The optimal choice as a material for the neck of a homemade barbell would be steel reinforcement. You should not choose a rod that is too thin if you are going to lift heavy weights. But even if you take thick reinforcement as a basis, keep in mind that its weight will not be small.
If you can’t find steel reinforcement, you can use an iron pipe, a strong crowbar, or, as a last resort, a wooden handle. But be sure to check them for strength.
If you are using a hollow iron pipe, fill the cavity with concrete or thinner reinforcement to make it stronger and heavier.
A barbell for your home can be made from other available materials.
To lift small weights, you can use a bar made from a shovel handle, attaching small loads to it in the form of cans, tires, or other things.
For more advanced training, you can use a barbell with a reinforced bar. It is advisable to make a thread at its ends and secure washers so that the pancakes do not slip off.
A simple rod for the home can be made from an iron pipe with a diameter of about 4 centimeters. If the pipe is hollow, it must be filled with any filler (concrete, metal, sand). It is necessary to make threads at the ends of the pipe so that pancakes or other weights do not move out and cause harm.
For such a barbell, you can use threaded lead disks or other weights that can be securely fastened to the bar.
If the barbell is needed not for record achievements, but for light training, then instead of powerful loads it can be supplemented with weights made from plastic bottles. This is the simplest and cheapest option for home use.
You will need 8 bottles of the same volume and filler for them. It could be sand, cement, water, crushed stone or something else.
Use tape to secure 4 bottles together. Do this as securely as possible.
Insert the bar into the space between the four bottles. Secure a homemade weight plate to the bar so that it does not move during exercises.
Do the same with the second pancake.
In the same way, you can make dumbbells for home use.
Body position when starting training with a kettlebell.
Body position at the beginning of the exercise - Pump (when the weight is taken from the floor, platform or ground):
The red triangle shows the base of the fulcrum points of the body and the weight.
The position of the feet and the base of the weight on the floor before starting classes : For comparison, I give the correct position of the body when starting the exercise - lifting the weight from the floor and the incorrect one.
| RIGHT | WRONG |
Here it is worth clarifying once again that the task is not to actually lift the weights how many times, but the task is to ensure that those muscles that we need work, and we need to pump up our legs.
Therefore, you should not leave your legs straight and unnecessarily load your spine. Exercise – Pump
The pump exercise should be done as the main basic exercise for quite a long time. One to two months.
To strengthen your body, pump up your circulatory system, and develop basic skills in handling weights.
At this time, you may not add any more exercises at all.
Starting position – legs slightly wider than shoulders – feet almost parallel – maybe toes slightly pointed apart (this is for convenience – according to how it feels).
In general, standing should be comfortable - but why are your feet not shoulder-width apart, but a little wider? - this is only because the weight in this exercise will swing between the legs and it is necessary that during its movement it does not hit the practitioner’s knees.
To perform the exercise - Pump - you need to take the starting position as in the figure and, straightening your legs, lift the weight off the floor.
We approached the weight - placed our feet as described above, and in relation to the weight in a triangle as in the figure.
Sit down and bend over a little!
They just sat down and leaned over a little and not vice versa!
We took the weight with a brush by the handle.
They strained their back - they picked up the slack in the back and in the arm!
DO EVERYTHING WITHOUT JERKING!!!
First we pick up the slack, tense up and..... only then use our legs!!! We lift the weight off the floor.
We lift the weight not with our backs, but with our legs!!!
The back does not change its position and angle. We simply lift the weight off the floor – with the help of a slight straightening of the legs!!!
As soon as we lift the weight off the floor, it will begin to tend to move backward according to the laws of mechanics.
She tries to fall - but she is held by a kind of cable - our hand and the weight on our hand make a pendulum movement. Flying back between our legs.
If you do nothing further, it will continue to swing with a decrease in amplitude and will gradually hang on your hand between your knees.
But we track that first backward movement of the kettlebell and use it to our advantage.
We allow the weight to swing back - without interfering with it, and when it loses its inertia and, under the influence of gravity, stops at the extreme rear point.
In order to move forward, we must be willing to begin to interact with it.
She starts moving forward again and then we kick!! Let's start helping her. The back and shoulders only hold the load without sagging.
But the legs work!!! It is the legs that are the engine in this exercise.
To begin with, you can not intercept the weight at the front top point and generally do not pull it forward high.
In general, if you have problems with intercepting your hands, you can start by swinging the weights - i.e. just swing it back and forth on one hand and put it back on the floor or platform. Then repeat everything with the other hand.
Learn to regulate the load by the depth of squatting down on your legs (when the weight is at the extreme rear point) and the height of pulling the weight forward - i.e. that height at which the weight seems to hang for a moment in weightlessness.
And it is precisely at this moment, while she is hanging, or rather even a little earlier - when she is still flying upward to this point and the interception of hands should occur.
Those. – You accelerated the weight upward with the help of your LEGS!!! And not the backs. And the weight, having received an impulse, flies upward for some time, maintaining this impulse.
You calmly release your hand - since the flying kettlebell will not go anywhere, and you can let it go (by the way, this is the main principle of kettlebell juggling).
And calmly take the handle of the weight with your other hand - apply the hand.
Your task is simply to learn to synchronize the speeds of the body, arms and weights and that’s it!!!!
In the upper phase of the Pump exercise, you simply stand quietly.
And in front of you, in the air, hangs a weight. You simply change one hand on its bow to the other. When changing hands, you should not grab the bow - grab it with force.
You need to remove one hand from the arch and place the other hand on the arch.
Since you start changing the hand on the arch before the weight reaches the top point - then you have enough time to change hands - the weight moves up a little - then it stops and starts moving down - at the top point this happens at very low speeds, This is exactly what allows you to make movement, efficiently and calmly.
You simply place your hand on the bar and gently wrap your fingers around it, and only as the weight falls and the load on your fingers increases.
You gradually strain your fingers and begin to take the load on them.
Don't rush - even if you don't have time to change your hand, the weight will simply fall to the floor.
That is why you should either lay something down or do exercises, at least at the very beginning on the ground or on the sand.
The weight will fall down. And since it hangs above the top point of the triangle, it will fall not on your leg, but at the top point of the triangle.
But remember anyway!!!! – If you missed the weight. And, for some reason, we didn’t have time to put the brush on the bow. The weight begins to fall, then accompany the weight down with your hands. During this movement, remove your shoulders, knees, and feet from her path.
In the exercise - Pump - the weight simply swings like a pendulum - back and forth - and your task is to accompany it and change the hand on the handle in time and that’s it.
But do not be fooled by the apparent simplicity of this exercise - at first it will be difficult to do in terms of attention. And in terms of load.
Don't overdo it at the beginning. Remember that you still need to let your body turn on.
We did 6-10 kettlebell swings as a warm-up, and put it down. Rest.
Let your body feel the load and get back to work.
This exercise, so simple in appearance, involves a lot of small movements. A heavy load is placed on your legs - if, of course, you do the exercise correctly - you squat with your legs, and do not bend over with straight legs.
And since there are large muscles in the legs, there is a very large pumping of blood, so the exercise
I call it Pump.
In terms of load on the legs, it is similar to a heavy exercise - squats with a barbell - only in dynamic mode and with less load.
And this exercise also involves your hands.
Here, as with other exercise machines, we just need to understand what we want: to lift the weight many times and load the spine - bringing it closer to injury, or do we want to become stronger and more resilient without getting a spinal injury? You decide.
And I also want to remind you once again:
We create inventory from plastic
Do not skimp on adhesive tape and tape - poor fixation of the dumbbell elements can lead to its destruction
You can assemble dumbbells quickly and very cheaply by using plastic bottles. Due to the simplicity of the design, you can practice with such projectiles immediately after production. For one dumbbell we need: 2 plastic bottles; filler; insulating tape/adhesive tape.
Manufacturing
- The middle part of the bottles needs to be cut out, and then the top and bottom parts must be reattached with adhesive tape.
- Then you need to fill the resulting containers with filler. Sand and cement are excellent fillers, but if you need more weight, then feel free to add nails, scrap metal, balls from bearings, in general, let your imagination run wild.
- After filling, you need to insert a wooden or metal shelf or pipe into both necks. Cover the areas with tape or duct tape. You will get a very comfortable, soft and non-slip handle.
Assembling the barbell
You can also assemble a barbell from plastic. Since it itself implies a lot of weight, you need a lot more bottles. For the bar you will need: plastic bottles, at least 8 pieces; filler; fingerboard; tape/duct tape.
- As a neck we use a pipe and fittings that are comfortable for the hand.
- We fill the bottles in the same way as in dumbbells.
- Place the finished weight around both ends of the bar and wrap it with tape. We get four bottles on each side, between which the bar passes. Tape the weight securely to the bar so that it does not move or cause play.
- For a more impressive weight, we take another load and place it in the spaces between the existing bottles, like logs. We recommend wrapping each new layer with new tape - this way you can increase the weight of the bar up to 100 kg.
Cement dumbbells
That is, if you need a dumbbell with a different weight, you will have to make a new one. Another disadvantage of cement is its fragility and friability. To strengthen the mixture, glue (PVA) is added to the solution, and if you do not like, like a powerlifter, throwing the barbell to the floor with a victorious cry, then it is unlikely that it will quickly become unusable.
So, we will need: metal pipes of suitable length; drill, screws or bolts; cement mortar, PVA glue; cargo form.
To begin, take a pipe and use a drill to drill holes for screws at its ends in four directions. Screw in the screws so that they are held as tightly as possible at the ends and stick out in the shape of a cross. This is necessary to hold the cement. Next, take a mold (a flat bucket of paint, mayonnaise, or whatever you like.
It is only important that the size suits your weight), and mix the solution with glue or oil paint for hardness. Insert the pipe into the solution and wait four days until it dries completely. Then you need to do the same on the other side. Support, tie or hang the structure for another four days.
Of course, for an exercise like the “farmer’s walk,” two canisters hung on a stick are also suitable; you can also weigh down a metal bar with car wheels, tires filled with sand, and much more. But only these cement dumbbells will allow you to fully engage in sports.
On the other hand, they will be useful only in the first stages. If your passion for sports goes further, then you will understand that it is time to make dumbbells from metal.
Read more: Calf raises with dumbbells
How else to make a barbell yourself at home
Cement-based dumbbells are much heavier than bottle dumbbells. Large and heavy, solid plates for dumbbells and barbells are obtained from a solution that has hardened into a certain shape with a bar inside. The main disadvantage of such equipment is the inability to optimize for a constant increase in loads or for another person.
Always remember the fragility of such a product
That is, if you need a dumbbell with a different weight, you will have to make a new one. Another disadvantage of cement is its fragility and friability. To strengthen the mixture, glue (PVA) is added to the solution, and if you do not like, like a powerlifter, throwing the barbell to the floor with a victorious cry, then it is unlikely that it will quickly become unusable.
So, we will need: metal pipes of suitable length; drill, screws or bolts; cement mortar, PVA glue; cargo form.
Manufacturing
- To begin, take a pipe and use a drill to drill holes for screws at its ends in four directions. Screw in the screws so that they are held as tightly as possible at the ends and stick out in the shape of a cross. This is necessary to hold the cement.
- Next, take a form (a flat bucket of paint, mayonnaise or whatever. It is only important that the size suits your weight), and mix the solution with glue or oil paint for hardness.
- Insert the pipe into the solution and wait four days until it dries completely.
- Then you need to do the same on the other side. Support, tie or hang the structure for another four days.
- After complete drying, you need to soak the dumbbell in water a couple of times over the next week to make the cement stronger.
Help: if you prepare concrete in a 2-liter form, the weight of the projectile can reach 5 kg (depending on the composition of the mixture).
Of course, for an exercise like the “farmer’s walk,” two canisters hung on a stick are also suitable; you can also weigh down a metal bar with car wheels, tires filled with sand, and much more. But only these cement dumbbells will allow you to fully engage in sports.
On the other hand, they will be useful only in the first stages. If your passion for sports goes further, then you will understand that it is time to make dumbbells from metal.
Metal plates and bars are analogues of factory ones, but they will only cost you less. If you make a dumbbell bar and a barbell from the same tube, you can use the same weights, saving you time, money and space in your room.
The best and easiest way to make stacked dumbbells
In order to make such dumbbells, you will need: a mechanic's workshop; metal rod - future neck; thin-walled pipe with a diameter slightly larger than the neck; Sheet steel; locking locks.
Manufacturing
- First we make the neck. A crowbar about 3 cm in diameter works well as a base. We saw off a neck 35-40 cm long from it. Then we take a thin-walled pipe and cut 15 cm from it. It needs to be put on the neck to protect the place for the hand, in other words, it will be a handle. After making the dumbbell itself, it can be wrapped with electrical tape or covered with relief.
- We cut out disks (future pancakes) from sheet steel using an autogenous machine. Do not doubt their weight - with a sheet thickness of 1 cm, a disk with a diameter of 18 cm will weigh 2 kilograms. Hang 10 cm on each side of your dumbbell - and you will gain 40 kg! If desired, vary the size of the discs to randomly change the weight from the lightest to the heaviest when training different muscle groups. It would be a good idea to cut a whole set based on the prototype of factory dumbbells so that the total weight of one dumbbell could reach 25-30 kg - it is unlikely that you will need more.
- We produce locking locks. We find a pipe with a diameter slightly larger than our neck and cut off rings 3 cm wide from it. We need them to move freely along the neck, but not slide off by themselves. In each ring you need to drill a fairly wide hole (about 1-1.2 cm) for screws. After screwing in the screw, the ring will press against the bar and hold the plates. Just remember to press it close to the disks so that there is no play.
- Let's start assembling the dumbbell: there should already be a tube in the middle from step 1, then we hang the disks and secure them with locking locks.
The best, of course, are metal dumbbells and barbells. But when making them, you need to be as careful as possible so that the width of the disks and the quality of the locks correspond to your calculations. It is better not to use discs that are too wide - it is better to increase their diameter, or make 2-4 very heavy discs and the rest smaller.
Take the time to clean and polish every part of your new dumbbell or barbell to make it look presentable—paint the weights like sporting goods manufacturers do. In the end, it will still cost you less than purchased equipment, and the pleasure of exercising with such equipment and the effort expended on it will motivate you to train regularly, which will certainly benefit you.
There are photographs online of craftsmen hanging about 100 kg on their dumbbells, demonstrating the quality of workmanship. Don’t even think about wasting your energy on such antics, it’s better to make a barbell and hang 200-300 kg on it for a deadlift - that’s impressive.
Depending on your capabilities, you can buy handles and a neck in a store, and make the pancakes yourself or order them from a workshop. Then the high-quality shape and comfort of the branded handle will help you hold your grip better, and the rest will cost much less.
How to make dumbbells and barbells in 5 minutes and what exercises to do at home
During the coronavirus pandemic, many people found themselves isolated at home, after which they began to quickly lose muscle and gain fat. This is not surprising, because physical activity has decreased, and the refrigerator at home is always in front of your nose!
Few people have sports equipment at home, and not everyone has the money to buy them. Of course, I think that a pair of dumbbells is inexpensive, but on the other hand, now everything is being sold out (after all, fitness centers have been closed) and this leads to an increase in the price of sports equipment in stores. Nevertheless, there is a way out! Let me tell you which one, and you can write to me in the comments below the article how you like this option!
We take bottles, canisters or carboys of the required volume and make ourselves quite tolerable shells of various weights! Handles can easily be made from duct tape or duct tape!
You can make exercise equipment like kettlebells, dumbbells and barbells at home, quickly and for free! All you need is tape and empty water bottles of various sizes. We will fill water bottles and cans with water or sand (if you are a super powerful muscleman). 5 liters of compacted dry sand weighs 8 kg 500 g, so you can increase the weight of these shells if you really want to.
So you filled your bottle with water, then put your fist on it and wrap the bottle and fist with tape about 10 times. This will give a fairly secure handle, I wrapped and tested the handle with only 7-8 turns of tape and nothing broke. However, tape comes in different strengths and everything is subject to wear; you can make 12 windings to be on the safe side!
Standing neutral grip curls to develop biceps and brachialis
Then we pull out our hand, and we get a great handle, albeit sticky from the inside. We take a piece of tape and stick it on the inside, now the handles will not stick to your hands. To prevent your hands from getting cut, you can also wear special fitness gloves during training.
Make yourself several shells of different weights. If the apparatuses are not large and paired, then they can be trained as dumbbells. Let's assume 2 bottles of 4-6 liters (you can start with 3 liters of water, over time add up to 6 when the muscles become stronger).
If you take a large 22-liter canister of water, then it makes sense to make 2 handles, at an equal distance from each other. Then you can use the canister as a kettlebell or barbell, and perform squats, rows, and Romanian deadlifts with it.
Finally, you can thread a regular straight stick through the electrical tape (adhesive tape handles) and hold onto the stick like a barbell. This grip may be more comfortable for you.
I immediately suggest you learn how to perform three effective exercises with a canister barbell and recorded a video for you with what technique to perform them. You will find the video at the bottom of the article, at the same time watch the exercises and how I made the barbell with my own hands. Now look at the description of these exercises.
Technique for performing exercises with a homemade canister barbell