What muscles work in bringing the arms together in the simulator?
Although the abduction of the arms in the simulator is isolated, it still involves a sufficient number of primary and secondary muscles. Even if most of them do not participate in the movement itself, but work only statically. They still receive a certain share of the load.
The main muscles include
:
- Large pectoral
- Small pectoralis
It is for their formation that we perform mixing in the simulator. They are responsible for bringing the shoulders towards each other. Do not confuse with deltoid muscles. The pectoralis major and minor are attached to the humerus. That is, in simpler words, they bring our hands together.
- Anterior delta bundle. Our main task is to make sure that this muscle does not become dominant and does not take the entire load upon itself. I'll tell you how to do this a little later.
Reduction of arms in the simulator
Muscle assistants:
- Coracobrachialis muscle. Participates in raising the shoulder upward.
- Serratus anterior muscle. These are the muscles that are attached to the chest and actively work when it expands and contracts.
- Rhomboid muscles.
Responsible for bringing the shoulder blades together.
Stabilizer muscles:
- Rectus abdominis muscle
- Spinal erectors
These muscles help maintain an even body position.
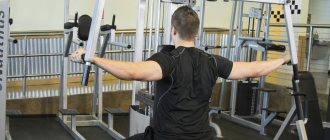
Reverse flyes on the Peck-Deck machine
In this article you can familiarize yourself with a description of the correct technique for performing the rear deltoid exercise - reverse flyes in the Peck-Deck simulator.
Technique:
- Adjust the position of the handles and the height of the seat of the Peck-Deck machine so that in the starting position the distance between the handles is equal to shoulder width, and the arms holding the handles are straight and parallel to the floor.
- Take the starting position: your chest is pressed against the back of the seat, your torso is in an upright position, your back is slightly arched in the lower back, your arms are straightened and hold the handles with a neutral grip (palms facing each other). Slightly spread the handles so that the load lifts from the stops.
- As you inhale, tighten your rear deltoids and back muscles, spread the handles as far back as possible, your elbows should be behind your back.
- At the top of the exercise, when your arms are pulled back as far as possible, take a short pause, tighten your rear deltoids even more, and then exhale and smoothly return to the starting position.
- Having reached the bottom point of the exercise (handles slightly wider than shoulder width, weight suspended and not touching the supports), pause for a second and proceed to the next repetition.
- Perhaps the design of the simulator will not allow you to perform the exercise with straight arms. In this case, it is allowed to slightly bend your arms in the starting position. The main thing: do not bend or straighten your arms during the movement; the elbow joint must be fixed until the end of the set.
Adviсe:
- Try to imagine that you are spreading not your arms, but your elbows. This visualization will help you properly engage your muscles and perform reverse flyes using your rear delts and back muscles, not your arms.
- Be sure to keep your torso straight and still throughout the set. This is a guarantee of both safety and effectiveness of the exercise.
- It is fundamentally important to hold your breath during the arm extension phase. Firstly, this allows you to develop more powerful force, and secondly, it protects the lower back from injury.
- To achieve maximum contraction of the posterior deltoids, middle traps, and rhomboids, be sure to place your elbows behind your back. If this fails, the weight is too heavy or you may need to work on improving your shoulder flexibility.
- Don't go for heavy weights. The secret of effectiveness is strict adherence to the correct form and technique of performing the exercise.
Quantity: 3-4 sets of 10-15 repetitions.
https://youtu.be/aUWGcM3YaTw
Reverse flyes are a tool for fine-tuning the shape and relief of the rear deltoids, as well as all the muscles of the upper back. In addition, reverse flyes strengthen the rotator cuff muscles, the strength of which directly determines the resistance of the shoulder joint to stress.
Pros and cons of this exercise
Unlike other chest exercises, chest curls have many advantages.
- When mixing, the load at the top point is not lost. That is, when we bring our arms together, our pectoral muscles tighten even more. This is because they are subject to the counterforce of the simulator itself. Which is trying to spread your arms apart. To prevent this from happening, we have to keep our pecs in constant tension.
- Suitable for athletes of any level of training. Exercise machines were specifically designed to make it easier for us to perform heavy exercises. Therefore, both beginners and professionals can do hand pinch.
- There is no work of the pressing muscles. Since we are not squeezing the weight, but trying to bring our hands together. We exclude muscles such as triceps, serratus and deltoids from work.
- The ability to pump the middle part of the pectorals. This is one of the few exercises that allows you to feel this area.
- Less chance of injury. All due to the lack of vertical load on the elbow joint. That is, the weight does not press on him from above.
As you can see, this exercise deserves to be included in your training program. Although it has several disadvantages.
- No weight gain. By performing compressions, it is unlikely that you will be able to increase the muscle mass of your pectorals. Therefore, we can only count on improving their form.
- Less activation of stabilizer muscles. This is in contrast to the lying arm raise, where many stabilizer muscles are involved in the work. The pinch loads only the pectoral muscles. Therefore, we will not be able to work smaller muscles.
Pros and cons of this exercise
Of course, these disadvantages are not critical. Moreover, bodybuilders who use this exercise in training know them. But for them, the advantages still outweigh and are a higher priority.
Reduction of arms in the “Butterfly (Pek Dec)” simulator
Pumped, powerful pectoral muscles are one of the advantages of a professional athlete. You can achieve similar results by following a training program that includes exercises with free weights (barbells, dumbbells) and the use of special exercise machines with a block mechanism for bringing and raising your arms. A similar simulator is used in the “butterfly” exercise (pek dek). Its main components are: two movable arms, support platforms, a block base with weighting tiles for different weight categories. In general, the design of the simulator is aimed at ensuring the isolation of one muscle group (in this case, the pectoral muscle).
Block simulator for performing the “butterfly”
Types of simulators for performing Options for the design of simulators for performing the “butterfly”: with weights from 40 kg.
Design options for exercise machines for performing the “butterfly”: with weights from 40 kg. Chest training is carried out while sitting by bringing together rigid movable levers. The weight is adjusted using a pin in the post located at the back of the base or on the base itself. The level of the seat and backrest can also be changed depending on the height of the athlete. In some versions of the simulator, you can choose the type of handles, this creates additional comfort during the butterfly/butterfly exercise.
Types of simulators
The halls have changed a lot over the years. Previously, there were practically no simulators. But now there are a lot of them. There are two options for bringing their hands together.
Peck-deck exercise machine with hand support
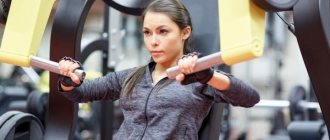
The simulator is very popular. In order to perform hand movements in it. You need to adjust it to your height before starting the exercise. The main criteria here is the seat height. We must choose one so that the arms are brought together in front of the chest. It is also possible to grab your hand a little higher or lower. This will help shift the focus to the chest. That is, if we take it a little higher, then the upper part will receive more load. If lower, then lower. But we must understand that these changes are not so significant. Therefore, it is best to take it in the middle and use the entire chest area.
Peck-deck exercise machine with forearm support
This is another simulator in which you can do hand pinch. I remember it from my youth, but then it seemed to me ineffective. If I knew what I know now, my opinion would be completely different. This simulator allows you to work the pectoral muscles with maximum amplitude. This will allow us to stretch it more, using a large number of muscle fibers. And by fixing the forearm in soft pads, the load on the elbow joints completely disappears. The height of the simulator is set similarly to the previous one. Only now the elbows act as a guide for us. In the classic version, they should converge with each other in front of the chest.
https://youtu.be/kszAN_p8poE
Peck exercise equipment
To train the pectoral muscles, athletes perform a number of exercises with free weights, for example, different versions of the chest press, lying dumbbell flyes, as well as paired arm raises, etc. In order to “polish” and target muscles, training can also be carried out on special equipment – baking simulator, or Pectoral Machine. This type of equipment is necessarily present in the model range of manufacturers. In fitness rooms, it is in demand among women and men, beginners and experienced athletes.
The Italian manufacturer Panatta offers two types of pack simulators:
- In the Monolith, SEC, XP Lux series, the Pectoral Machine is presented, on which you can only perform hand pinch.
- As part of the XP Lux and Fit Evo series, the Peck Back model was released. Its functionality is wider: it allows you to train the chest muscles, front and rear deltoids.
Important! To differentiate pack simulators, you can use two names:
- "Pack-deck" is equipment intended only for bringing hands together. The design of their working levers includes cushions (rests) for fixing the forearms.
- “Pack-back” is a two-in-one equipment for mixing (reverse butterfly) and breeding. There are no pillows (as in the “pack deck”), the arms are free in the elbow joints, so the exercises performed on this equipment imitate the extension/reduction of dumbbells as much as possible.
Let's consider the features of training on each type of equipment separately.
Execution technique
Before starting the exercise, let’s repeat the points about setting up the simulator. Without this we will not be able to achieve ideal technology.
Initial position:
- Go to the Peck-Deck machine. Set the desired weight. To do this, you need to insert a special limiter into the hole with the number of blocks we need.
- Adjust the height of the seat so that your arms come together in the center of your chest. And the forearm was at the same level with the deltoids. Elbows should point to the sides. If you have a machine with forearm supports. Then be guided by the position of your elbows. And they will no longer look to the sides, but down.
- Turn your body to one side and grab it by the handle (or rest your forearms on special pads). Bring her to the center. Next, turn your body the other way and take the second handle and bring them together. It is from this position that we will begin the movement.
- The shoulder blades should be retracted and pressed against the back of the machine. The chest is slightly forward. There is a slight arch in the lower back, the back is straight. The gaze is directed forward.
- The feet are pressed tightly to the floor. The stability of our body depends on this. If, due to your short stature, your feet do not reach the floor, then you can place pancakes or step platforms under them.
Performance:
- As you inhale, spread your arms out to the sides, as far apart as possible.
- Then, as you exhale, bring your hands together with a powerful movement and straighten your elbows slightly. This will allow the pectoral muscles to be loaded as much as possible. When performing the forearm-rest version, try to keep your elbows as close to each other as possible. This will make it easier for you to engage your pecs and focus on their work.
- At the end point, tighten your chest as much as possible and stay in this position for a while.
- Repeat the specified number of times.
https://youtu.be/kcCrgNO5Yhw
Breeding in the peck-back simulator
In the pack-deck simulator, designed for arm raises, among other things, the user can take two positions: back to back (for the butterfly) and facing him (for the reverse butterfly). Raising your arms in a weight-block pack machine imitates an exercise with free weights – bent-over dumbbell flyes (or flyes on paired blocks). These exercises are aimed at working the rear deltoid and only at first glance seem easy to perform. When training with dumbbells or paired blocks, it is very difficult for an athlete (especially a beginner) to isolate the rear deltoids. During training, other muscles are also involved.
The advantage of the peck machine is that it not only allows you to sufficiently load the rear deltoids, but also easily isolates them. Other advantages of Panatta equipment:
- the ability to customize it for yourself (adjust the seat height and select the required weight);
- Choose the desired position on the handles to perform exercises with different accents.
When doing a fly, the athlete has to use additional muscle effort to fix his elbows (remember that pack trainers do not have pads for reduction) and control his movements.
However, training on a pack-deck trainer for the rear deltoids requires adherence to the following technique:
- Starting position: facing the seat, feet firmly on the floor, lower back slightly arched, grip of the handles straight or turned out.
- Forearms and elbows should be at shoulder level at all stages of the exercise.
- When performing the exercise, it is important to stop at the level of the back shoulders (if the arms “go” back, then the “trapezius” will come into play). At the end point, you should linger for 1-2 seconds, this will allow you to maximally strain your deltoids.
Another - more common - version of the exercise on a pack simulator is mixing. Let's consider its features.
Recommendations for implementation
In order to achieve greater results, there are some recommendations that will help you with this.
- It is important to exclude deltas from the work. To do this, control the position of your shoulders. Eliminate any possibility of them rising up. Otherwise, they will take the entire load on themselves, and part of it will go to the trapezoid.
- Do not bend over while mixing. When the body tilts, the load also shifts to the front deltoids. And the chance of their injury increases.
- Don't lift your pelvis. If this happens, you have taken too much weight. It's worth lowering it.
- Tighten your abdominal muscles . This is very important, so you can fix your body more firmly.
- Don't extend your arms too far. The fly should be comfortable for your chest and shoulders. If you feel pain, then you have moved your hands too far.
- Don't be afraid to straighten your elbows as you roll down. As I said earlier, the risk of injuring your elbows in this exercise is minimal. Of course the movement must be controlled. If you cannot control this moment, then refrain from this movement.
- Focuses attention on the chest. You should feel the pectoral muscles working in a positive phase during the reduction. So in the negative at the time of breeding.
- Don't bend your hand. If you can’t keep your hands straight, it means your joints and ligaments are still weak. So lose weight. And when you feel that your joints are stronger, increase it.
There is another option for performing hand reduction in the simulator. You can see it quite rarely, but sometimes this technique is still practiced. We are talking about bringing each hand together separately. This option helps to reduce the imbalance in the development of the right and left sides of the pectorals. Now one-way training is gaining momentum. And there are even athletes who promote it. But let's get back to our exercise. In this option, we will be able to work at maximum amplitude. After all, the other hand does not interfere with us, so we can move the handle of the simulator further from the center. For beginners, this will be a good exercise that will help you feel the work of the pectoral muscles. After all, it is easier to focus your attention on one part than on two. And in general, I advise everyone to try this version of information. Your muscles will experience new stress. And this is only to our advantage.
General rules and recommendations
There are a few things to keep in mind when working with Peck-Deck.
- The chest muscles should be tensed all the time, and especially during the negative stage. This will keep your shoulder joints healthy.
- If you pull your elbows back, you overload your shoulder joints, ligaments and tendons. This increases the risk of injury.
- To fix the body in a stable position, you need to take a big breath and hold your breath.
- Keep your back firmly pressed against the back of the seat and do not lean forward. Perhaps the desire to bend over is the result of excessive overload.
- When training, you must avoid sudden movements and jerks so as not to reduce the effectiveness of the exercise.
- Once you reach the end point, try to keep the handle vertical to avoid stretching your chest muscles.
Basic mistakes
Incorrectly selected weight in the simulator
This is a very serious mistake that most beginners make. In an effort to achieve great results in the shortest possible time. Athletes simply do not notice how they gradually increase the weight of the simulator. At the same time, having not yet reached the proper level of development of the pectoral muscles. And in order to somehow squeeze out this weight, they tilt their body forward. Thereby connecting the anterior delta. And since this exercise is anatomically not intended for its development. We risk simply injuring her.
Jerk movement and work by inertia
This error follows from the first one. In order to bring their hands together with a lot of weight, many resort to inertial movements. It all looks like this: When doing the fly, the athlete relaxes his chest and arms under the weight of the machine and sharply moves them away from each other. And then, with the help of a jerk, the arms are brought back to their original position. This is a very dangerous technique! Which can injure your shoulder, elbow, or cause you to tear your pectoral muscle.
Strong bending of the elbows and their incorrect position
The position of the elbows is a very important component in this exercise. Of course, in the simulator where we rest with our forearm, this error will not affect us. Since in this version the elbows cannot be placed differently. But in another simulator this is possible. And if we bend our arms too much at the elbow joint, we simply will not be able to properly contract the pectoral muscles. And lowering them down will lead to bending in the hand. And with a lot of weight, this area can be seriously injured.
Reverse flyes on the Peck-Deck machine
In this article you can familiarize yourself with a description of the correct technique for performing the rear deltoid exercise - reverse flyes in the Peck-Deck simulator.
Technique:
- Adjust the position of the handles and the height of the seat of the Peck-Deck machine so that in the starting position the distance between the handles is equal to shoulder width, and the arms holding the handles are straight and parallel to the floor.
- Take the starting position: your chest is pressed against the back of the seat, your torso is in an upright position, your back is slightly arched in the lower back, your arms are straightened and hold the handles with a neutral grip (palms facing each other). Slightly spread the handles so that the load lifts from the stops.
- As you inhale, tighten your rear deltoids and back muscles, spread the handles as far back as possible, your elbows should be behind your back.
- At the top of the exercise, when your arms are pulled back as far as possible, take a short pause, tighten your rear deltoids even more, and then exhale and smoothly return to the starting position.
- Having reached the bottom point of the exercise (handles slightly wider than shoulder width, weight suspended and not touching the supports), pause for a second and proceed to the next repetition.
- Perhaps the design of the simulator will not allow you to perform the exercise with straight arms. In this case, it is allowed to slightly bend your arms in the starting position. The main thing: do not bend or straighten your arms during the movement; the elbow joint must be fixed until the end of the set.
Adviсe:
- Try to imagine that you are spreading not your arms, but your elbows. This visualization will help you properly engage your muscles and perform reverse flyes using your rear delts and back muscles, not your arms.
- Be sure to keep your torso straight and still throughout the set. This is a guarantee of both safety and effectiveness of the exercise.
- It is fundamentally important to hold your breath during the arm extension phase. Firstly, this allows you to develop more powerful force, and secondly, it protects the lower back from injury.
- To achieve maximum contraction of the posterior deltoids, middle traps, and rhomboids, be sure to place your elbows behind your back. If this fails, the weight is too heavy or you may need to work on improving your shoulder flexibility.
- Don't go for heavy weights. The secret of effectiveness is strict adherence to the correct form and technique of performing the exercise.
Quantity: 3-4 sets of 10-15 repetitions. Reverse flyes are a tool for fine-tuning the shape and relief of the rear deltoids, as well as all the muscles of the upper back. In addition, reverse flyes strengthen the rotator cuff muscles, the strength of which directly determines the resistance of the shoulder joint to stress.
Inclusion in the program
The hand press in the simulator can be used in different ways in training programs. I would not advise beginners to start it in the very first days of their training. First, train your pecs with more complex compound exercises. Such as: BENCH PRESS and DUMBBELL PRESS ON AN INCLINED BENCH. And after 2-3 weeks, you can slowly add information to the training.
In general, most bodybuilders prefer to do isolation exercises with medium to high reps. The classic scheme is 3-4 sets of which 1 warm-up for 12-20 repetitions.
Since the exercise is isolated, there is no point in performing it at the beginning of the workout. You will only tire your muscles and will not be able to show good results in basic exercises. Although bodybuilders with extensive training experience sometimes use the strategy of preliminary muscle fatigue. That is, first they do the training in the simulator, and then a more complex exercise. So they are trying to shift the emphasis from the triceps to the pectoral muscles. But if you don't use this strategy, then put the information at the end of the workout. In order to properly finish off the already tired pecs.
The main thing to remember is that your movements must be controlled. It's not your weight that controls you, it's you that controls it. So, check your ego and gradually climb to the top of the pedestal. And if you put in a good dose of effort and patience, then as a bonus you will get bigger and more developed breasts.
Good luck to everyone in your training!
Frequent mistakes and contraindications
Using a Peck-Deck machine can cause injury, but only if the athlete makes mistakes. As mentioned earlier, these are jerks, incorrect body position, as well as too much weight and poor control over the projectile. Experienced fitness trainers advise doing exercises in a simulator with full control of your actions. They advise performing fewer repetitions, but with high quality.
The information in Peck-Deck will not benefit athletes with shoulder injuries, limited shoulder joint mobility, or thoracic injuries. For example, this could be microtears in muscle tissue or tendons. If these injuries are not acute, then you can simply take less weight and perform movements in a smaller volume.
Performing information in Peck-Deck should be included in the training program, since the exercise will develop the chest muscles and polish the relief of the athlete's upper torso. By following the rules, you can achieve good results.
Add a comment Cancel reply
You must be logged in to post a comment.
Exercise No. 2: Hyperextension while sitting on a machine
Horizontal hyperextension, as well as forward bends with a barbell, are considered effective. Their main purpose is to develop the lower back and hamstrings. In turn, hyperextensions in a sitting position on a specialized simulator turned out to be completely ineffective.
It is believed that such exercise machines were created specifically for people with back problems. However, in practice, everything is completely opposite. When performing the exercise, the lower part of the spinal column is subjected to excessive compression load.
If we compare hyperextensions in a horizontal position and in a sitting position, then in the second case the compression load on the spine doubles, and with an inclination exceeding 15 degrees it is even more significant. Perform hyperextensions in a horizontal position.
Example of training with the Pek Dec simulator
Chest workout:
- Warm-up: perform 3x20 delt rotations, then do bench press with an empty bar - 2 sets of 10 reps.
- Bench press - 3 sets of 10 reps.
- Incline Bench Press – 3 sets of 10 reps.
- Reduction of arms in the pek dek simulator - 3 sets of 12 repetitions.
https://youtu.be/789ka76JFlQ
Shoulder workout:
- Warm up: first delt rotation 3x20, then push-ups 2x8.
- Military standing press - 3 sets of 10 reps.
- Dumbbell lateral raises (dumbbell swings) - 2 sets of 10 reps.
- Pulling your arms back in the peck dec machine - 3 sets of 12-15 repetitions.
https://youtu.be/f87eZ2ZFhIM
Benefits of the Butterfly Exercise for the Chest Muscles
Despite the simplicity of the design of the simulator and the movements performed on it, the “butterfly” has several advantages in comparison with more complex, complex exercises:
- High-quality “grinding” of the relief of the pectoral muscles (the exercise does not allow you to lose the main muscle mass of the chest, the results of its implementation are reflected superficially).
- When the arms are brought together, the pectoral muscles are qualitatively stretched, blood circulation in the upper body is accelerated, which leads to the saturation of the body cells with useful substances.
- During the “butterfly” exercise, all areas of the chest are involved, including previously unworked muscle bundles.
- For girls, the exercise is of particular importance: the “butterfly” tightens the shape of the bust.
- The deep part of the midline of the chest develops, as a result of which the border between the left and right pectoral muscles becomes visible.
- Only the chest muscles are involved in the work, the other groups are isolated from movement.
Reduction of arms in the simulator
The visible relief of the pectoral muscles is the result of performing the “butterfly”
Visible relief of toned pectoral muscles as a result of performing the “butterfly”
Correct execution of the exercise
Setting up the simulator:
- The seat must be installed so that the athlete can bring his arms in front of the chest, anatomically speaking, bring the shoulder to the midline of the body. His forearms should be in the same plane with the projection of the shoulder joint;
- The back should be horizontal, the tilt should be removed if there is one;
- If it is not possible to press against the back of the machine due to the length of your arms, you should not grab the handles, but slightly higher or lower, but the shoulder blades touch the back in any case;
- The starting position of the handles is anatomical neutral, that is, the position from which we start with our arms spread to the side, parallel to the floor;
- If you have experience in bodybuilding, your joints work normally, and there are no back problems, you can move the handles back a little so that in the negative phase you feel a greater stretch of the muscles. This option is not recommended for beginners;
- The height of the seat is selected so that the feet touch the floor and there is good support with the legs. If it is not there, you should place blocks or pancakes under your feet.
Starting position - you need to sit on the seat of the exercise machine, rest your feet on the floor, and grab the handles of the exercise machine with a free grip. Next, the shoulders are moved away from the ears, the shoulder blades are pressed against the spine, and lowered to the pelvis. The lumbar arch should be kept natural.
Movement:
- We bring the handles of the simulator to the center of the body, due to the contraction of the chest muscles;
- Shifting the grip upward shifts the emphasis to the upper bundle of the pectoral muscles, lowering it to the bottom of the chest, but the accents are insignificant;
- The extension is done gently, the arms are moved to the sides smoothly, without jerking;
- It is better to bring the movement together and separate it in two counts, without making jerks;
- All repetitions are performed without pauses, in a single approach, rest between sets for 1-2 minutes.
Important:
- It is necessary to ensure that the shoulders do not rise up to the ears and the trapezius muscles are not involved in the movement;
- Reverse deflection in the thoracic spine must be excluded; a round back is the cause of injury;
- The tailbone should be in a neutral position, it does not need to be “pushed” up and pulled towards the lower ribs;
- The legs rest moderately on the floor; there is no point in “pushing” the body up with each repetition;
- The abs need to be tightened and slightly collected, the stomach does not fall out;
- There is no need to make jerky movements, push the handles towards the midline of the body due to inertia, and tear the shoulder blades off the back of the machine;
- Beginners and fitness trainees should not place their arms beyond the midline of the body. This can cause shoulder injuries;
- This is an isolated exercise; you need to measure your capabilities relative to the weight of the weight. It is better to use light weights, but work the muscles carefully, not pushing the machine by inertia, but bringing your arms together and straining your pecs
Anatomically optimal position - the hands are located in the plane of the midline of the chest. The reduction should be carried out along an arcuate path in front of the chest. If the design of the machine allows you to rest your forearms on the soft rollers, the elbow should be on the midline of the chest.
You can strengthen the work of the pectorals by taking short pauses at the point where the arms are brought together and statically tensing the muscles. But this will not necessarily lead to more significant growth. Such techniques are selected individually, and their effectiveness depends on the structure of the athlete’s muscle tissue and the predominance of a certain type of fiber.
There is no need to allow the brushes to “break” or put excessive pressure on them. The grip should not be too tight; you should bring your hands together comfortably without pinching the handles with your fingers. However, it is better to use a closed grip.
Severing the shoulder blades from the back and tilting the body forward is not allowed. If the athlete prefers to use significant weights, it is worth helping him “move” his arms from a dead point. But this technique is not recommended for beginners and fitness enthusiasts. It is only suitable for experienced bodybuilders.
The effectiveness of the movement decreases if it is performed in jerks. If you experience pain in your elbows, you should monitor how far they are bent and choose the optimal angle. The more flexion at the elbow joint, the more the biceps are involved in the exercise.
Analysis of the exercise
Anatomy
- The main mover is the pectoralis major and minor muscles. Due to their contraction, the shoulder is brought to the center of the body; when extended, the muscles compensate for the inertial force and make the work smoother.
- Additional working muscles are the anterior deltoid, serratus anterior, coracobrachialis, and superior head of the biceps.
- Stabilizing muscles - latissimus dorsi, rhomboids, longus dorsi, rectus abdominis, quadriceps and hamstrings, gluteal muscles.
Pros of exercise
- Ability to work at any level of physical development. The exercise is available to both experienced bodybuilders and beginners from the first day of classes;
- The movement places less stress on the shoulder stabilizers than the dumbbell curl in front of the chest. This allows it to be included in rehabilitation programs after shoulder injuries;
- The load is smoothly distributed between all bundles of the pectoral muscles, and allows them to be worked out efficiently;
- There is no work of the pressing muscles - triceps and back. You can train your chest in isolation
Cons of the exercise
- So far, no one has been able to build muscle mass with lifts alone. This movement is needed as an addition to bench presses, and not as a replacement for them;
- The exercise does not work the pectoral muscles, but the shoulder stabilizers are disabled. If you turn on inertia, you can still get injured
https://youtu.be/2LkDR19nHBc
